Night time photography is surprisingly similar to daytime photography in the sense that it’s all about finding the right light. Obviously, things are considerably more challenging at night, and while it may appear your opportunities are severely limited once the sun dips below the horizon, you should think in terms of having a different set of opportunities rather than having fewer of them. Night scenes possess a unique aesthetic — the night can transform a familiar location into something strange, mysterious, and captivating; the night can even be freeing in some respects, as you can now see the world (and the skies above it) without the distraction of sunlight.

Photo by Mike Behnken
Night time photography may very well push the limits of both you and your camera, but it is a worthwhile challenge with the potential to pay big creative dividends if you stick with it. If you’ve been looking to get started with night time photography, the tips below should be of some interest to you.
1. Plan Ahead
Spur of the moment adventures are great but it’s not always the best approach, especially when you’re new to something. Your night photography endeavors will benefit from having a plan. It is good to know not only where you want to shoot, but also how to navigate the area. Getting lost at night isn’t going to be any fun and could even end up causing you more trouble than you bargained for. You will also want to check the weather; admittedly, depending on where you live this could be totally useless, but it’s good to have some idea of what Mother Nature may have in store. Make sure you bring along items like your cellphone, a small flash light, and maybe some insect repellent — anything that will make your outing safer, more comfortable, and more efficient.
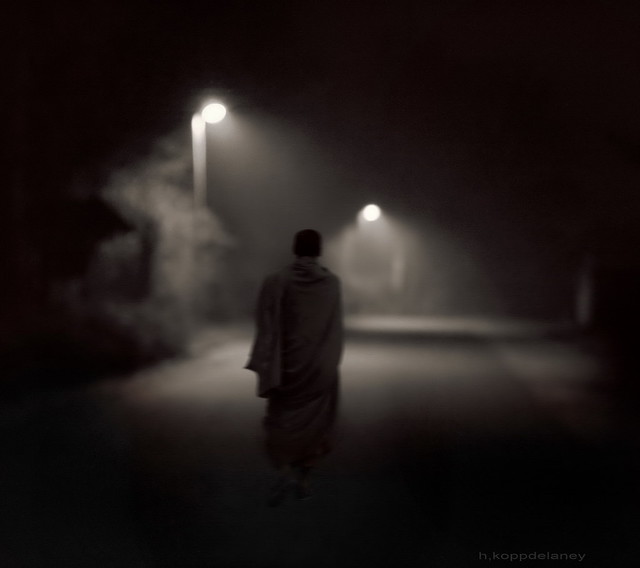
Photo by Hartwig HKD
2. Timing
You don’t necessarily have to wait until it’s pitch black outside to get some great night shots. Dusk provides an excellent opportunity for low light photography with the added advantage of capturing the amazing colors that linger in the sky shortly after sunset.
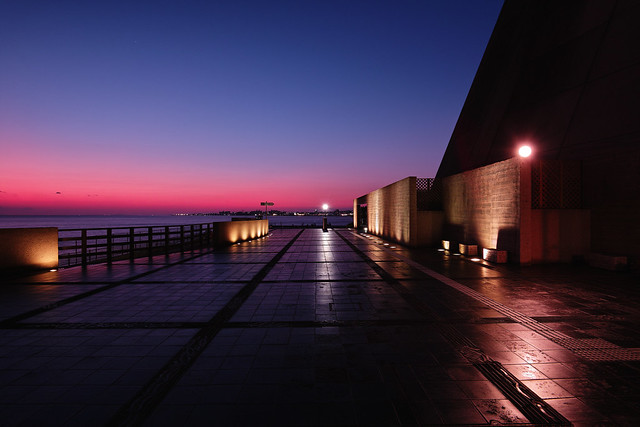
Photo by halfrain
3. Leave the Flash Behind
Night photography is all about long exposures. Using a flash to approximate the look of daytime defeats the purpose of night time photography. You might find a very specific use for flash if you do night time portraiture, otherwise your flash won’t be of any use to you with nothing to bounce it off and most subjects being too big or too far away for flash to be effective. Instead of relying on flash, take maximum control of aperture and shutter speed. Larger apertures and longer shutter speeds capture more light and are essential to low light/night time photography.
4. Leave the Tripod Behind
For some photographers, a tripod is nothing but a hassle. Considering the fact you’re trying to move around under less than ideal illumination, you probably won’t want to deal with a tripod. This is especially true if you’re in an urban/city environment where there are nearly as many people on the move at night as during the day. When you need to stabilize your camera, look for sturdy objects in your environment — whatever that might be — to rest your camera on.
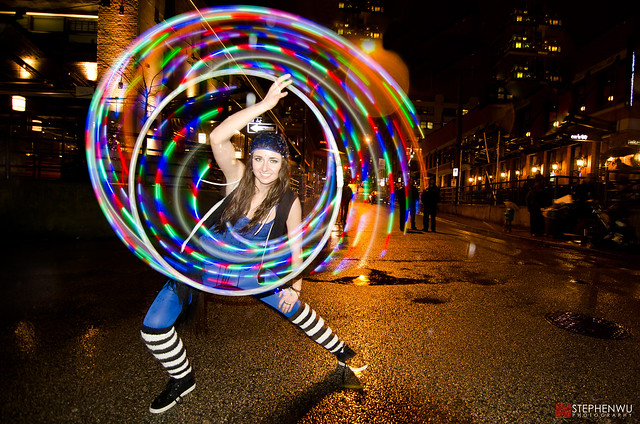
Photo by Stephen Wu
5. Bring a Tripod
Ok, tripods aren’t always trouble, and there are photographers who don’t mind lugging one around. A tripod is much easier to manage when you don’t have to navigate a crowd and it’s a necessity if you plan to do something like light trails or astrophotography. A cable release and a sturdy tripod will make it easy for you to keep the shutter open for as long as you need.

Photo by Roberto Taddeo
6. Experiment
Night time photography is just a blanket term that covers a number of things you can do and locations you can work in. Landscapes, light trails, astrophotography, motion blur, silhouettes — why not try your hand at each of these? Experiment with exposure, try various angles, and don’t be afraid of a little noise (or film grain if you prefer analog). In time you’ll discover that the challenges associated with night photography pale in comparison to the results you produce.
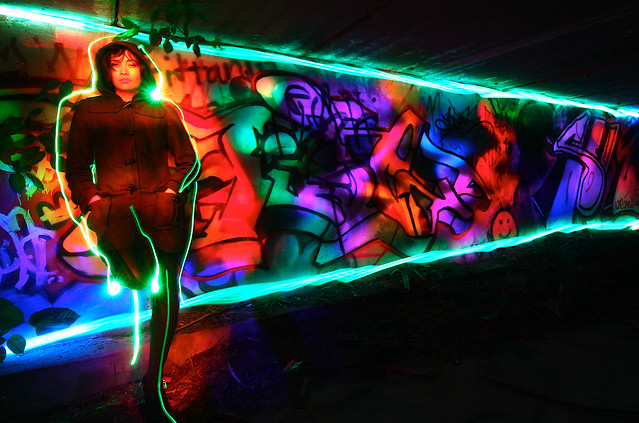
Photo by illum
As a final thought, consider the advice put forth by night time photography specialist Kevin Adams: “Night photography is unique in that the photos look nothing like what we see with our eyes—a result of long shutter speeds, high ISOs, big apertures, and subjects that are often on the move. A good night photographer understands all this and knows what the image will look like before shooting.”


7 Comments
It would be extremely helpful and most appreciated if the settings used on the above pictures were posted. Seeing great pictures can be inspiring, but without the setting information — exposure, ISO, f/stop, metering, focal points, etc. — they are basically useless and provide no real learning experience.
Well, my bad! I did see the settings after I clicked on the picture.
It was very interesting to find out that you should try to shoot without an external flash. Should you use the small flash, inbuilt one on your camera? Is a cable release using a tripod of course, is this necessary? I would think so because as you push the button to take the photo it jerks the camera. Could you use it without the use of a tripod?
I really want to do night time photography but so far some turned out ok but some quite grainy and blurred. These crazy squiggles.
When you’re doing long exposures at night you really don’t need to use a flash of any kind. The combination of the long shutter speed, large aperture, and high ISO (if necessary) will give you enough light for a good exposure. If you’re doing something like landscape photography or astrophotography you will definitely need a tripod and a cable release (or use the self timer). Doing street photography at night won’t usually require such long shutter speeds as there should be enough light available from street lamps, store signs, etc. to work with. And no, there’s not much use for a cable release when a tripod.
I love shooting at night. Well really at dusk. But I have to say that #4 tip will be somewhat confusing.
Have you ever “honestly” gotten a still frame propping your camera on a fence or wall or whatever “sturdy objects in your environment — whatever that might be — to rest your camera on. ” ? No.
Maybe a bean bag, but good night! getting a level frame will be a nightmare. I have managed that before, but it usually does NOT work very well.
Whatever camera one is using, an ESSENTIAL piece of gear is a sturdy tripod.
A nice article, thanks fo the tips. I agree that a tripod is essential but the “solid surface” tip is great, who hasn’t spotted a superb opportunity for a night time shot with a compact camera in their pocket but no tripod..find that wall, the roof of a car, anything! Remote release cable is great but you can improvise with the camera’s timer as well. Keep ISO low and don’t start raising it until exposures get around 30 secs (sensor heat causes artifacts).
Finally, on the list of exciting things to do, you can add light painting! Use a torch to illuminate certain areas of your composition, you can really add something to the interpretation and meaning of your photograph.
one of the points, leave flash behind, yet image 6 is taken with flash!