A common belief in photography is that your subject should be perfectly lit from the front to capture good photographs. While it may be true in many cases, you should remember that you can move away from the norm and utilize backlighting to create some stunning images. You may be surprised at the results you obtain after doing so. Experimenting, as always, is the key to add to your understanding of the concept. Here are 8 reasons why you should photograph against the light.
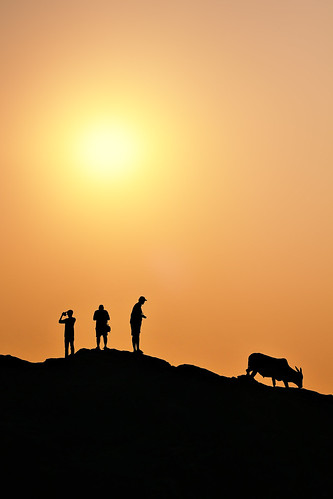
I see a little silhouetto of a cow by Ritesh Saini, on Flickr
1. Photographing Silhouettes
Silhouettes is one of the most popular examples of shooting against the light. A silhouette adds mystery to a photograph as it transforms the subject into a graphical shape. To successfully capture a silhouette, the background light should be much brighter than the subject. Try to avoid clutter around the main subject. Exposing for the bright background usually does the trick but if you want a darker silhouette, slightly underexposing may help. Dawn and dusk offer wonderful opportunities with richly colored skies that can act as nice backdrop for your subject.
2. Capturing Rimlighting
Rimlighting is the fine illumination or halo of light surrounding an object. A cloud with a ‘silver lining', or a person's hair illuminated with light from behind are two of the many examples. Rimlighting can help define the subject and make them stand out by making their edges apparent. To achieve the effect, the light should fall on the subject from the back but obliquely. Negative Exposure Compensation may be required to get the rimlighting exposed properly. Natural subjects like grass and reeds look great under rimlighting. Rimlighting can also be creatively utilized in portrait photography.
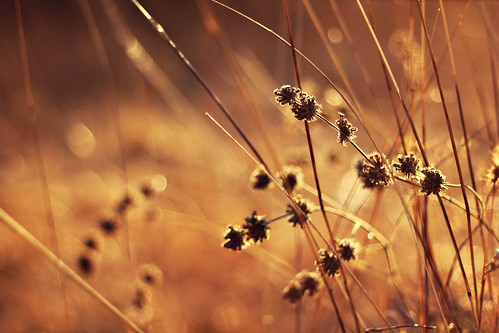
Golden insignificance by Ritesh Saini, on Flickr
3. Capturing Translucence
If light can partially pass through an object, it is said to be translucent. Translucent subjects like leaves and flowers, when backlit, can provide vibrant colors and textures for you to photograph. Stained windows inside a church can also provide stunning results. Fill the frame with the translucent subject, with required underexposure to get more saturated colors.

Backlit Sunflower by Jim Staley, on Flickr
4. Creating Low Key Photographs
This may seem counter-intuitive but even while you shoot against the light, you can use large shadows to produce drama through a low key image. Low key images feature mostly darker tones across an image. When photographing against the light, this can occur when the subject is directly lit but the background/surroundings is in shadow. You may have to experiment with a negative Exposure Compensation. By virtue of their nature, low-key images tend to work really well in black and white.
![Dew [Explored]](https://farm9.staticflickr.com/8237/8385356062_78e63bfcf3.jpg)
Dew [Explored] by Darren Johnson, on Flickr
5. Capturing High-Key Images
These are the exact opposite of low key images. High key images have predominantly light tones across an image. A simple subject, which can even be a silhouette against a bright/white background, works best. A clutter free, clean background and foreground is a must. For high key images outdoors where sky dominates the frame, you will need to overexpose the shot to get a close-to-white sky. Shooting in Raw helps when photographing for high key or low key images as it captures a higher dynamic range.

Ladybower Reservoir – A windy, foggy day. by Darren Flinders, on Flickr
6. Shooting Lens-Flare
When light enters a lens at an angle, it results in an optical effect called lens flare. While it is avoided by many photographers as an optical flaw, many other use it creatively. Keeping the light source towards the edges or right outside your frame can help you achieve the effect. Make sure the background is darker for clear visibility of the flare. Usually narrow apertures like f/8 or f/11 will give you better results.

Lens Flare – Image by Life of Pix
7. Photographing Rays of Light
During early morning hours, when the air is filled with fog and mist, you must have observed sun rays making their way through trees, or windows, perhaps. The effect is much more pronounced when it is captured against a darker background. You may have to underexpose for this reason. Landscapes, monuments, human figure – all work great with with the added sunbeam.
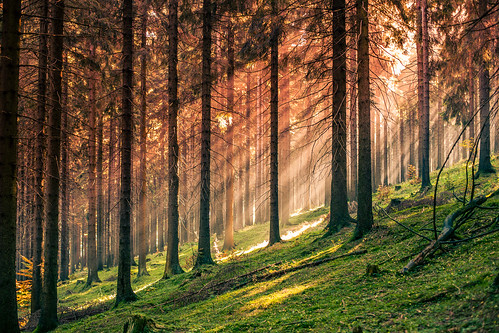
magic Forest by *Light Painting*, on Flickr
8. Producing Bokeh
Tiny points of light in the background of your image can be turned to beautiful bokeh – or the area out of focus. The smaller the source of light, the sharper and more circular the bokeh. It works best when the focus is on a single subject in the foreground, like portraits, wildlife or still life images. Bokeh is more apparent with lenses with wide apertures like f/2.8 or wider. Light sources like headlights, lights from distant buildings, or fairy lights in festivals can all be used to create magical bokeh.
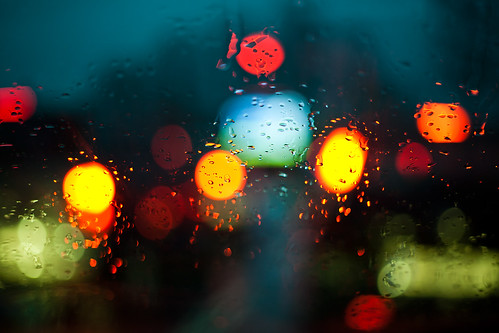
Autumn rain by 55Laney69, on Flickr
What does your experience say about shooting against the light? Please share it in the comments below.


3 Comments
Great blog and examples, and thank you for using my image on number 5 🙂
Great article! Nice easy explanations. Very impressed with your ability to explain basic details. Nicely done!
Just the right amount of information with great photo examples
Thanks