What we know today as the process of photography had its start at the beginning of the 19th century. Back then, the process was really complicated. For almost a century following its inception, photography was done strictly in black-and-white, which feature still has an impact on photography nowadays. Creating a black-and-white photo is surprisingly easy. The difficulty, however, is that it isn’t easy to to produce a black-and-white photo that portrays the same feelings and attracts the same kind of attention as the originals.
Today’s cameras capture the photo in full color (with the exception of monochrome-dedicated cameras), simply because that is the way the sensors are designed. Afterwards, the photo can be converted into a black-and-white .jpeg image by the camera directly, or you can do it yourself in post-process. The RAW files are always in color. The camera never discards the color information even if you set the it to black-and-white.
So how can you come closest to capturing the charm of classic black-and-white photographs in your photography today?
In this article I will be demonstrating the process I typically utilize, using this image that I took back in 2013 as an example. The photo is a tad soft because the lens wasn’t in the best working order, but it will do fine for the sake of this example.

A little background information: this photo is an HDR image, photomerged in Lightroom 6. I will be using Lightroom 6 again (and maybe some Photoshop afterwards for some minor healing, and such) for the main black-and-white conversion and RAW developing.
It is best to first develop the main settings: Highlights, Shadows, Whites, Blacks, Exposure, Contrast, and Clarity.
I fix the white balance while the image is still in color. It affects the black-and-white image, so the white balance should be neutral. I next pick the White Balance Eyedropper tool and click on a gray area which I know for a certainty is gray. For this image I’ll use the pavement for the reference.
Next, I click the Black & White button in the Treatment section (right above the white balance section). Now the image is in black-and-white, and we can go on with the editing.
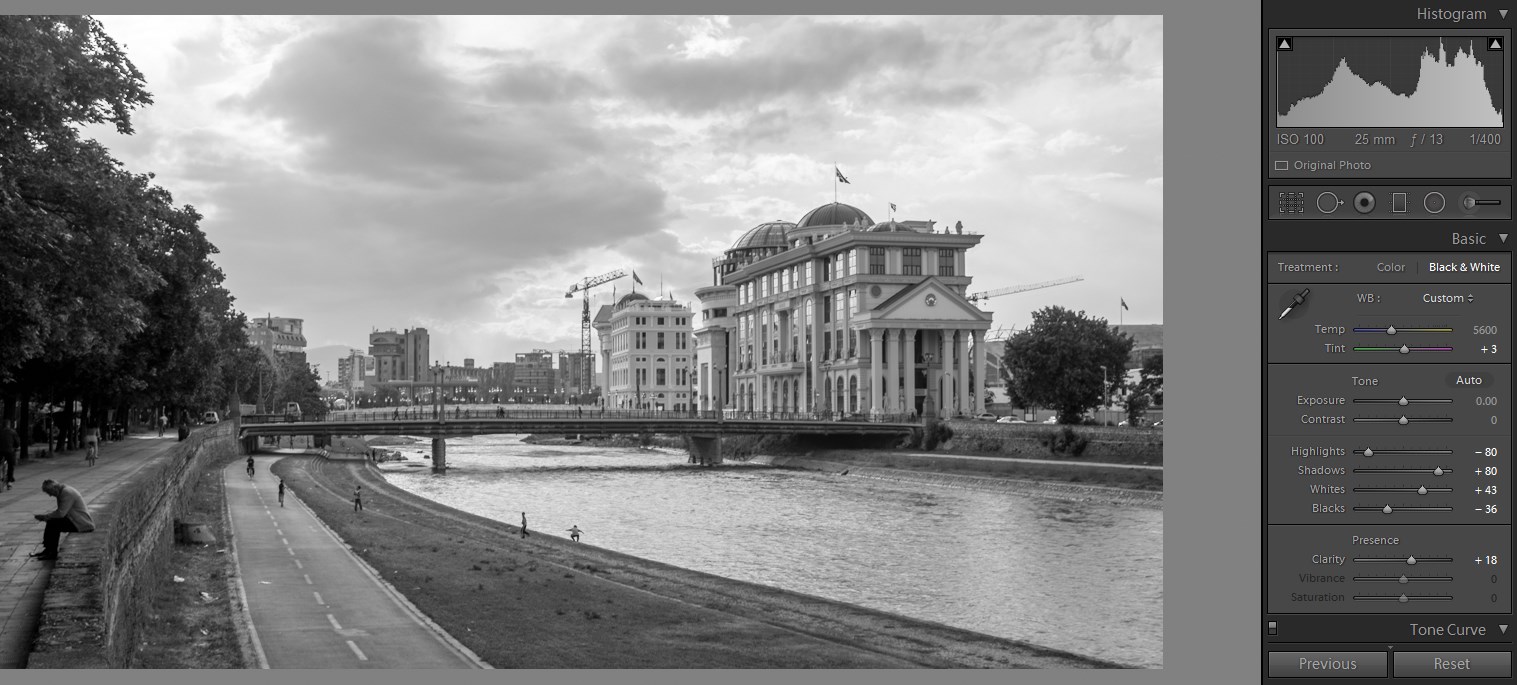
Since this one is an HDR image, I will be pushing the dynamic range to its limits because I want to bring out the structure in the clouds above while maintaining decent visibility in the rest of the image.
That's it for the basic develop module, so now we can move on to the Black & White mix.
This is the area in which you determine how the colors of the spectrum will behave on the black-and-white image. Don’t get confused by this – it is still a black-and-white image, but all the colors are converted to black-and-white, and you can control the luminosity on each color channel in order to enhance the black-and-white image, overall. Imaging you were to put a yellow filter on your black-and-white film camera in order to get a deeper sky by contrasting with the blue of the sky. This is pretty much the same concept, but the digital editing enables you to affect every color.
You can effect selective changes by dragging the tool hidden in the small circle in the top left corner of the mixer section on the photo. Click on that circle and click on the point of the picture you want affected. Holding down the mouse, drag the pointer up-and-down in order to vary the strength.
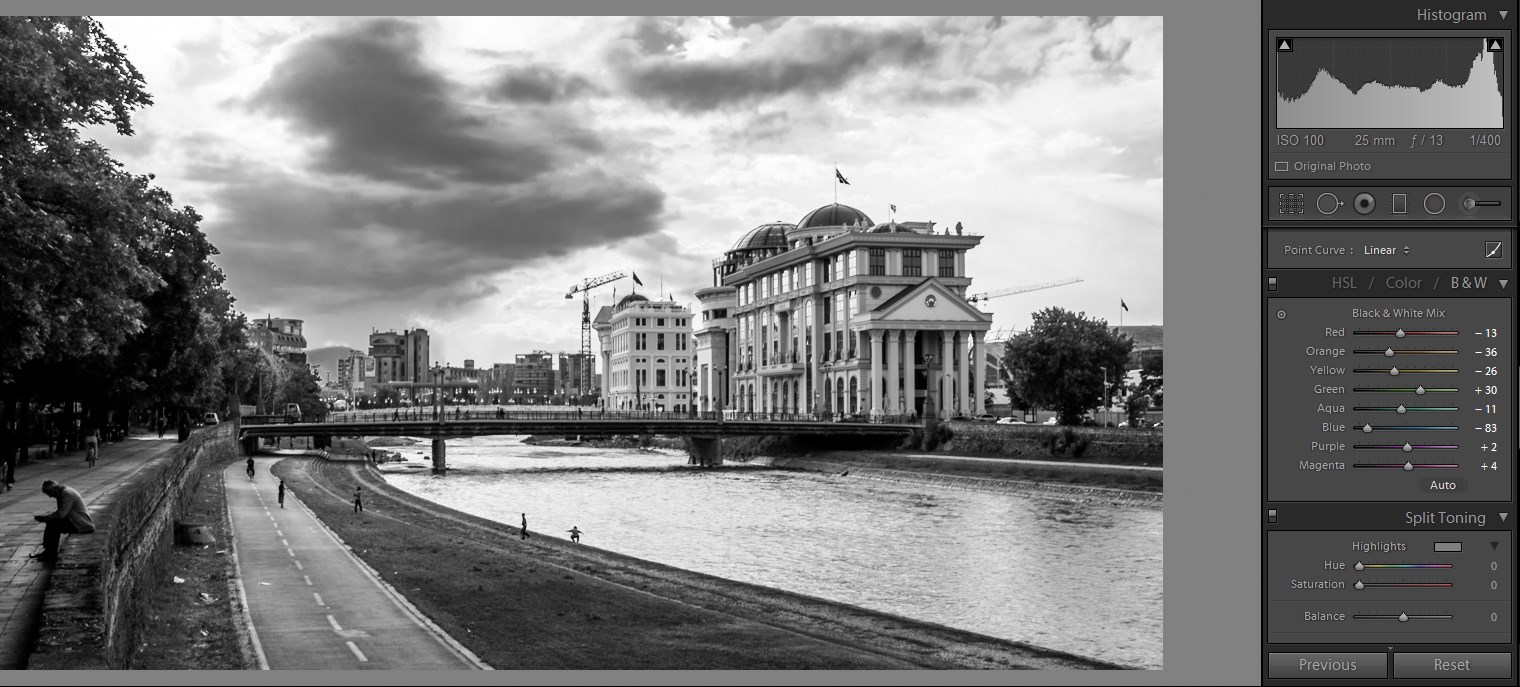
I prefer changing the values by hand as I feel that I have more control that way. Since I know that the clouds are pretty much blue, I will reduce the value of the blue channel in order to darken the sky. Aqua is also present in the clouds, but because it is brighter than blue, I can use it to make the clouds appear more three-dimensional and “pop,” thereby increasing the value of the aqua channel.
The image was shot during sunset, so orange is also present. I can use that to create general contrast in the image, so I will be reducing the value a bit, but not too much. Overdoing it will generate artifacts, which I don’t want.
Yellow and green are usually present in the foliage. By decreasing the amount of green and increasing the amount of yellow (or vice versa depending on the situation) I can create local contrast in the foliage which usually makes it look more realistic.
To darken the sky a tad more, I will use Graduated Filter but I will mask out everything except the sky. This way, it will affect only the sky and nothing else. This is done by using the Brush in the filter panel in the mask section. After the masking is done, I’m just going to reduce the exposure, and that’s all.

Now it is time to sharpen and create a film look. Sharpening to the amount of 100 with the mask set at 95 will take care of the edges and the details well enough, but it won't affect the noise and tiny details which would make the image harsh to look at.

The type of grain, if any, depends upon your personal preference and the look you are aiming to achieve. I used an amount 25% for the grain, with 50% size and 75% roughness, since I wanted large chunky granules which are indicative of a classic, cheap 400-800 ASA black-and-white film.


3 Comments
Nice one. I use to think I should always have specific lens for every type photography..Im not a professional photographer (yet), and do not have an abundant amount of money (yet) for specific lens…thanks.
I always love reading the thorough tutorials that are posted here, even though I don’t understand half of what I read. I am just getting started with Lightroom , and if I learn just one tip each day I’m happy. Today my takeaway is learning to work with the color mixer panel for black and white photos. I didn’t even know they would affect my finished photos. Thanks so much for sharing this.
Great Article (Tutorial) and I have been working very hard on this style of images.
Thank You
Birdmanphoto