Exposure Compensation provides the ability to make small adjustments to your camera's exposure. While our cameras produce high quality images, we may have individual preferences that are just a bit different from how our camera reads various scenes. Or, when working with a subject, we may want to add another dimension from a creative, artistic perspective using Exposure Compensation.
The honey bee image below was captured using Aperture Priority with settings of f/8, ISO 250, Matrix Metering and Exposure Compensation of -1/3EV. Shutter speed was 1/800 sec. The day was very bright. Based on the histogram and a playback of the image on the camera's monitor, I modified the Exposure Compensation.

Photo by Sheen's Nature Photography
There are 1) three terms that will be helpful using Exposure Compensation for 2) Corrections and 3) Creativity.
1. Getting Started: The Basics of Exposure Compensation
Exposure – It determines how light or dark an image will appear when it's been captured by your camera. Exposure can be adjusted by changing the f/stop (aperture) the length of exposure (shutter speed) and ISO (sensor speed).
Exposure Compensation – It allows the photographer to adjust the exposure measured by the camera's light meter. In aperture priority mode, Exposure Compensation changes the shutter speed. With shutter priority, Exposure Compensation changes the f/stop number. In manual mode for most cameras, instead of using Exposure Compensation button the meter indicator in your viewfinder can serve as your guide. Changing shutter speed, f/stops and ISO will adjust the same meter in manual mode that you used when in Aperture or Shutter priority when shifting the values + or -.
Metering mode – It refers to the way in which a camera determines the exposure. Exposure compensation can be used when you are in any of the metering modes (Matrix/Evaluative, Center-weighted or Spot) as well as when you are shooting in Aperture Priority and Shutter Priority. For more information on metering modes refer to our recent article on how to to best utilize the various metering modes in your camera.
So let's bring these three terms together using an example: It's an evening sunset filled with beautiful colors and depths of tones. You've decided to use Matrix metering so the camera will read many points in determining the exposure. Since it is a landscape, f/16 is selected and you're working in Aperture Priority mode. To add a richness of color, go a bit darker, Exposure Compensation is moved down by -1/3. The shutter speed in this case would be faster (not letting in as much light) than if set at 0.
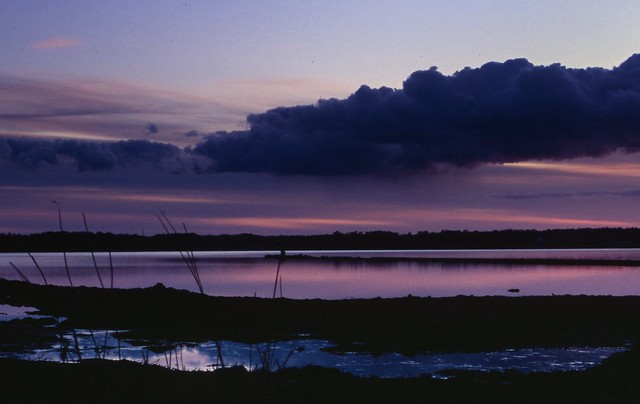
Photo by Mikael Tigerström
2. Exposure Corrections
Exposure Compensation settings are stated in terms of exposure value numbers (EV numbers). Example would be EV +1.0. Values range on many cameras from EV +5.0 to EV –5.0. The higher the EV is increased, the brighter the image and the slower the shutter speed. The lower the EV is increased, the darker the image and the faster the shutter speed. Small adjustments at sunset and sunrise as in the image above may change an image from pretty to breathtaking.
In the field, reviewing the histogram and the image on the camera's monitor after a sample image is taken helps determine how the image will look. If there's time and depending on the subject, adjusting the EV + and – on a given image will give more options to work with in post-processing.
Program the camera's bracketing feature so that three shots of the same subject using multiple EV's of your choice can be taken. Thank goodness for digital!
3. Explore Your Creativity
Exposure Compensation is an effective tool for creative expression. The overall exposure selected by the photographer determines how an image feels. When working with a subject, consider what the impact would be if it were underexposed with darker, richer colors. Would it be dramatic, romantic or even eerie? What would happen if it were overexposed? Would it have a stylized, artsy feel? Or, if in a garden, feel soft, gentle and airy?
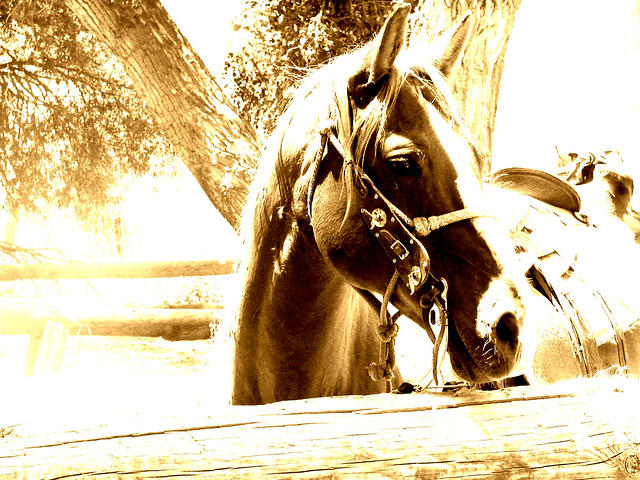
Photo by Rennett Stowe
Exposure Compensation changes ambiance from subtle to dramatic by simply moving the EV + (brighter) or – (darker). You should definitely give it a try.


4 Comments
For 6 years I have been taking photos 6 days a week and more, while not a professional, I know more than the average photographer.
Thought I did anyway.
I am very focused in what I shoot, egrets and herons. I have a Nikon D90 and a D7000 and use a 55-300 v/r everyday. A host of other equipment.
Love herons, and generally get 3 photo opt periods of time a year, beyond that, nothing.
He is here now I think, I know he is slightly out of my good range as he is a new bird for me and is nervous about me, but my photos are coming out grainy on both cameras, AND I HAVE NO IDEA WHAT TO DO. I look at the settings each day, and I am lost as to what I need to do.
Can I send 3-5 photos to somebody to see what the problem is? If so how and where?
Driving me crazy.
THANK YOU,
Michael
Hi Michael, I’ve been a professional photographer for over 30 years and I’m an avid Nikon shooter. I currently host photo training in Central FL and I’d more than happy to review your pix. If you ever find yourself in Central Florida, feel free to join our monthly sessions or join one of my mentoring sessions.
Michael, what was the result of your grainy pictures. Thanks, because sometimes I get the grainy look to. Using Nikon 7100 with 55-300 lens.
When shooting wildlife especially birds from a distance one tends to use a fast shutter speed to freeze motion and a small aperture to maximize depth of field. Also one tends to shoot at a long focal length which requires faster shutter speeds to minimize camera shake. If the day is not very bright or you are shooting early in the morning or at sunset this can require a fairly high ISO setting which will increase grain in the photo.
There are not a lot of options here other than to consider a full frame camera which generally produces less noise at equivalent ISO’s. The grain should not be much of an issue if you are printing no bigger than 8 x 10.