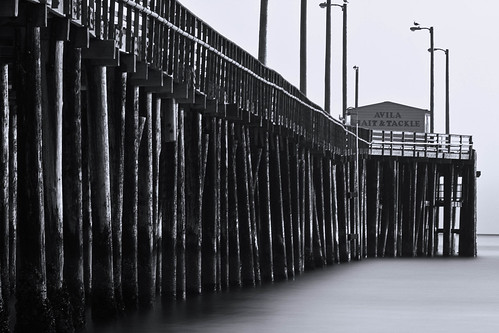
Neutral density filters add artistry and mood to images. In addition to circular polarizing filters, it is another frequent go-to tool used by professional landscape photographers to add ambience. Neutral density (ND) filters look like grey glass. Their function is to simply bring down the intensity of light passing through the lens to the sensor. They do not affect the color of an image.

When to Use an ND Filter
The most common uses for ND filters include landscape, long shutter speed and flash photography during the day.
- With ND filters, waterfalls turn soft, silky giving the feeling of flowing water. By harnessing the light with these filters, shutter speeds can be slowed to create the sense of movement.
- Big apertures can be leveraged to gain a shallower depth of field. ND filters cut down the light so you can utilize wide apertures on a bright day without having to compromise on the shallow depth of field.
- Bright daylight washes out and flattens color. Adding an ND filter combined with a flash channels the light to highlight the subject.
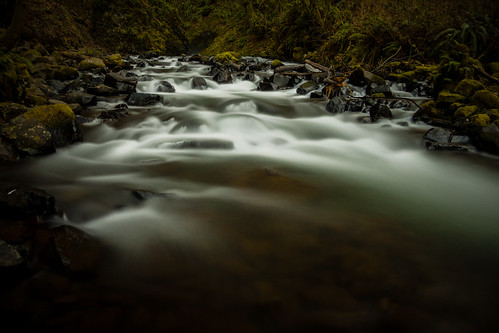
ND filters allow you to use a slower shutter speed to capture motion. Photo by Luke Detwiler
What Type of ND Filters to Use
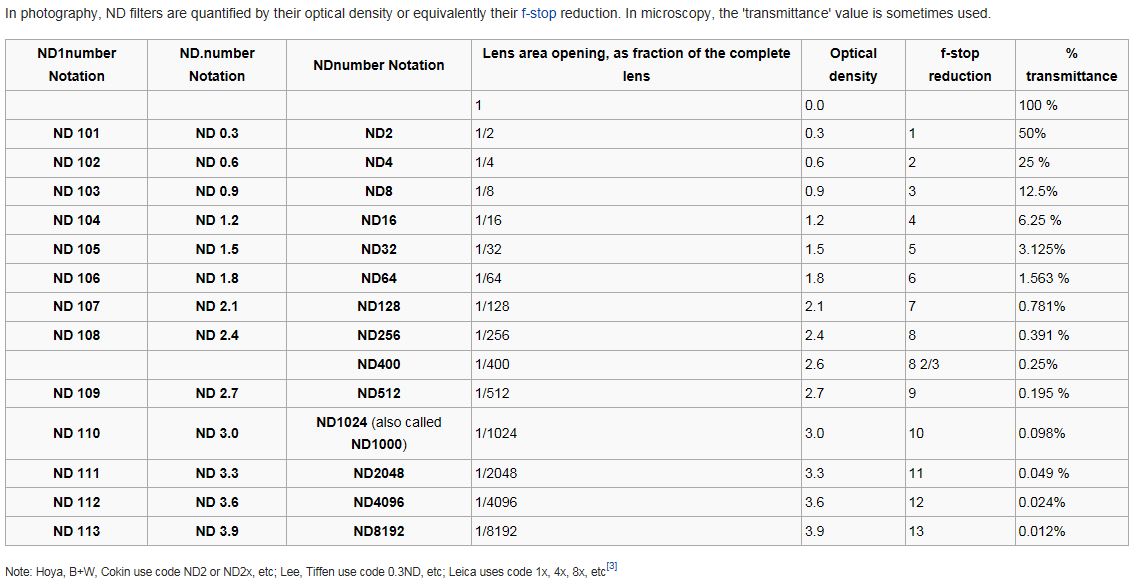
These filters are available in multiple densities quantified by the equivalent f/stop reduction it provides. They allow the photographer to create the conditions needed by controlling the amount of light passing through the lens. The darker the gray, the less amount of light passes through the lens. (See the chart at the end of the article)
- A standard ND filter reduces the same amount of light over the entire image.
- A graduated neutral density (GND) filter blocks some of the light. For example, at sunrise the sky is bright, the beach is dark. The graduated filter brings down the light in the brightest part of the image to achieve optimum exposure in the foreground and background.
- Colored neutral density filters are tinted with a variety of colors for enhancing a blue sky, sunrise or adding warming or cooling tones.
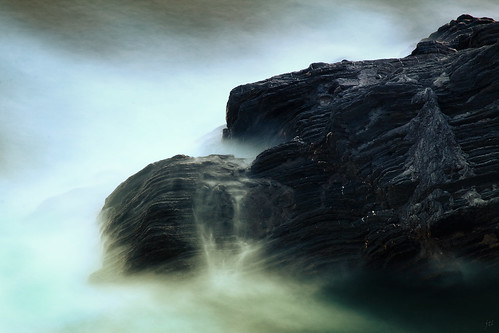
Cliffs and rocks with water and haze at long exposures invoke a haunting, ethereal moment. Photo by Jason OX4
How to Work with Them
With the lighter gray ND filters, photographers can use autofocus or manual focus. The darker the glass, the harder it is for the camera to focus. At certain densities it's just too dark for autofocus to work at all. The following steps simplify the process when working with darker glass.
- Set the camera to manual mode. A tripod and cable release are required to obtain quality images.
- Using autofocus (or manual focus) without the dark neutral density filter on the camera, focus on your subject and lock it in.
- If using autofocus, switch to manual focus after you have established your focus point. This is to keep the camera from trying to find a focus point after the filter has been placed on the lens.
- After switching to manual focus, gently put the dark gray filter on the lens without moving the camera.
- Set the shutter speed and use the cable release to enable the shutter. Note: if using an exposure longer than 30 seconds, you may want to turn your Long Exposure to “On” in the shooting menu.
Pounding waves become a misty moment. Photo by Derek Giovanni
Deciding Which ND Filters to Buy
Selecting the right filter should be based on the amount of light you want to allow through the lens. There is not a standard rule of thumb regarding which one to buy first. It requires trial and error. For the ultimate in motion blur for waterfalls, dramatic haze from the waves, an ND 9 or 10 will deliver. If it's gray and overcast, an ND4 to ND6 may be the best option. I started with an ND6 and an ND 10 and this combination has worked well but it is personal preference.
The majority of these filters screw in to the lens so it's important to know the filter ring size of your lens before ordering. Screw in filters include B&W, Hoya, Singh-Ray. There are also square filters (Lee filter) that slide in to a holder that is attached to the lens with an adapter.
The chart below illustrates the densities and associated f/stops.

Source: Wikipedia “Neutral Density Filter”
In addition to cutting down light and allowing you to capture motion, there's another benefit of using a neutral density filter. It encourages us as photographers to slow down a bit too. This means savoring the moment, clicking the shutter button and just breathing as we wait for the image to be captured.


2 Comments
Nice guide to start with long exposure photography.
Just to add a few pointers to the Practical aspect:
-Turn off your image stabilization button if your lens has one since you’d be using a tripod.
-Combat light leaks by always covering the viewfinder’s eyepiece.
-And I definitely do NOT use the in-camera long exposure noise reduction setting specially if long exposure times over 5 min, since it doubles the writing times (even on modern DSLR with fast cards) . You don’t want to be taking a 10 minute image to then wait another 10 to finish writing the image While losing 20 min total without being able to take another picture, since you can always also reduce the noise in post production in just a few seconds.
Excellent recommendations Ventura!!! Absolutely agree!