Lightroom Time Saving Tips for Photographers
Adobe’s Lightroom has evolved into an incredible tool for us photographers. It started life as an image management program to help us speed up our workflow, in particular processing RAW files.
But, over time, many many modules and tools have been added to it. Today it's an extremely powerful app that rivals it’s sibling Photoshop as a must-have tool for photographers.
The problem that often arises when adding functionality to a program is that it loses it’s simplicity. In some ways, this has happened to Lightroom.
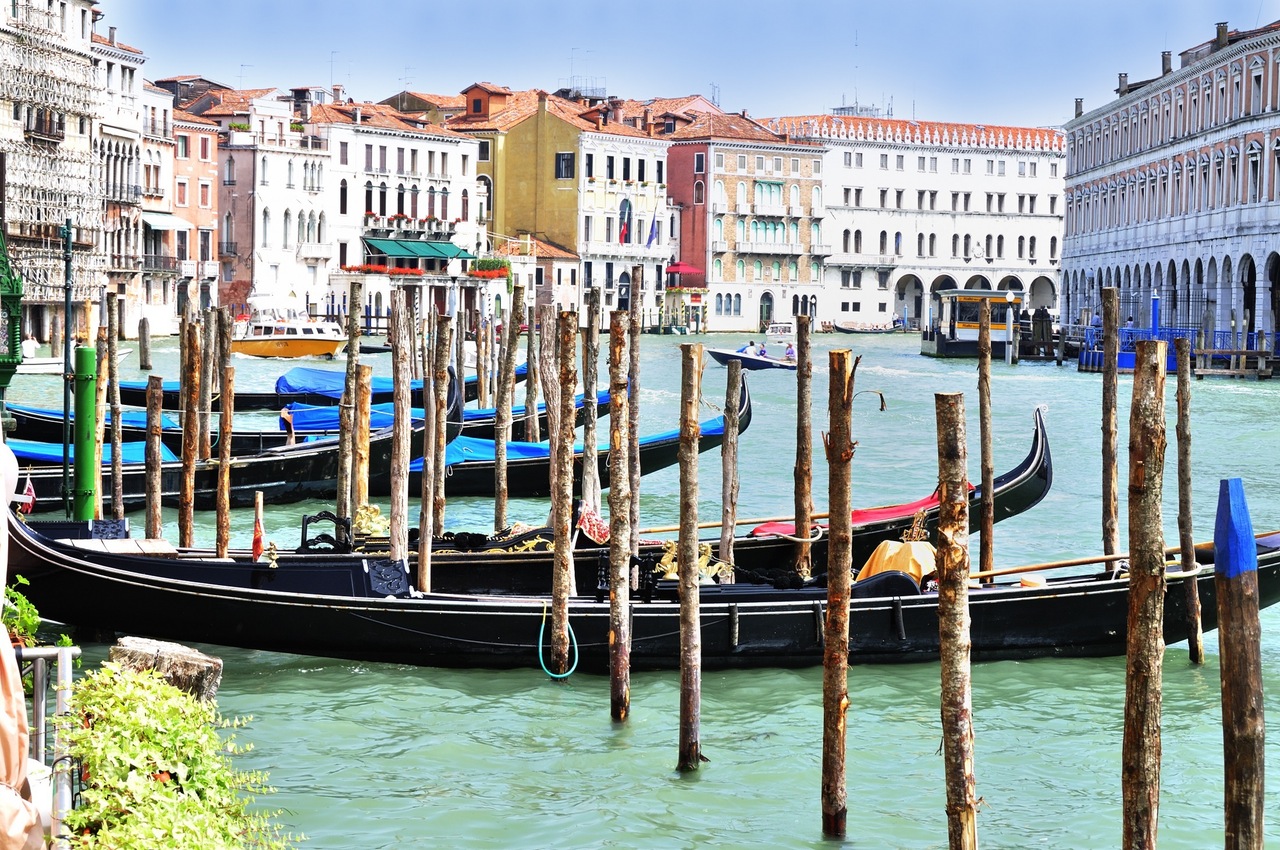
Today we are going to help you return Lightroom to its raw simplicity by introducing you to some time-saving tips. Less computer time equals more camera time…your Lightroom time saving tips are here!
Save Time on Your Import
Importing can be time-consuming in itself so why not carry out some work on those images as they are being imported? There are two things that can be applied as your images are imported. These are:
- Metadata and
- A basic preset.
You can create a metadata template that can apply everything from basic contact detail to complete keywording. For general work, I use a template with
- My contact details,
- Copyright, and
- Licensing details.
If I have done a shoot where I have A LOT of images that require the same description and keywords, I modify a template to add this. This time-saving method is a no brainer!
To create or modify a metadata template, on the Import page, go to the right side of the screen. Midway down you will see the Apply During Import. Click on the Metadata drop-down to reveal the options.
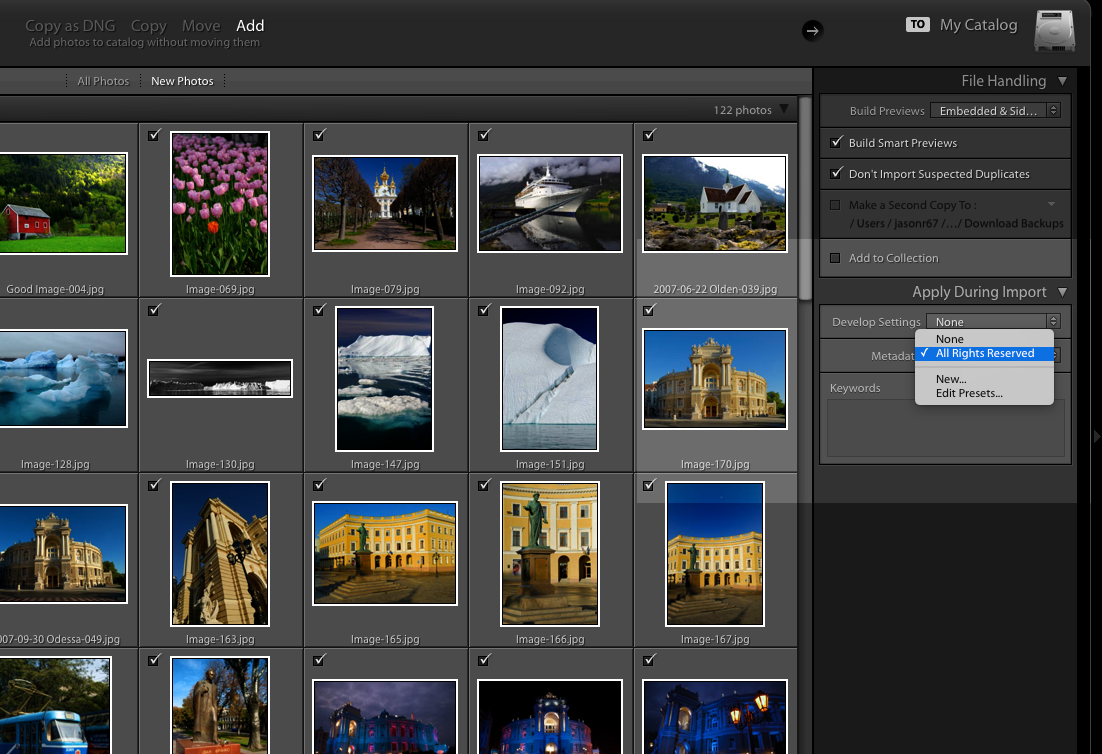
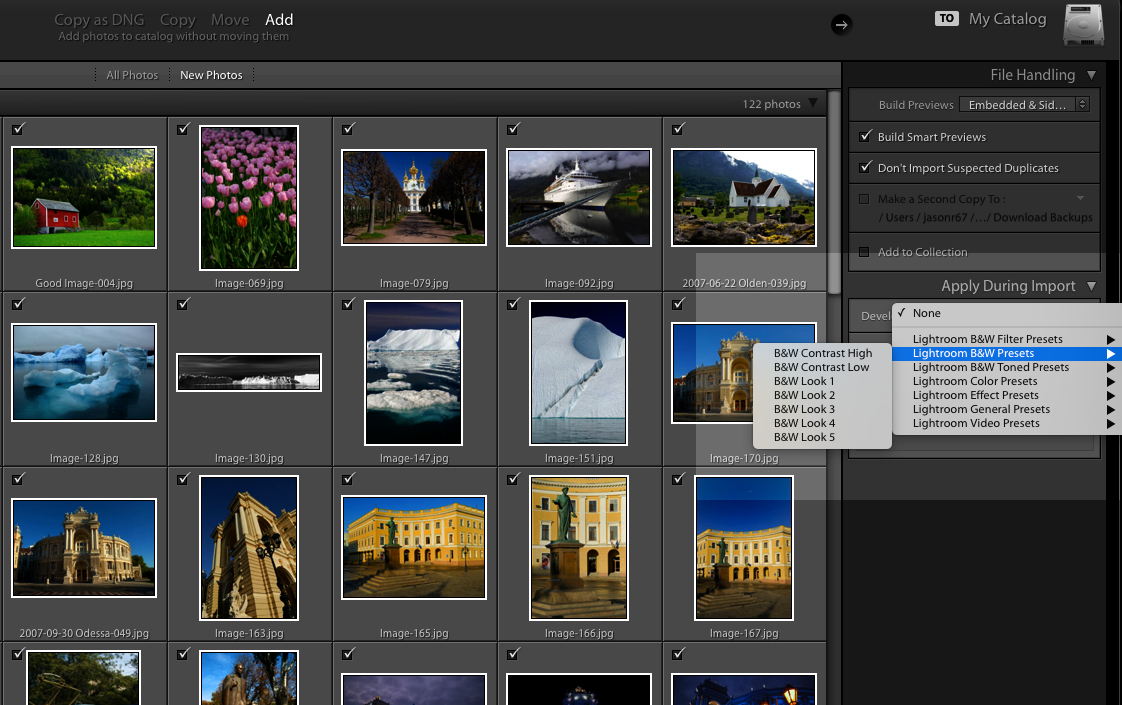
The other item you will notice in this section is the Develop Settings. Clicking on this will reveal a whole range default Lightroom presets that can be applied as the images are imported. This is most useful when you have images of a uniform exposure.
Even More Lightroom Time-Saving Tips – The Mighty Shortcut
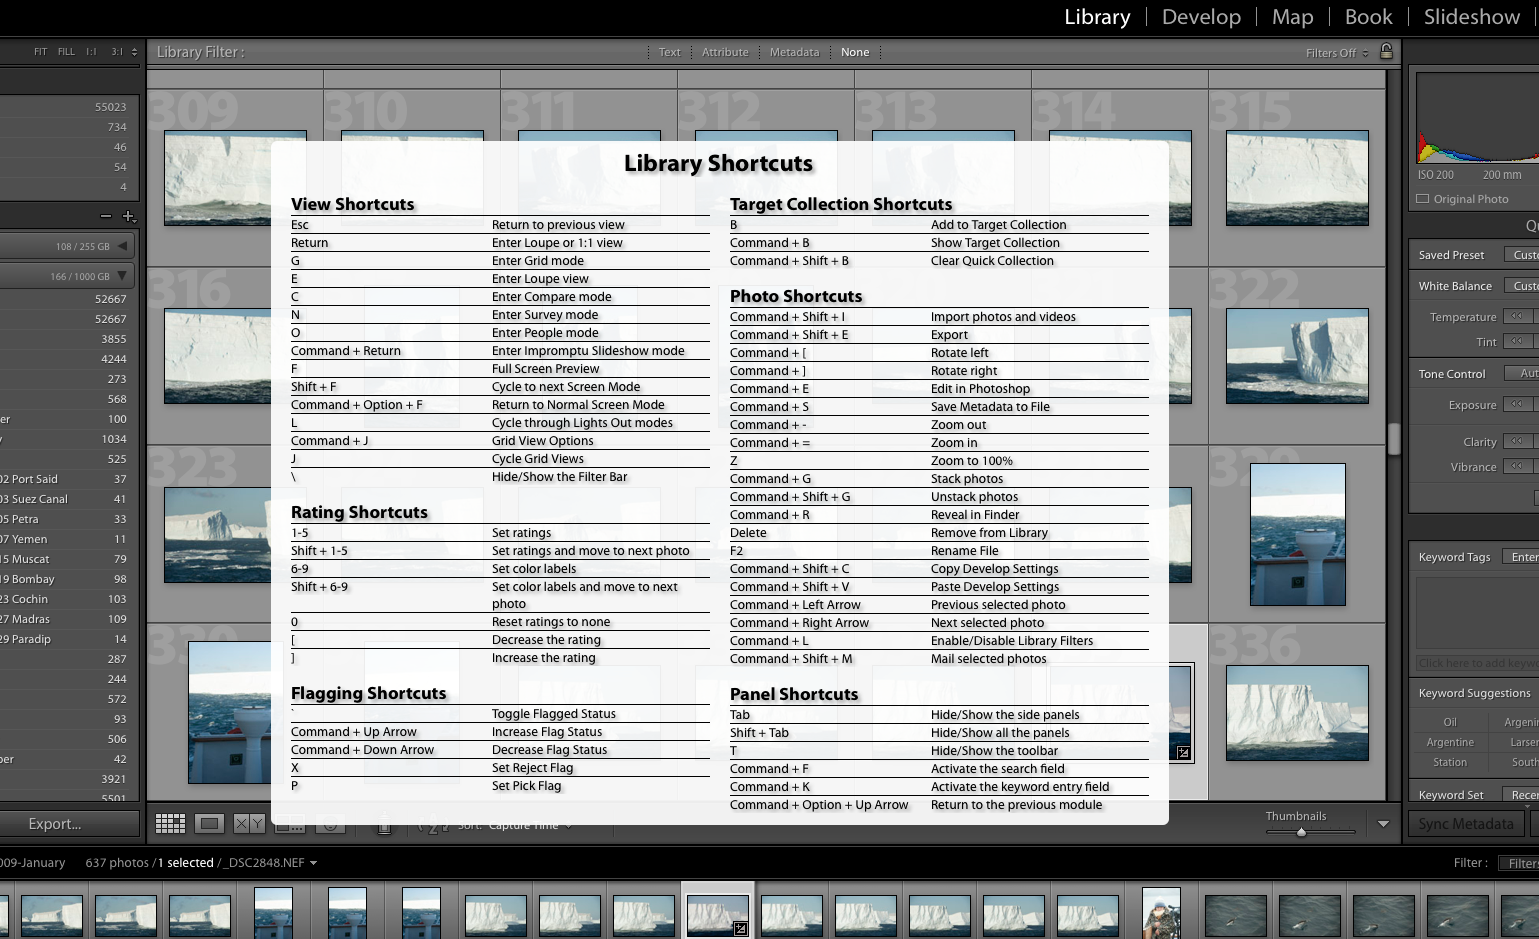
These are a long term project that can save you huge amounts of time. Long-term because they take time to memorize and practice. Once mastered they can significantly improve your workflow.
Don’t set out to memorize ALL the keyboard shortcuts. Concentrate on the things that you do most often in your own workflow and the practice shortcuts for them. There is a very simple way to access the keyboard shortcuts directly in Lightroom.
On a Mac press “CMD /” and on Windows press “CTRL /”
Copy and Paste Develop Settings
This one is a great help when plowing through tons of relatively similar images. It works in both the Library and Develop modules and allows you to paste, one, several or all of the edits you have done to one image to a selection of other images.
To do this:
- Select the master corrected image in either the Library or Develop module.
- Right-click on that image and select Develop Settings – Copy Settings.
- A window will open show all possible edits that can be copied. Either tick them all or select the ones you wish to transfer.
- Click Copy.
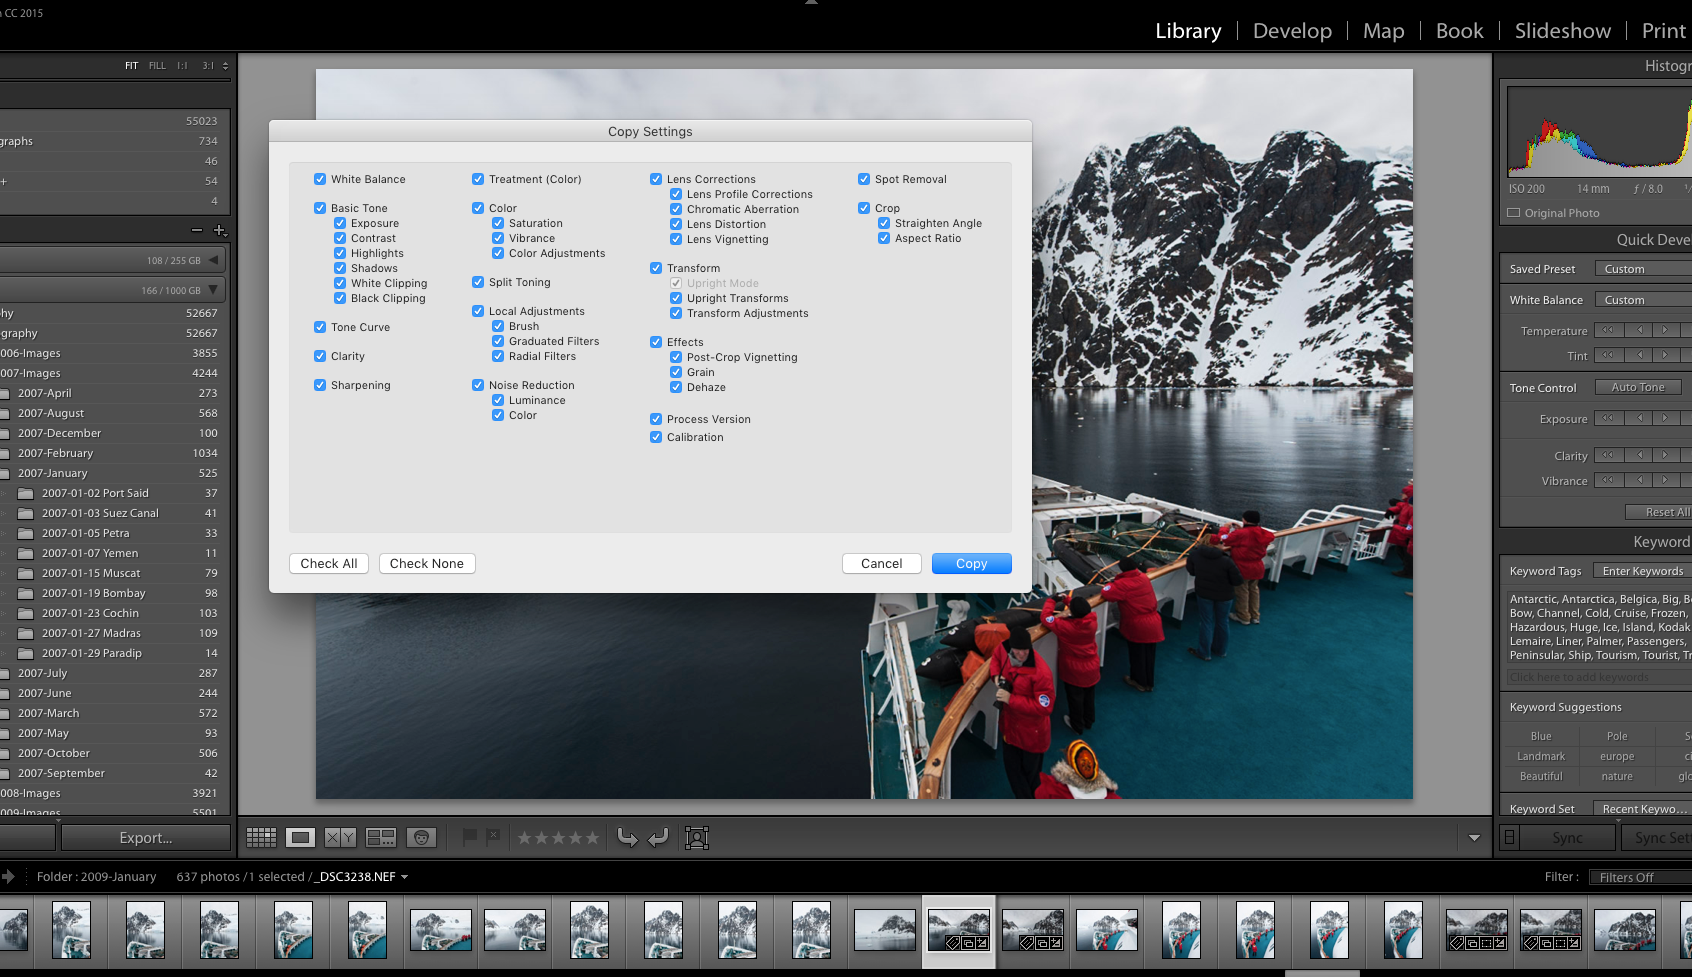
- Now select the image or multiple images you wish to apply these settings to.
- Right click and select Develop Setting – Paste Settings.
Done.
One other useful tip here is the Copy from Previous. When working on an image similar to the previous image right click and select Develop Settings – Copy from Previous. This will apply all the edit setting from the previous image.
The Almighty Lightroom Preset
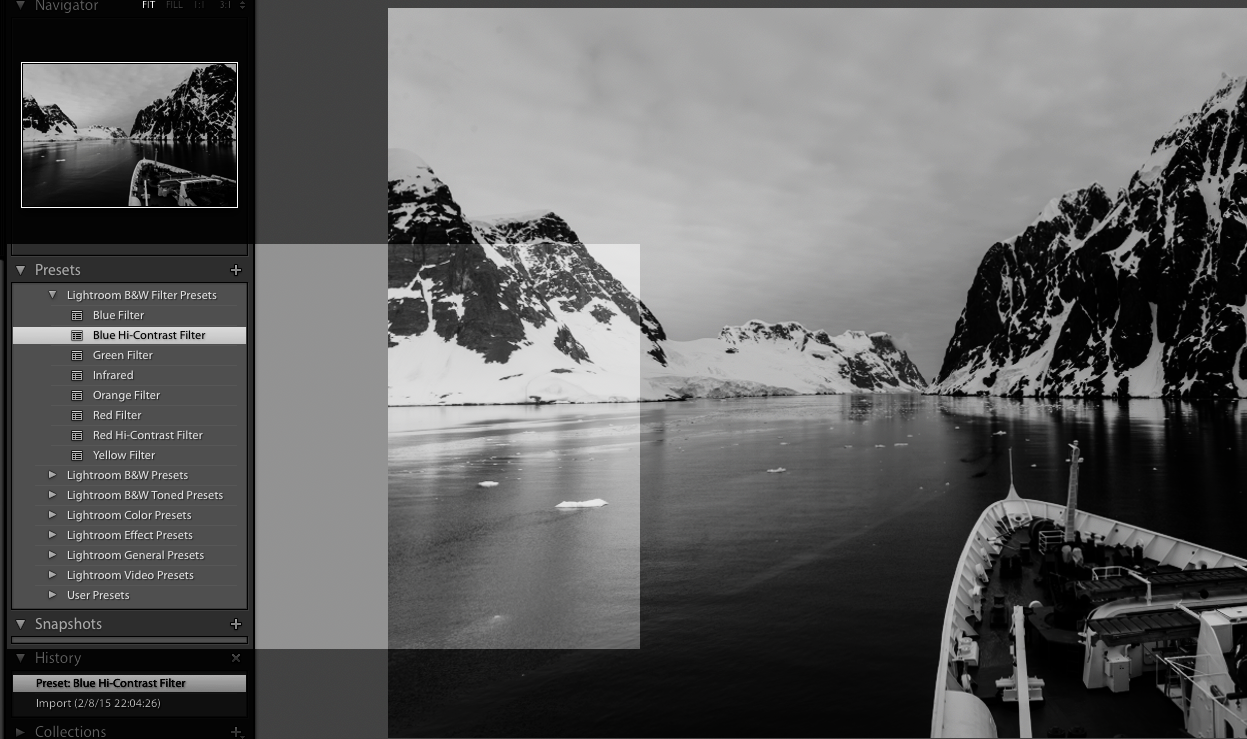
Presets allow you to apply a uniform set of edits to one or multiple images almost instantly. You can choose from a range of default Lightroom presets, third party paid or free presets or even create your own to suit. Lightstalking's very own HERE.
Presets are found in the Develop Module on the left side of the screen. They are arranged in a folder hierarchy. At the top, are several different types of default presets and to the bottom your own, user presets. This will include any “third party” presets.
Have a Go at Creating Your Own
To create your own presets simply
- Edit an image the way that you wish then from the Presets tab on the left,
- Click the + icon.
- You can then choose which edits you wish to add, give the preset a name and add it to a folder.
Instant White Balance
On of my favorite Lightroom time saving tips is If you shoot RAW; because you will know that sometimes it can be tricky to get a good white balance on your images. Rather than spend a lot of time trying to get a close balance, Lightroom has a neat little tool to aid you, the eye dropper.
Found in the Develop Module at the top left of the Basic tab this tool allows you to click on a neutral area of the image and will give you a reasonable white balance from which to work.
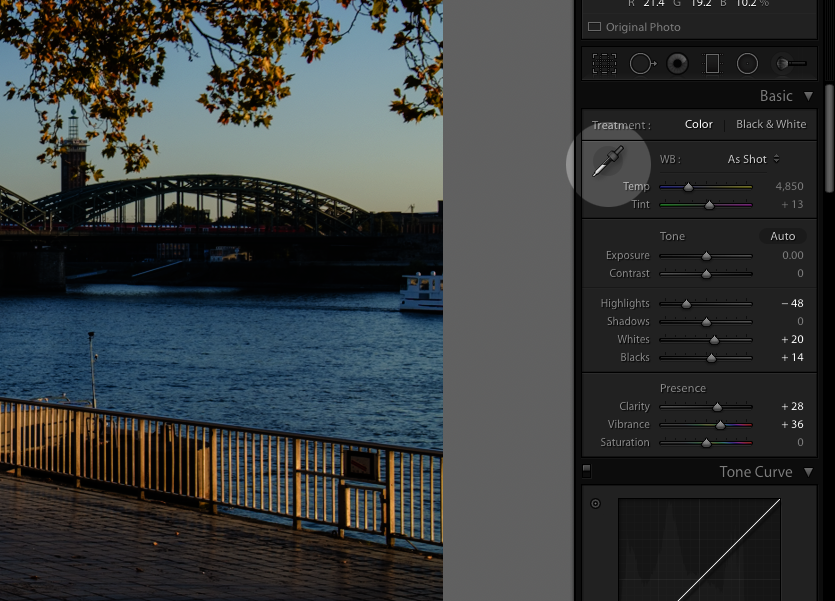
To use it, click on it once and drag it to a neutral area on the image. Underneath the tool, you will see the RGB values for the color you are hovering over.
If the numbers are similar i.e. close to neutral gray, click again and Lightroom will approximate the white balance. You can then zero in on a perfect white balance manually.
Time Saving Summary
Lightroom is full of these time saving routines. Learning them will shave significant time of your post production workflow. In a couple of weeks we will introduce you to Five More Time Saving Tips but until then, practice these and get your workflow optimized.
Lightroom Time Saving Tips – Top Takeaways
- Keyboard Shortcut Keys – learn a few and use them frequently to save you time, then try and build some more into your memory – it'll take a while but will really improve your efficiency using Lightroom!
- Lightroom is a big tool for photographers and can appear overwhelming at first. So take the time to learn things that will save you time in the beginning so that you don't end up need to break old habits.
Further Resources
- 7 Smooth Tips For Using Lightroom As A Photo Organizer by Jason Row
- Silver Efex Pro 2 vs Adobe Lightroom – Black and White Photography by Peter Bredahl Dam
- Is Lightroom Struggling? These Tips Should Fix That by Dzvonko Petrovski
Further Learning
Want some guidance from a pro photographer about processing your images in black and white using Lightroom?
Kent DuFault’s guide to editing your images in Black and White is a great place to start.



1 Comment
And what do you think about film-based presets? Which system is better, RNI or VSСО?