The long awaited Lightroom 6, known as Lightroom CC to those using it on a subscription basis was an evolutionary rather than revolutionary upgrade. There was however a number of important new features added, two in particular that are not only great additions but will make the photographer’s workflow much easier. They are of course the panoramic and HDR tools that are now built into Lightroom.
Before this update, creating both Panos and HDRs meant round tripping the image either to Photoshop or a third party app. Now the whole process can be done from inside Lightroom, with an added bonus that will discuss shortly. Lets have a look at how to use these new tools, starting with the HDR tool.
Creating HDR in Lightroom CC
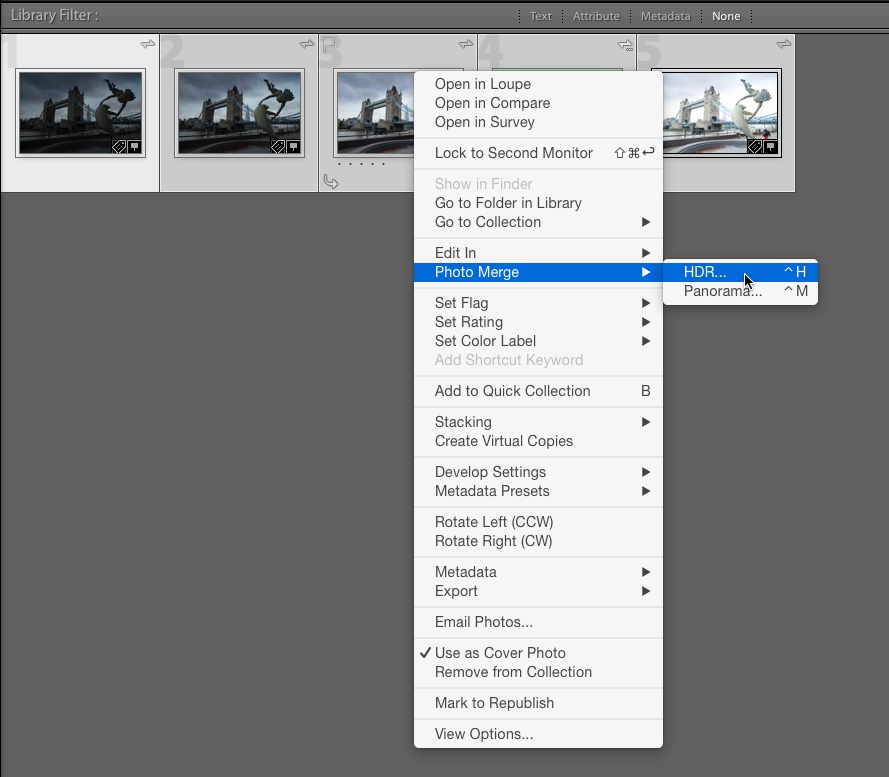
To create an HDR in Lightroom, firstly select the images that you wish to merge, in the Library Module. To do this press, the CTR (Windows) or (CMD) OS X key and click on each of the individual shots. You can choose as many as you wish, depending on how you bracketed the shot but be aware the more you choose the slower the rendering will be. Once you have the images selected, keep your mouse over one of them and right click. Now select Photo Merge – HDR. A new window will open with a few basic options. At the top, you have Auto Align and Auto Tone. Auto Align is best suited to images that have been shot handheld and may not match each other’s positions. Switch this off if you shot the sequence on a tripod. Switch Auto Tone on, this works out the optimum exposure for the HDR based on the images you selected.
Below this is the Deghost Amount. What this does is work out the subtle differences between an image and remove them. For example your HDR shot might be of a quite street, but in one of the shots a person is walking through the scene. Deghost will attempt to remove that person from the final image. You can choose from None, Low, Medium and High.
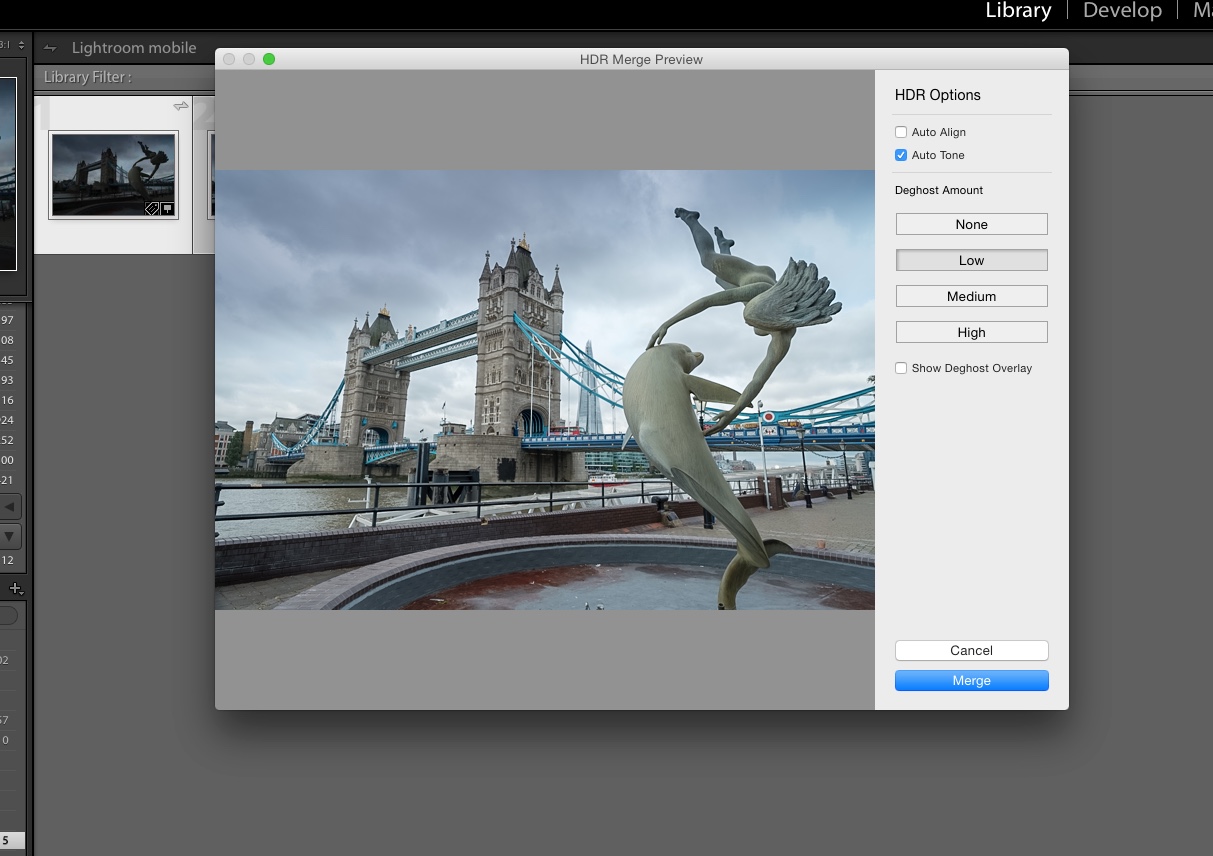
Once happy, press the Merge button at the bottom and wait for the magic to happen. The new image will be added to the Library and can be identified by the suffix -HDR.

So what of this bonus I mentioned? Well, Lightroom now processes RAW files in HDR. Not only that, it can output the final merged image as an HDR raw. The benefits of this should not be underestimated. Whereas before, when we count tripped to Photoshop, Lightroom would convert the images to TIFF, now we maintain the full dynamic range of each individual shot in our final HDR merge. The best way to see the power of this is to take a merged RAW HDR image and play with the Blacks/White/Shadows/Highlights sliders. You will see that you move each, large distances without introducing clipping to the histogram.
Creating a Panoramic in Lightroom CC
The principle of creating a panoramic is the same as for HDR. Select you images in the Library Module, right click and select Photo Merge – Panorama. Again a new window pops up, this time with options to select three different projections, Spherical, Cylindrical or Perspective. By default Lightroom will auto select what it thinks is the right choice, however you can override this by unchecking the box at the top. Clicking each or the projections will give you a preview of how the image will look. Below this you can choose Auto Crop, this will crop excess canvas from the image on rendering. Again this is previewed on screen. Once happy, click the Merge button. Like HDR Panoramic shots work in RAW. If you use RAW source files, the final output image will be in Adobe DNG RAW format, giving you the extra dynamic range and editing leeway that that provides.


These two new tools are actually a huge addition to a relatively evolutionary upgrade. The ability to not only use RAW files but to output our HDR and Panos as RAW DNGs gives us a lot of advantages. These include the ability to change color temperature and the much extended dynamic range. Best of all, all corrections that you make to your final merge are non destructive. You can return the image back to its original state whenever you like.


