One of the last, and arguably most important stages of post production is sharpening and noise reduction. In Lightroom, Adobe has placed both of these tools in a tab called Detail in the Develop Module. It is found towards the bottom of the tools tab on the right side of the screen, perhaps to signify it should be one of the last stages of post-production.
Whilst not an overly complicated tool, it is important that care is taken when using the detail adjustments. Too much sharpening leads to ugly looking images whilst too much noise reduction can give us smeary, blurred looking shots. Today we're going to look at the tools of the Detail tab and how to use them.

Sharpening and reducing noise
When we work on sharpening and de-noising an image, we should always zoom into at least 100% view.
- The easiest way to do this is to use the Navigator panel on the left of the screen. Selecting 1:1 will give you a 100% view of the image.
- The second thing we should do is form the Details tab, click on the little cross hair icon and select a part of the image to use as a reference.
- This will isolate that part of the image in the small preview window, making it easier to judge how our adjustments are going.
- Lastly, if you hold down the ALT key as you make adjustments, you will see various overlays that help you visualise the sharpening process.
First of all, let's look at sharpening the images. The sharpen tools are similar to Photoshop’s Unsharp mask tools The options are Amount, Radius, Detail and Masking. The first two are the same as the Photoshop equivalent, Detail is an additional slider and Masking is similar to Photoshop’s Threshold tool. Let's take a look at what they do.
Now that you're using Lightroom's amazing tools, how about looking into mastering the essentials you need to take your editing skills up a notch?
This Course: Steele Training Lightroom Made Easy will enable you to learn the tricks from the pros, create stunning images plus a whole load more and quite simply, make you a more efficient and confident editor of those images you've spent your precious time planning and taking.
Down The Details Tab…The Slider Tools Opened Up
Amount:
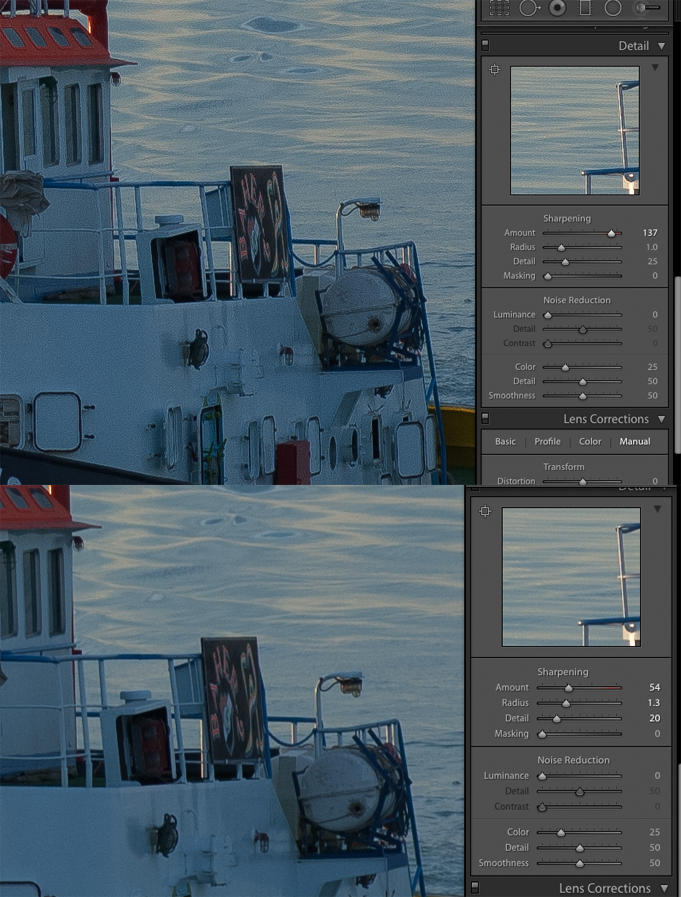
This is the basic sharpening control. It effectively increases the contrast between pixels giving a visually sharper looking image. This is the first slider that we use to adjust an image. It is a bit of a blunt tool so slide it to the right carefully whilst monitoring the main image and the Details preview image. Usually about 50% is a good optimal position for Amount but it will vary for each picture.
Radius:
This slider tells Lightroom how far from each pixel to apply the sharpening. A setting of 1 affects only that particular pixel, go beyond one and it starts to effect surrounding pixels. The effect of this is very subtle but the further you push the slider to the right, the more pronounced the contrast between pixels becomes.
Detail:
This is the fine adjustment tool – go easy. So long as we have not pushed the Amount slider to far, we can make much finer sharpening adjustments using the detail slider. It works on a per pixel basis. Push it too far and you will see noise appear in the form of too much contrast between individual pixels. However, use it carefully you can add fine detail to your sharpening process.
Masking:
The last slider allows us to back off the effects of the first three. It does this only in less defined, softer areas of the image leaving the well- defined areas alone. The effect of this is to back off any over sharpening in less detailed regions of the image.
Want to discover and learn Lightroom's amazing tools properly? Well, we've got just the Course for you, Steele Training Lightroom Made Easy – check out the link, it could be just what you're after.
The two other parts of the Detail equation are related to noise reduction. There are controls for both Luminance and Color. Luminance is the most common type of noise and can be found in images taken in all types of light.
Color noise is more prominent in very low light shots such as night images. It is pretty easy to tell them apart. With the image at 1:1 view, luminance noise will look like excessive graininess such as that found in film images. Color noise manifests itself as random pixels being a different colour to the general image area.
The Luminance tool has three sliders. Luminance itself will progressively soften the edges of noisy pixels so that they start to merge into each other. Whilst this reduces noise, it also tends to soften the image. Slide the Luminance all the way to the right and you will see a visible overall softening of the shot.
The Detail slider counters this softening by returning some sharpness to the image without re-introducing the noise. The Contrast slider returns some of the contrast lost when the Luminance slider is increased.
As with sharpening, noise reduction is a subtle balancing act, always use the sliders from top to bottom, Luminance, Detail then Contrast
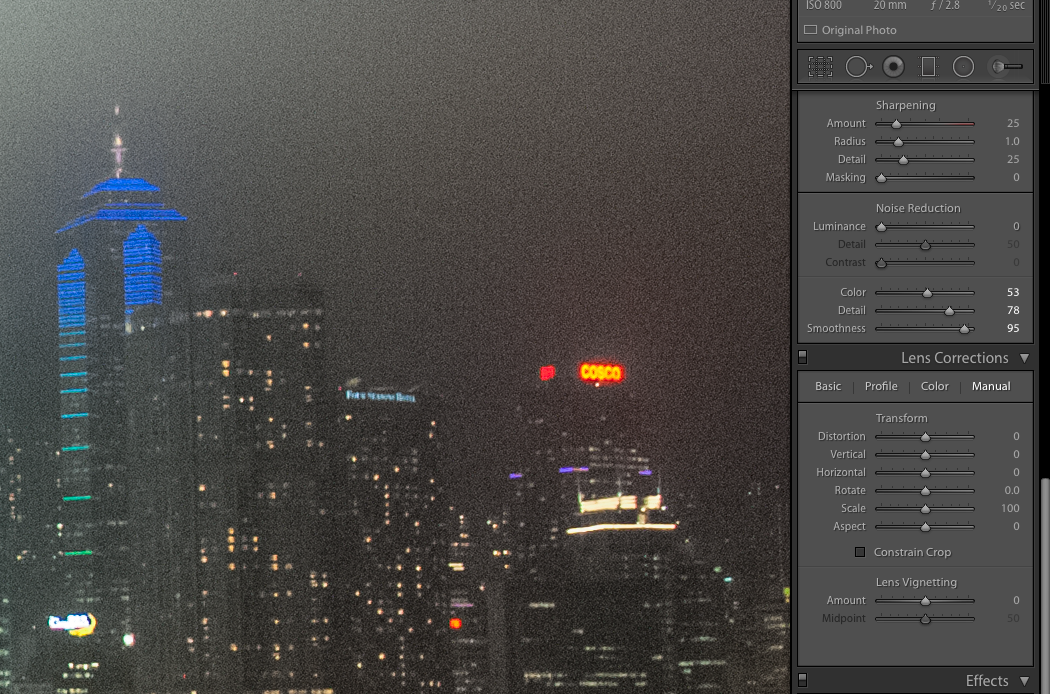
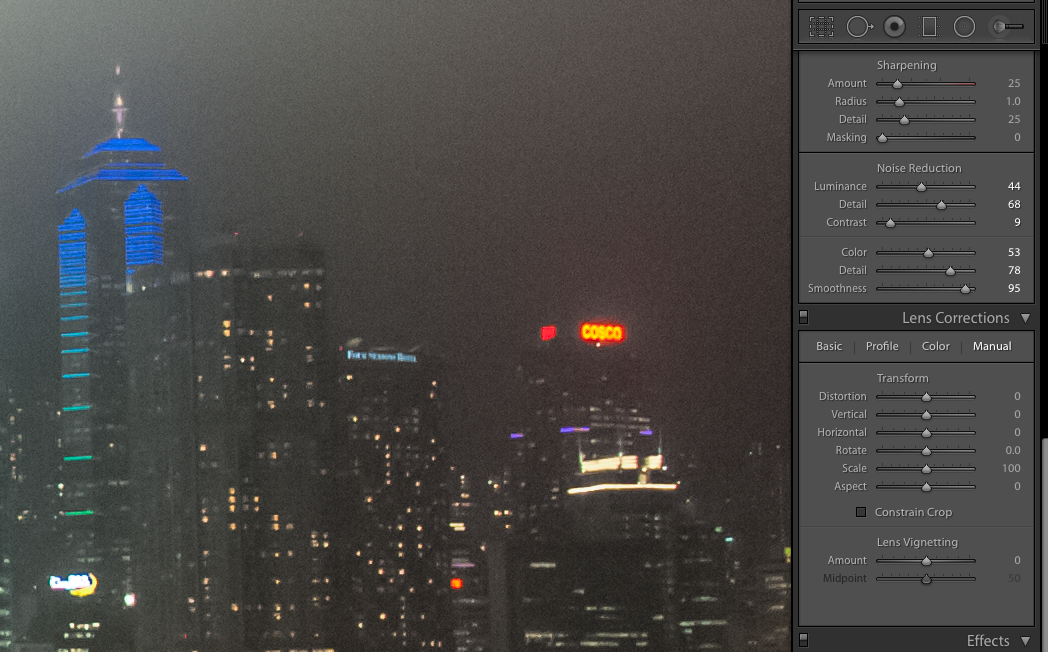
Color noise reduction works in much the same way as Luminance. By sliding the Color to the right, Lightroom will attempt to neutralise pixels that show the wrong color compared to surrounding pixels. As with Luminance, the effect of this is a slight softening of the image. This can be recovered using the Detail tool.
Making the most of Lightroom's amazing tools? Well, we've got just the Course for you, Steele Training Lightroom Made Easy – this will enable you to learn the tricks from the pros, create stunning images plus a whole load more and quite simply, make you a more efficient and confident editor.
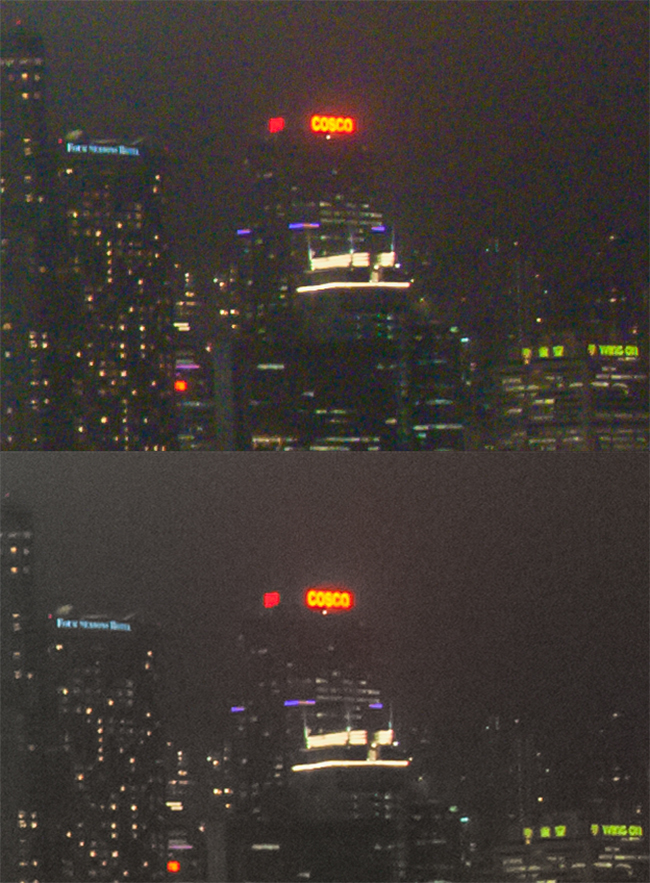
The Smoothness Tool helps to differentiate between color noise and areas where there are differences in the actual color of the image.
The secret to using the tools in the Detail tab is precision. Use each one sparingly, starting with the upper tool moving down to the lower tool whilst all the time keeping a close eye on both the main image at 1:1 view and the preview window in the Detail tab.
Further Resources
- How to Reduce Noise in Photoshop With the Power Of the “Blend If” Tool by Dzvonko Petrovski
- How to Use Lightroom’s Contrast, Clarity, Sharpening & Dehazing Tools for Better Images by Sheen Watkins
- This is Why the “Blend If” Tool in Photoshop is Amazing For Sharpening Photos by Dzvonko Petrovski

