A very powerful and yet often forgotten function within Photoshop CC are Smart Objects. Smart Objects were originally created for graphic design use and introduced in Photoshop CS2. Since then, they have evolved into an extremely useful tool for photographers. One of their major uses is their ability to allow non destructive editing not only of the images but also of filters applied to an image. In this article we will take a look at some things that you can do with Smart Objects.
What are Smart Objects?
When you convert an image to a Smart Object, what you are effectively doing is saving the raw data about that image, within the Photoshop PSD file itself. This means that despite any editing that you carry out on the image, there is always a master reference file to refer back to. In other words, if you undo an edit, you return that image or Smart Object back to its original state. This is not the case when editing ordinary Photoshop layers, most Photoshop editing is destructive, meaning there is a certain amount of quality lose during the edit. One of the best ways I have heard to describe a Smart Object is as creating a RAW layer of your image. So what can we do with Smart Objects?
Re-edit Camera Raw Files
Camera Raw is Photoshop’s built in RAW processing module. Its undoubtably powerful, however if you carry out your adjustments and then open the RAW file in Photoshop, there is generally no way to return to RAW to make further adjustments. However if you convert the image to a Smart Object when exporting from Camera Raw, you can return and make further RAW edits.
To do this, once you have completed your adjustments in Camera Raw, rather than click on Open Image, hold the Shift key and you will see the button changes to Open Object. Clicking now will open the image as a Smart Object in Photoshop. To check this you should see a Smart Object icon in the bottom right of the image layer in the Layers palette. To return the image to Camera Raw, at any time, simply double click on the layer thumbnail.

The Smart Object icon in the Layers Palette
Re-editing a Raw Smart Object
Selective Editing
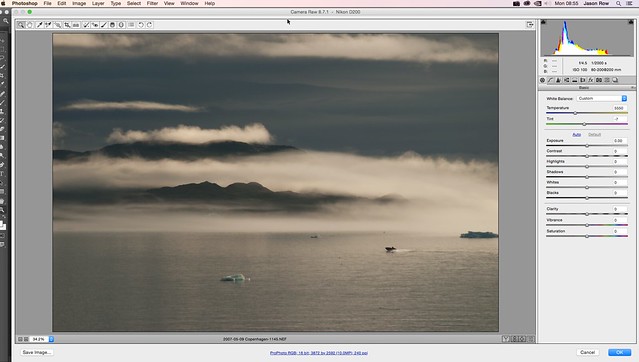
This is one of the most powerful features of Smart Objects, the ability to edit and transform without reducing the image quality. Let's say, for example, you have a nice landscape shot in RAW but with a dull but potentially interesting sky. We can process the RAW to give us a good overall look and opening it as a Smart Object in Photoshop.
Now we need to duplicate the layer but we do not use the Layer Duplicate command as this will restore us to the original Smart Object if we want to undo stuff. Instead we go the menu and select Layer – Smart Objects – New Smart Object Via Copy. This will give us an independently editable Smart Object in the layers palette. Double clicking on the thumbnail will now return us to the Adobe Camera Raw window where we can process the image to make the sky look good.
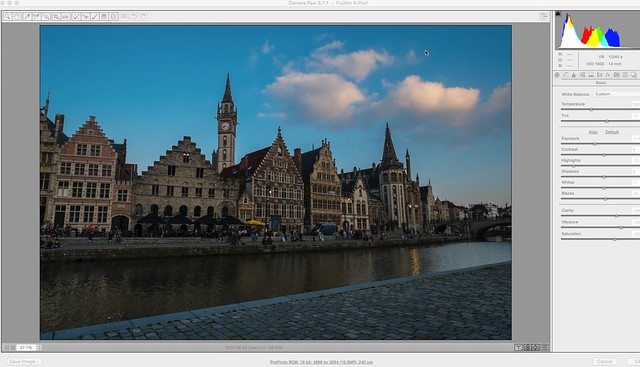
Editing for the sky in Camera Raw
When we are happy with the new RAW image, we can click ok and the corrections will be seen in the adjusted layer. Now we click on the Layer Mask icon at the bottom of the Layers Palette and make the mask black by clicking CMD + I (Mac) or CTRL + I (WIN). We can now select a suitable soft edge brush, set the opacity to around 50% and with the foreground color set to white, paint in the new, improved sky area.
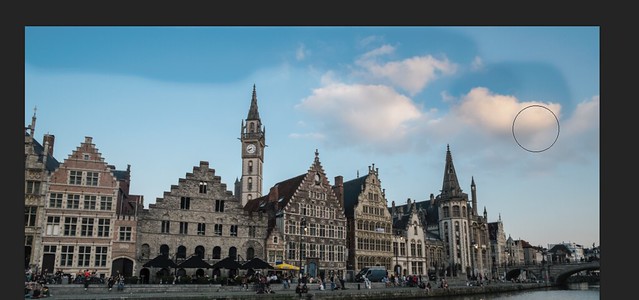
Paint the new sky in on a layer mask
Single Image HDR
The last technique that we will look at today is to create a good quality HDR image from a single RAW using Smart Objects.
Process your original RAW file to get a good balance of shadows and highlights and then send it to Photoshop as a Smart Object. Make two copies of this Smart Object using the New Smart Object Via Copy technique.
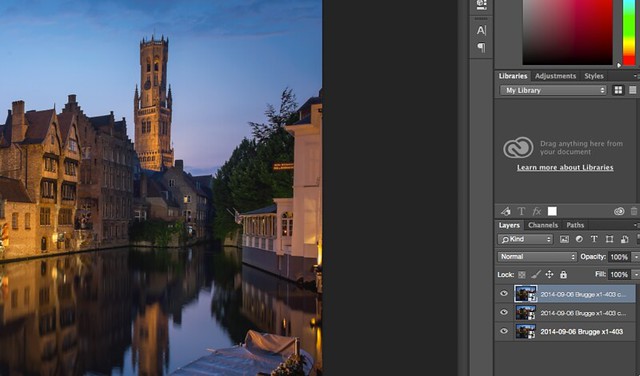
Make two additional copies of the Smart Object
Double click the first copy and in Camera Raw make adjustments to the the highlights. When happy, return it to Photoshop. Repeat this with the second copy, exposing for the shadow areas and return to Photoshop. Select the bottom, original layer and go to Image – Adjustments – HDR Toning. You will asked to Merge Layers and after doing so, the HDR Toning window will open. Here you will find most of the familiar HDR tools and can create great looking images very easily.
Create the HDR Toning effect
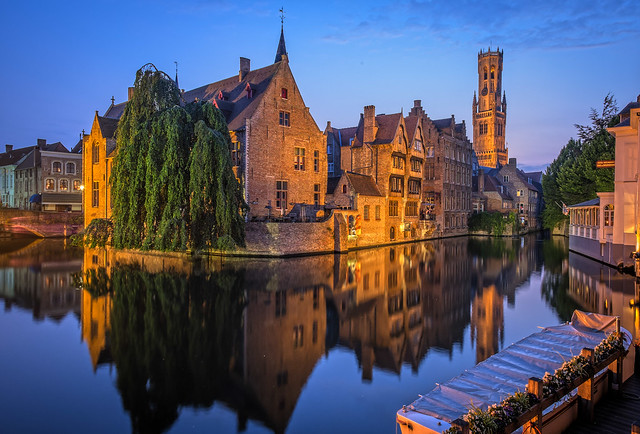
The Final Result. Photo by Jason Row Photography
Smart Objects can seem a little daunting at first but with a little practice they will prove to be a powerful and extremely useful addition to your Photoshop techniques.
As a footnote to this article, it is also possible to send images direct from Lightroom, to Photoshop as a smart object. To do so, right click on the image in the Library or Develop modules an select Edit In – Open Image as Smart Object in Photoshop.


8 Comments
Nice article
In the section on Smart Editing, your second ¶ begins with “Now we need to duplicate the layer …”
I don’t understand why although I’ve seen tutorial about Smart Filters do this, too.
If the original Smart Object can be edited without changing the image (right?), why not just continue to use the original Smart Object?
Are there cases when you’ll need more than two Smart Objects?
I feel that I’m so close to understanding Smart Objects. I hope your answer will enlighten me. Thanks for this article!
Hi George, you need a second smart object so that you can have two layers with different camera raw settings, then blend the two together by masking. You need to use “new smart object via copy” from the layers menu in order to have different camera raw settings on the two layers; if you just duplicate the layer in the layer stack then the two layers refer back to the same smart object and changing the CR settings in one layer will alter both together (I just tried it to check this!). Hope this helps, Peter
Hi George,
When I try to bring out the clouds of an image, I find it easier to edit the image as a whole with regard only to the sky/clouds, with no thought/care to the foreground. This lets me focus on perfecting the clouds/sky without having to worry about exact painting/masking using the adjustment brush/gradients in RAW editor.
When I open an image in RAW editor for the first time, I typically make my edits with respect to the foreground, ignoring the sky/clouds. I shift+open into PS (opens the image as a smart object) then duplicate this smart object via copy. The new, duplicated smart object will then be edited in RAW editor to perfect the sky. While the masking must be done eventually to blend the sky and foreground together, I find it much easier to mask in PS than RAW editor.
The benefit of using Smart Objects to edit the same image differently (sky vs foreground) rather than bracketing in camera is that there are 0 small/minor movements to deal with. Even on a tripod, the wind on a long lens can cause slight movement in the bracketed images. By using the same, single image to properly expose/edit the sky/foreground, there is no movement of the camera/lens.
Use your imagination to see other uses, as this comment focused on landscapes/cityscapes. I hope this helps!
Derek
Thanks for sharing. Your articles have been very helpful for me. Always looking to improve my skills and Light Stalking has been a big help.
Wow, what a great tip, I must remember to use this feature! Thanks Jason
Hi, good article! Do you know of much more memory or CPU power a Smart Object takes over a regular layer?
” if you carry out your adjustments and then open the RAW file in Photoshop, there is generally no way to return to RAW to make further adjustments”. This is incorrect.
You do not need to create a smart object to re-edit in camera raw. In Photoshop click on the filter dropdown menu and then click on Camera Raw Filter.