Photography is more than just sunsets, memories of vacations, family gatherings and weddings – it's actually in our life every single day. Product photography ranges the gamut from cereal boxes and billboards, to the photos you see on Amazon and every other online retailer. Someone takes those photos, and those photos require a lot of work. Not only is it a fun profession to do, the techniques are also something that almost everyone can benefit from and apply to their own photography, even if it's not product photography. From listing better photos on eBay and Craigslist to broadening your existing skill set, these techniques will help round out what you already know.
Starting out, one of the most crucial things every product photographer needs to get a full grasp of is that the photography is secondary, the product comes first! A perfect product shot will entice someone to want that item, whatever it is, so it needs to properly display what it is and convey it's message.
Gear will vary based on what the product is, but the important thing to note is that you can start with almost any digital camera, even some of the higher end point and shoots, those which have hotshoes. Here's a rundown of what you'll find in a professional's studio:
Lenses. An assortment of lenses, however primes tend to be favored because of their sharpness. Macro lenses for detail shots are also used and for some work a tilt-shift lens is desired to avoid distortion.
Lighting. Multi-strobe setup with umbrellas, softboxes, ringflash, snoots, grids and other lighting modifiers. Also flags to block light.
Backgrounds & more. Seamless paper of every color, but also specific items like light tents, light cubes, clear plexiglass, and black plexiglass.
Tripod. This is essential so you can move and adjust lighting and keep your camera consistent.
Preparation. The amount of time you put into your preparation will result in the quality of your photography. The smallest bit of dirt, dust and fingerprints will show in your photos. Keep a microfiber cloth and other cleaning supplies handy, the last thing you want is to spend hours in post production removing tiny bits of dust when you could have spent a few minutes cleaning before the shoot.
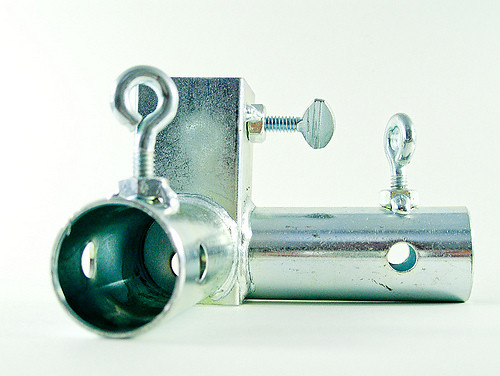
The unseen. A lot of products can't support themselves, need a stand or special rigging. These can vary from dress forms for clothing to elaborate, hand bent aluminum rods used to hold a product in place properly and even fishing line, only to be removed in post processing.
Like most disciplines of photography, it seems there's never enough gear to be had. You can fully expect to be into the hobby or profession for 20-30 years and keep buying stuff because it will continue to enhance your work. For beginners, it's important to note that all the gear in the world won't help cover bad photography, so start with the basic understandings and work from there.
Starting with your product, it's important to know what it will be used for. Amazon.com for example shows almost all of their products on a white seamless background, floating if you will. Here's a homemade lightbox for doing this type of work:

diy product photography setup by MinimalistPhotography101.com, on Flickr
Highly reflective material needs to show both the reflective properties and the shadowed areas, this shows depth to the photo in an otherwise floating background. Using a white frosted storage tub on it's side with a piece of white paper inside and some lights on either side you get a pretty clean file when done:
ebook images by MinimalistPhotography101.com, on Flickr
This was accomplished with hot lights, meaning always on, and a point and shoot camera. This is also ideal for photographing items for sale on eBay, but was actually used in a DIY photography book.
It's worth noting that a very similar effect can be created with a simple white paper sweep outside on your porch or patio, the sun will create a perfect drop shadow if that's what you're looking for, cloudy days act as nature's own softbox. Spending a few dollars on some white seamless paper and using the sun is the easiest way to start learning, but you'll never get consistent results due to the changing position of the sun and clouds. Don't try this in the rain!
Previously mentioned was plexiglass, this can be used when you want a more moody photo and is often used for more classy photographs of electronics and other highly valuable items. Here's a great example:
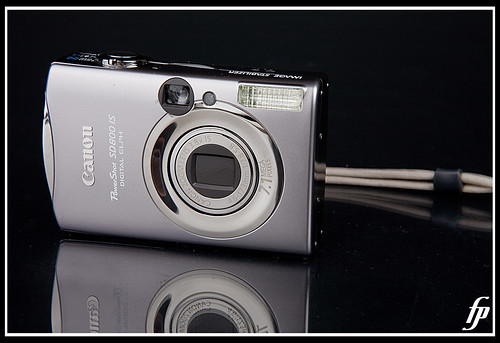
Canon SD800 IS by fensterbme, on Flickr
Here's how the shot was composed:
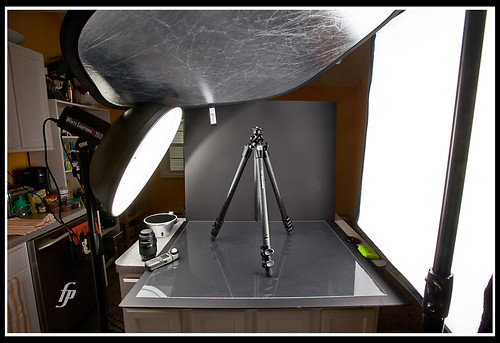
Tripod Shoot – Behind the Scenes by fensterbme, on Flickr
Note that the tripod you see is actually part of this featured photo, it was not used to support the camera, however the lighting was the same. Two strobes, the key with a beauty dish and a softbox to camera right for added fill. You can also clearly see the plexiglass, which is normally clear but when placed on top of black foamcore and shot from a low angle, it becomes very reflective.
White and black aren't the only backgrounds you should shoot on though. Sometimes you need to show the detail of an item. One photographer liked the pull tab and fabric texture of his new camera bag so much he took a wonderful macro shot of it.
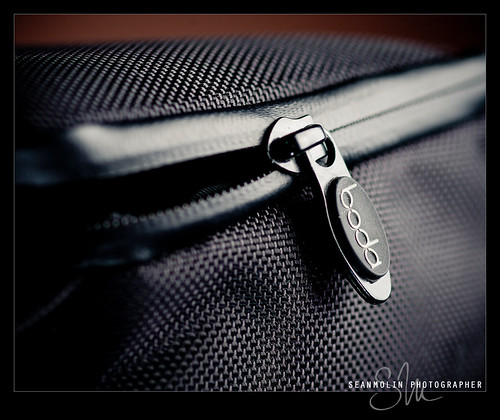
The Boda V3 Lens Bag | Zipper Pull by Sean Molin Photography, on Flickr
Shot with a single speedlight with a softbox, the detail fills the frame so the background doesn't matter much. These types of photographs are wonderful when building an online store, consumers really want to see the finer details of items they can't touch. This is an important tidbit of info, product photography is about the person who is buying what that photo represents. Touch is one thing photography will never provide so it's our job to really show what the buyer is getting.
Now that you have an idea of what you'll need to accomplish product photography, there's a few more things that are essential for a really nice product shot. Perspective is possibly the most important aspect to a successful shot. It's easy to notice once we point out that all of the above photos are shot at about the same level as the product, meaning the camera wasn't being pointed down and shot from above. If you're planning to use your dining room table to setup shots at, the camera should be only a few inches above the table. Don't adjust the product and lighting based off what you see when sitting in a chair, get your head down lower and look at it head on and why it was stressed earlier a tripod is essential so you can continuously make adjustments.
For a beginner, anything that's reflective will prove to be the most difficult products to shoot, and the most frustrating. For a shot like this:

Day 122 – Sperry Cup – Lake Ontario 300 Overall Championship trophy by uLight.Me, on Flickr
you could pull your hair out. There is a trick to it though. Just like the frost white storage tub above was used to soften light on reflective surfaces, with chrome and similar services they will show you exactly what's in their reflection, so you need to adapt. This type of shot can be recreated by using a black box or black tent, with fabric, not paper or plastic. The black fabric will absorb the light, it also helps give the black reflections you see in the chrome. Furthermore you can expect to see yourself and possibly camera gear in the chrome, to avoid this the shooter placed his camera really low, and also more than likely used a wide sheet of fabric (commonly called a flag) that's draped in front of the camera and has a slit big enough for the lens to fit through. This helps eliminate any self-reflections. This particular shot, according to the photographer, is actually a composition of similar photos that were pieced together in a similar fashion to HDR because of lighting restraints.
Earlier in the article consistency is mentioned. One tool to help you is a free website, iPad & iPhone app called Sylights, a great way to record, remember and share your lighting setups, aside from actually taking a photograph of your setup. Being consistent is about keeping diligent notes that include, aside from your typical EXIF data such as, distance from camera to product, distance from light(s) to product, distance to reflectors or flags, strobe power settings and any creative gels used. This information will allow you to quickly recreate the scene at a later date, not only saving you time but keeping the quality consistent.


5 Comments
Very nice & informative article.
Please help me I m facing a problem edges blur in pictures and reflection
I think the blur edges could be a problem of depth of field, please check your Aperture settings and adjust accordingly.
for reflections , depending on what you are shooting you will have to play around with the light and and use of some relectors or diffusers. hope this helps.
I found it interesting how you mentioned how some products need a separate stand to show off their best angles. My son wants to start a business that sells homemade sweaters and he has mentioned how he doesn’t think his product would be properly represented unless you can see the whole thing. Because I want to make sure my son is a successful businessman, I will keep this in mind as we search for a product photography service that utilizes stands!
Nicely explained,
Product photography, especially indoor photography is on the rise. Some offer you tips that are very basic and irrelevant while the other offers you costly solutions- https://bit.ly/2B02pUw