As a bird photographer, I've continued to get the question, “I have two birds in the photo, but only one is in focus. How do I get both birds, particularly the eyes, in focus?” A fair question. When photographing birds, we need fast shutter speeds which typically goes hand in hand with bigger apertures and more light (see: the exposure triangle). This also means that if one of the birds is not on the same focal plane (either in front or behind the bird we focused on) it will be soft or not in focus. With preplanning before the shoot and using a few post processing tools within Photoshop, a photo with 2 birds (animals or people) can be in focus.
Let's Look at an Example
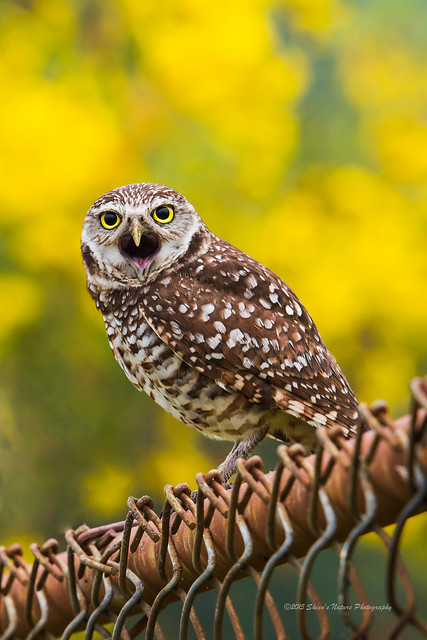
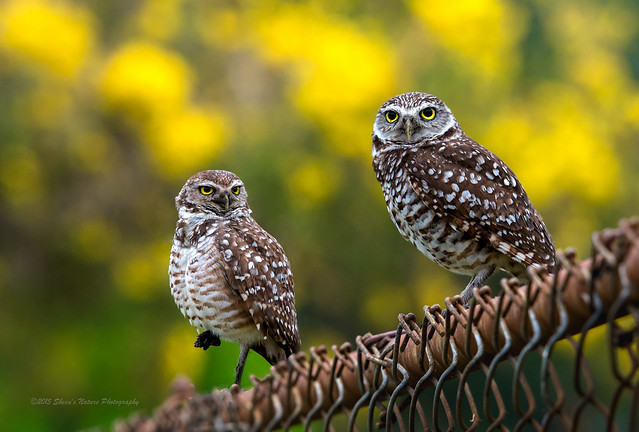
My subject? A pair of burrowing owls. Here's is the male. I believe he became quite bored with me being there as he started yawning while looking at me.
Is that cheating? Some say yes, some say no. It's a matter of personal preference. However, if entering your photo in a contest, be sure to understand the rules as some may or may not allow this process.
You photographed both birds, the composition is solid and the depth of field works. The best of both images can be blended together to create your desired photograph. So if you're interested in trying this technique (or have one of your own), read on.
Setting up the shot for two…with a reasonable shallow depth of field:
As a photographer of birds, they're not always cooperative. However, some birds are good subjects for this (as well as other subjects), particularly those that are bit slower to move, the observers, waders, etc. The example below uses 2 burrowing owls perched on an old rusty chain length fence.
The first few shots focused on owl's eyes in the foreground. The next series zoned in on the eyes of the owl further away from the camera. I went back and forth as they moved around a bit. They would look around, preen, but if I shifted my position, they would look back at me for a few seconds. The key is to move only the focus points, not the camera. The same image, settings makes it much easier!
Combining/blending the image into one
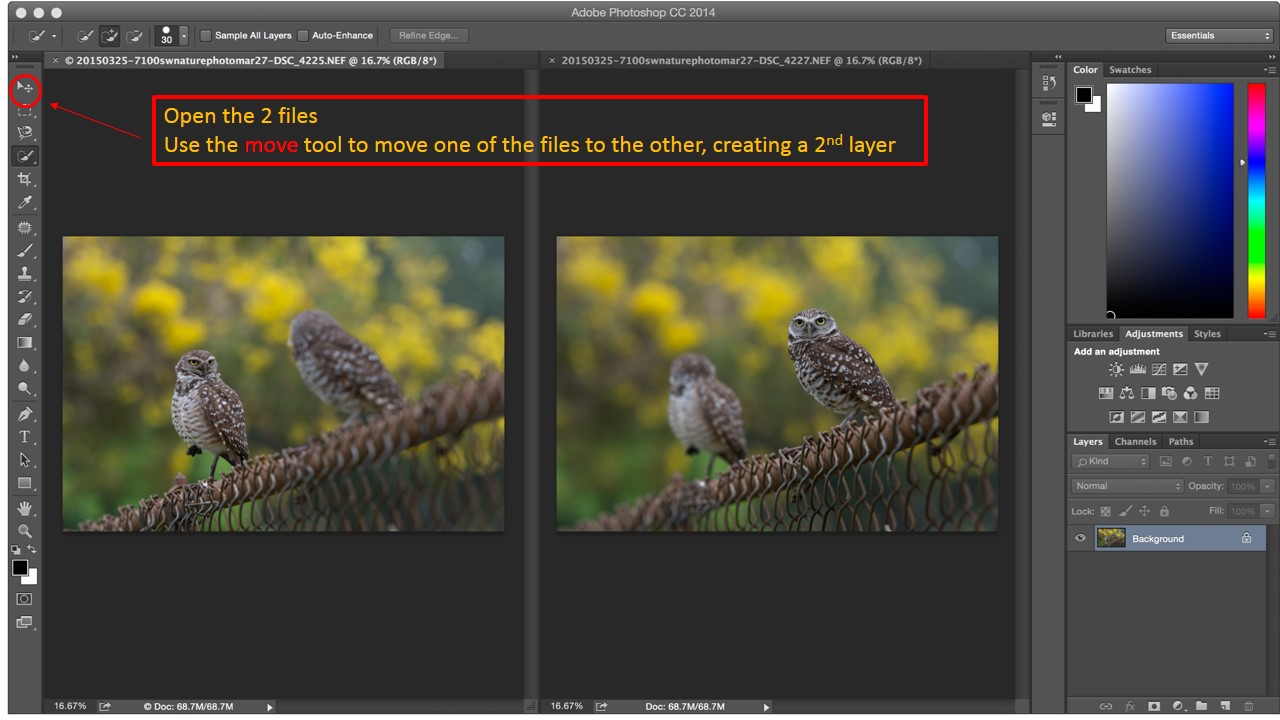
The process is quite straightforward, it's the fine tuning that makes the difference. First open both files in Photoshop. Once you have both files opened, you can view the two files by selecting Window on the main menu, then Arrange, then 2-up Vertical. Second, using the move tool, move one image into the other file which will create two layers.
From here, select both layers and do an auto-align, then auto blend which is accessed from the main menu by selecting Edit.
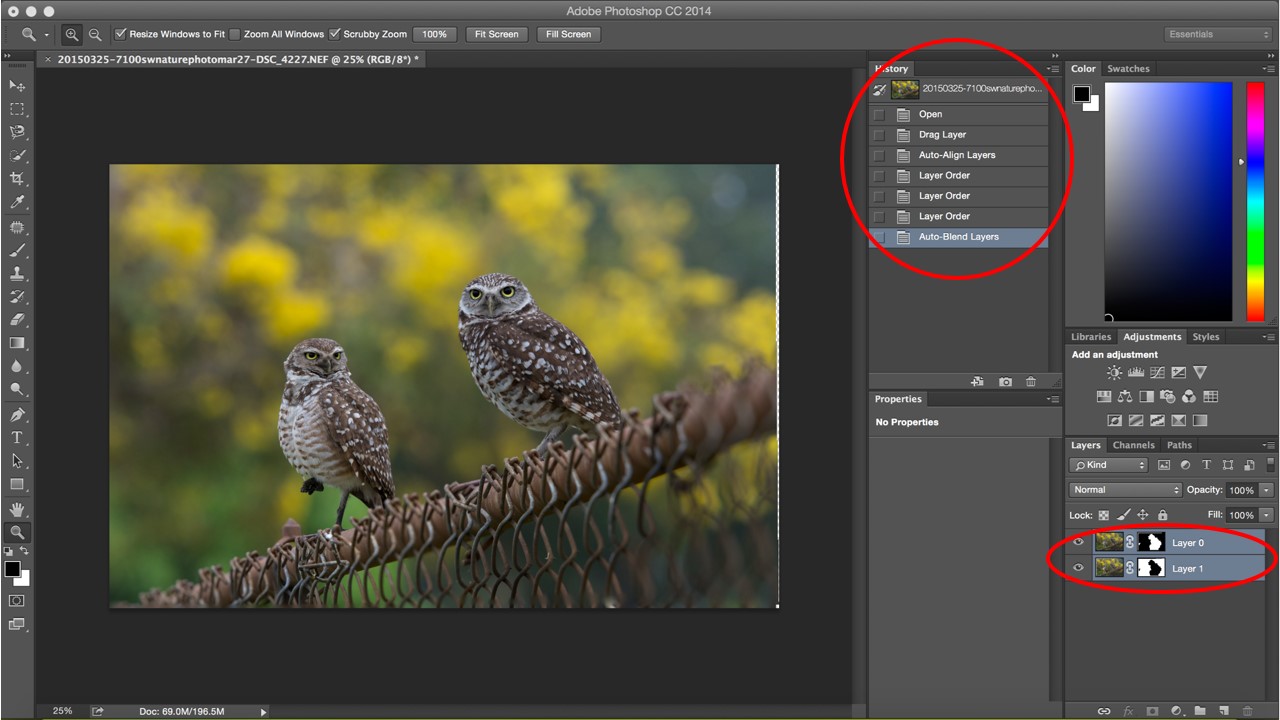
Photoshop's intelligence aligned the two layers, then blended the areas in focus to create an image ready for processing (exposure, hue, cropping, etc.).
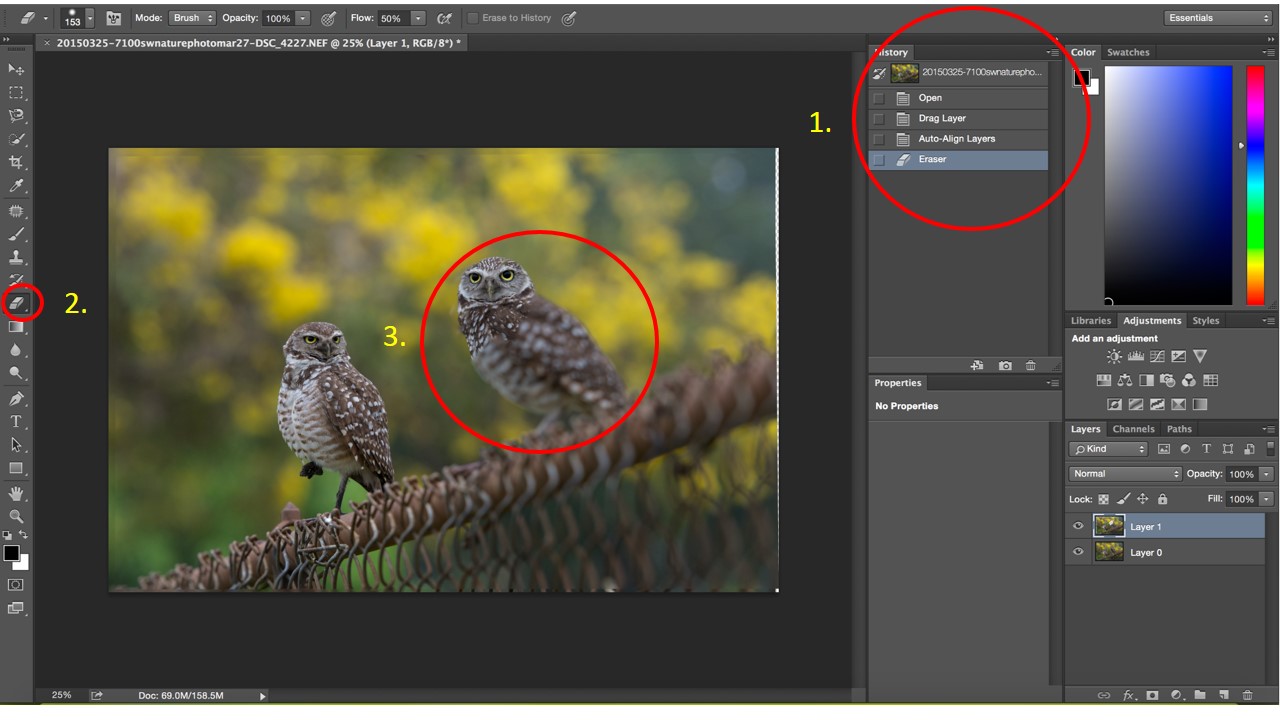
The other method was to:
- auto-align the selected layers.
- Using the eraser tool, brush over the area not in focus.
- Erase the top layer to reveal the in focus bird in the underneath layer.
In #3, only the head has been erased for demonstration purposes.
After you've erased ‘in' your subject, some adjustments and corrections may be needed before the final post processing. The area erased out may have some contrast that is obvious. This is where using the cloning and healing tools can be used to blend the contrasting areas.
Final Processing
Using either Photoshop, Adobe Camera Raw, Lightroom (or other tool), process the image to your personal preference. I wanted to modify the yellow background a bit. I selected the owls in photoshop, inverted the selection to work with the background and slightly adjusted the exposure with a slight push of the slider.
The final image is below.
This takes practice both in the field and in post processing. You can start with stationary objects or just dive in with your favorite subject.


3 Comments
It all sounds so easy, i have not dived into the photoshop pool yet……i have used elements before but there is no retina screen support with it so no good for my macbook pro and i think the full version is terrifyingly vast. Great result here so maybe time to dive in and sink or swim
This technique also works well with landscape photography too. One shot with the forground in focus and another with the distance in focus and then combinding them in Photoshop.Some say this isn’t ethical and that the resulting picture is a lie…I say it depends on the end use of the image…but that’s just my opinion.
You need to plan for the section of fence as well, otherwise it looks altered with the unfocused fence and perfectly in focus owl standing on it.