You look through your viewfinder, and you take pictures. Sounds simple, right? The viewfinder on your camera is not just an interface between you and your subject but also a repository of important information that will help you make that shot much better. Today we are going to take a guided tour of your camera’s viewfinder.
Before We Begin
When you do get around to reading the manual on your camera, you might find somewhere hidden in the specs a phrase like this – Viewfinder Coverage 96.5%. This is quite an important fact to understand because it means that you are not seeing 100% of what the sensor is recording. The nearer to 100% you can get, the more accurate your viewfinder will be. This is important to understand when framing your shots. There is a caveat to this – rangefinder cameras. These cameras often show more than 100% of the view and then have indicator lines to show you where the image frame is. Because, in rangefinder cameras, the view is offset – what you see through the viewfinder is not exactly what you get in the final image. This is an important thing to understand when using these types of cameras.
So let's get to the information within the viewfinder itself. I have created a graphic to show the most important elements that you may find inside your viewfinder.
This is What a Typical Viewfinder Looks Like
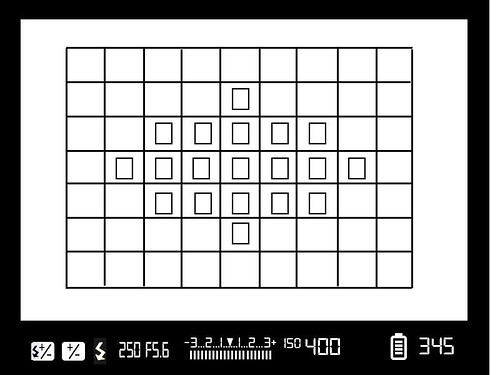
A generic DSLR viewfinder
This is a generic viewfinder, most modern cameras will have similar information to this but possibly with different layouts. Often the information shown can be changed, for example the grid might be changed to show a rule of thirds grid with two horizontal lines and two vertical. The information at the bottom may also be customized. So lets take a look in detail at this information.
Focus Points: Choose Where to Focus
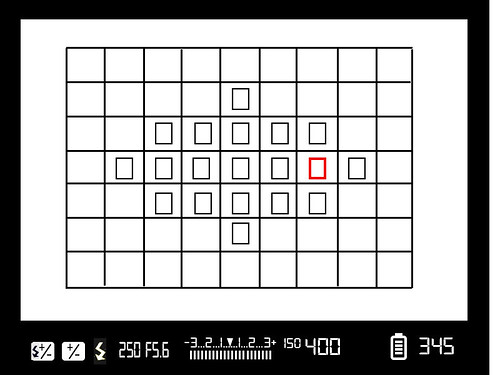
A highlighted focus point (in red) in the viewfinder
The rectangular boxes within the viewing area are the focus points, the actual point of focus is usually highlighted in red. If you are in an area focus mode, the camera will automatically select the focus point, if you use a single point mode, you can select any one of these boxes to be the point where you focus the camera. You should also be aware of how your camera's autofocus system works.
Shutter Speed and Aperture: What Settings to Use
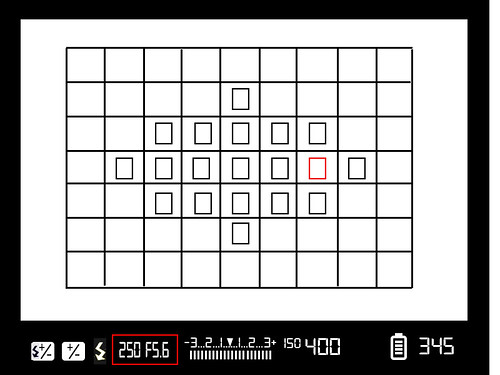
Shutter speed and aperture information
In this shot, the highlighted area shows us the shutter speed and aperture information. As you change either of these from the camera’s controls, the numbers will change also. This is a very useful guide when, for example you want to shoot a high shutter speed, you can rapidly change the shutter without removing the camera from your eye.
Exposure Level Indicator: Getting the Perfect Exposure
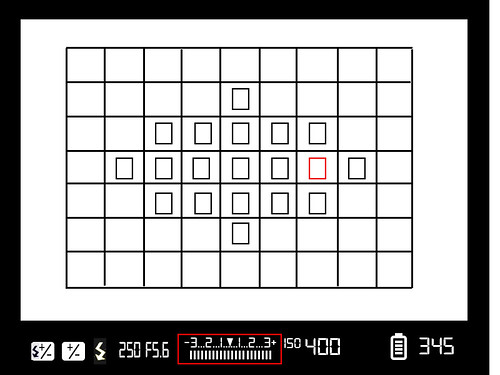
One of the most important parts of the viewfinder: the exposure level indicator
This area, is perhaps the most important in the viewfinder, the exposure value. If you are using any of the auto modes, the inverted triangle should be in the middle of the display, indicating the metered exposure. However, if you are using either manual modes or exposure compensation, the triangle could be either left or right of center. When shooting in manual mode, you change you shutter speed or aperture in order to bring the triangle towards the center. If you want to under or over expose slightly, move the triangle towards the minus or plus signs respectively. Learn to see your exposure scale when you shoot, it will allow you to make informed decisions about how your final exposure should look. This is just the beginning of how to get perfect exposures.
ISO Setting: Avoid Noisy Mistakes
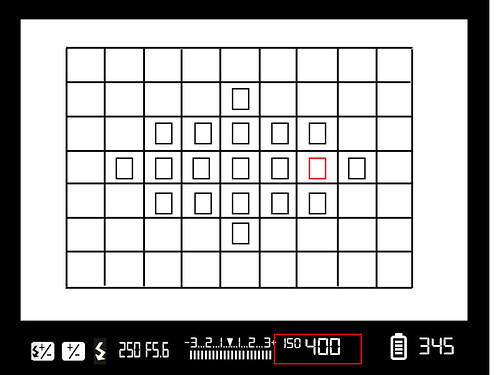
Learn to check your ISO regularly
Another important piece of information is the ISO setting. It is very easy to bump up your ISO to get a low light shot, then forgetting to return it to a lower value when in brighter light. Get in to the habit of checking your ISO setting frequently to avoid noisy mistakes. However, there are 8 ways to reduce noise that you should know.
Battery Indicator
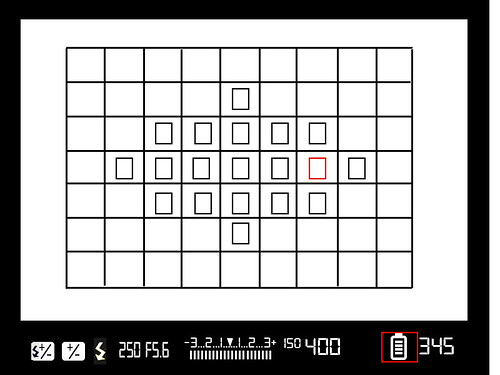
Keep a close eye on the battery indicator
Battery indicators are not 100% accurate but do give you an indication of how much power is left. Usually the indicator has 4 or 5 bars but as a rule of thumb once you get down to two bars be prepared to change or charge your batter fairly soon.
Frame Counter: How Many Photographs Can You Take?
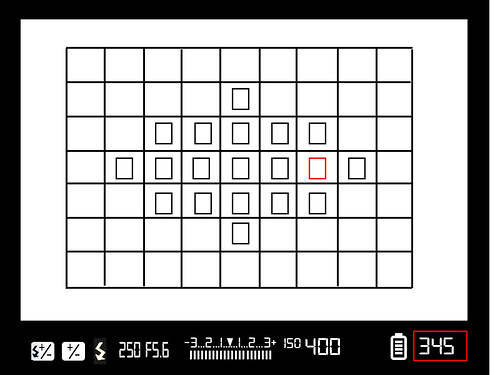
The number of photographs you can take before your memory card fills up
Another useful indicator is the frame counter. Get use to checking this regularly as well but also check what you camera setting is. Some indicators show frames taken, others frames remaining. You can usually change this from your camera’s menu. Be aware also, when shooting JPEG, the frames remaining count will be an estimate only.
Other Indicators: Flash, Exposure Compensation
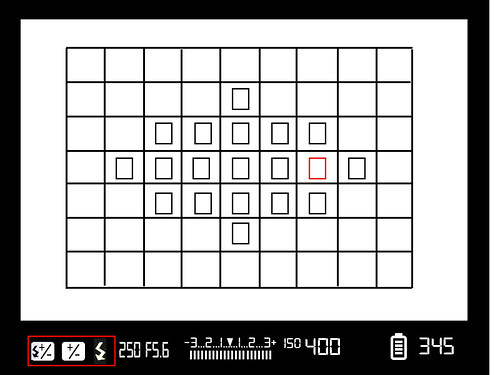
Some other indicators include: Flash Exposure Compensation, Exposure Compensation, and Flash on
Other useful information in the viewfinder as shown here could include whether you have an auto bracketing or flash bracketing mode on, and whether the flash is on and what mode the flash is set to. There may also be indicators showing whether you have set some exposure compensation, usually indicated by a second marker in the exposure scale, white balance information, focusing mode, for example area or single point, metering mode, and auto focus mode, manual, single shot or continuous.
Get Used to Your Viewfinder
There is a huge amount of useful information within the confines of your viewfinder. Learning to read the important elements about metered exposure, shutter and aperture values and ISO can help you improve the fluidity of your image-taking by allowing you to keep the camera up to your eye more often, rather than dropping it down to make changes.


2 Comments
Very useful indeed. Thankyou.
very useful and appreciate it, thanks