Photoshop can be a phenomenal tool for improving portraits. However, as with any tool, the final results are only going to be as good as the skills of the user. This guide will walk you through the basics of realistically enhancing a portrait in Photoshop.
Open and Evaluate Your Portrait
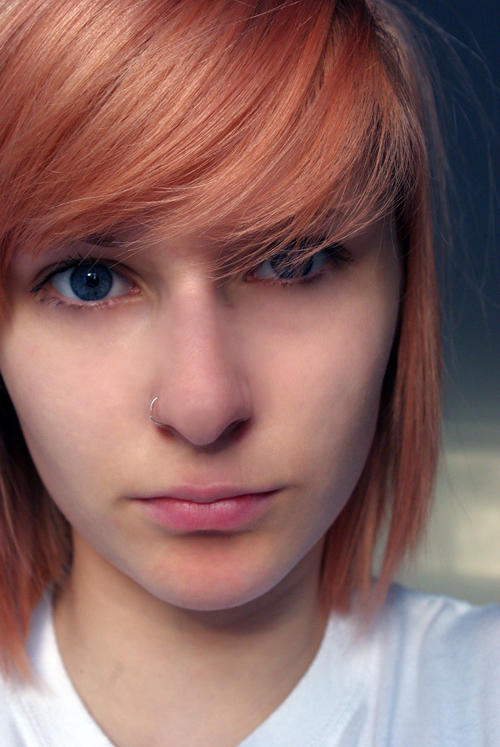
I chose the following portrait for this tutorial. She is a beautiful model, but from a photography point of view (and for the sake of showing how these changes can be made), her skin has some redness and enlarged pores, and there are some dark circles under her eyes. These minor imperfections can be easily diminished in Photoshop.
Once you have a portrait open that you want to work on, it's helpful to evaluate the problem areas prior to starting.
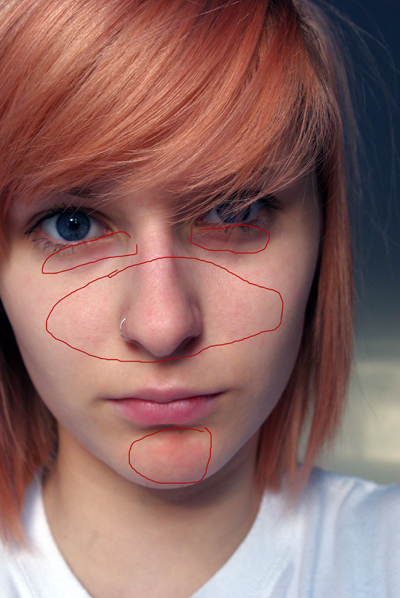
I've circled the areas that I want to fix in red. She has some redness and large pores around her chin, nose and the center of her face. There are also dark circles under her eyes.
Work Non-Destructively
Be sure to duplicate the background layer. To do this, simply right click on the layer and choose “Duplicate Layer…”. You will now see a second layer called “Background Copy”.
Choose the Spot Healing Tool
The spot healing tool, which is identified with a band-aide icon, can be found on the vertical tools panel. It replicates texture and tone to very effectively blend away small flaws, such as blemishes, in an image.
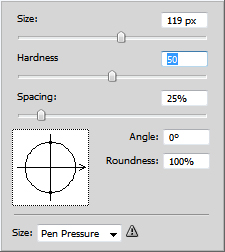
Choose a basic round brush and make sure it is just slightly larger than the area you want to improve. Be sure to set the brush hardness to 50%. Higher numbers will render the effect too harshly and lower numbers will blend too much.
Finally, be sure that the “Proximity Match” box is checked.
Once you have all the correct settings chosen, you can then look for small imperfections that can be fixed and click on them only once. They will pretty much disappear and blend into the background. Wait on larger areas since there is a special tool we are going to use next to work on those.
There are limitations with the spot healing tool. Be sure to work only on a similar texture or color, or the tool will actually get confused. You might end up with colors or textures in the wrong place. An example would be using the tool on a half-shadowed and half-lit area of the face. I only found a few very small spots to fix on her face with the spot healing tool, so no we can move on to the next step.
Choose the Healing Brush Tool
The Healing Brush Tool, which is designed to fix larger areas of an image, can be found in the same drop-down menu on the vertical tools panel as the Spot Healing Tool. It also has a band-aide icon next to it.
Again, using a basic round brush, set the hardness to 50%. Make sure that you check the “aligned” box.
The tool will replicate whatever texture you choose it too. Alt-click (Windows) or Option-click (Mac) on the spot that you would like to replicate. You will probably have to keep re-selecting the same area to replicate if you have a large area to fix, since like the Clone Stamp Tool, it will replicate the entire area and not just the spot you choose as you move the brush around.
I chose an area toward the outside of her face to replicate since it is very pale and smooth. However, I am going to have to keep re-selecting the same spot to avoid having the texture of her hair replicate on her face.
Leave the dark circles alone at this point since we are going to use a different tool to improve those.
Here is my result now. It is normal for it too look unnatural at this point so no worries!
Choose the Patch Tool
The Patch Tool can be found in the same drop-down menu as the Healing Brushes. This tool will reduce the dark circles under her eyes. This is also a good tool to use for portraits that show crepy or puffy under-eye skin.
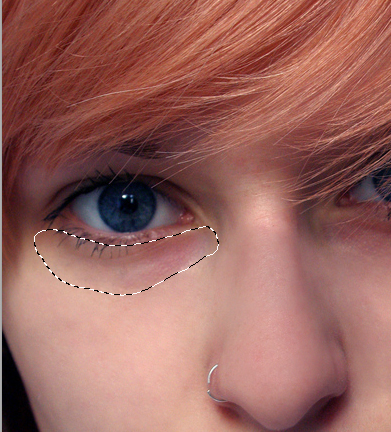
Use the tool to to make a selection around the darkened are under the eyes such as shown here.
Drag the selection to an area of the face or skin that has the texture and tone you would like to copy. In this case I'm going to drag it to an area on her cheek, which is already enhanced. Once I've done both sides, here is the result.
Blur and Blend the Layer into the Background
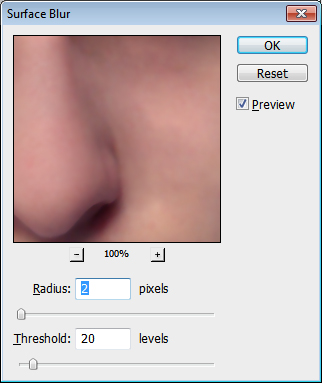
Now that we have made the basic corrections, we are going to give it some final touches. With the second layer still selected, go to Filter>Blur>Surface Blur. Set Radius to 2 and Threshold to 20.
Choose the Eraser Tool. Choose a round brush set to 50% hardness and erase the eyes and lips at 100% opacity. This will keep sharp focus to the eyes and mouth.
Run the blur tool with a round brush, hardness 50%, around the edges of the erased areas to soften it a bit.
Now, change the opacity of the Background copy layer to somewhere between 40% and 70% depending on your preferences. I chose to set opacity to 60%. Once you are satisfied with the result you can flatten the image and you are done!
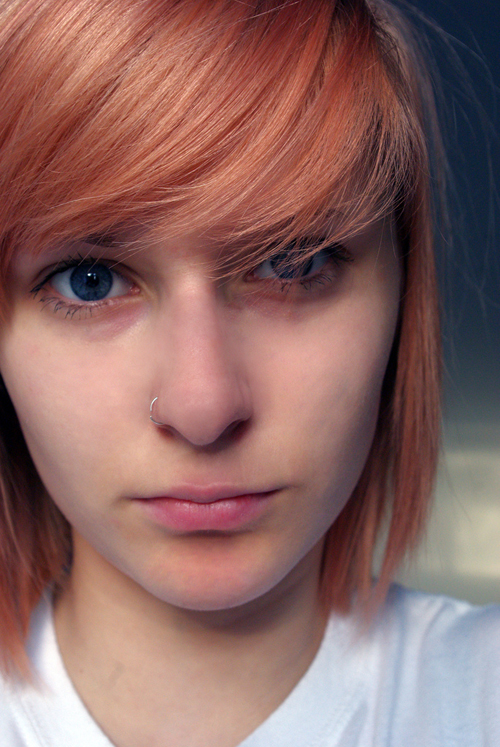
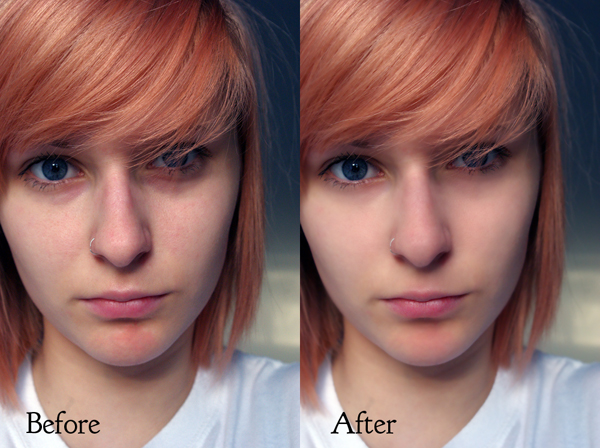
Here is the final result. As you can see, there is still some subtle texture and variation in tone, which gives a realistic look, but her skin and dark circles are much improved. Now her beautiful eyes are more the focal point.
Rachael Towne is a professional photographer and editor of the Photoluminary photography blog.



6 Comments
I used to spend a lot of time editing faces back in the day. I suppose over time I really began to fall in love with the flaws and stopped being so picky about it. I still remove the obvious things but I really do prefer textures in portraits now.
Done with better control over skin texture in GIMP with Wavelet Decompose plugin
1) Load the picture
2) select Filter > Custom > Wavelet Decompose
3) as options choose 5 layers and new image
4) select the color layer (not texture layers) and mask areas you want to clean with free select tool or [lasso mask] (you can use a feather about 50 for the mask)
5) go to Filters > Blur > Gaussian Blur and try values around 80
6) done – now you have to Merge all visible layers
(I have used original image at 2592x3872px)
this is the result scaled down /home/sorin/Desktop/makeup-scaped.jpg
I see that the example image for the previous comment was not copied as link – so you can check the example image here :
small correction :
at the step2 this text :
” select Filter > Custom > Wavelet Decompose ”
must be : ” select Filter > Generic > Wavelet Decompose”
my mistake
You made her so flawless. That is such a great talent! I saw other’s work that shows visible flaws on skin. I guess it is really the choice of an artist.
“…Make sure that you check the “aligned” box….”
“…You will probably have to keep re-selecting the same area to replicate…”
Simply *don’t* select the “aligned” box and you will not have to keep re-selecting. Then, every time you release the mouse button the source will return to the original point – which is what you want.