We at Light Stalking, like many other photographers, love the Golden Hour. And what’s not to like? Beautiful yellow/orange light, long soft shadows, and silhouettes, it’s a beautiful time of day and simply the most magical light if captured correctly. Sometimes though, are you a little underwhelmed when you see the final image on your computer screen?
There is a reason for that.
Camera’s don’t see color like us. They simply average out the color data they are given, effectively neutralizing the beauty of the scene. So, how do we make sure we have the rich colours of the golden hour in our final image? With some basic editing done to these images, you can turn these dull photos into beautiful and striking ones in a few easy steps.
Today we are going to look at how you can boost your Golden Hour images in Lightroom Classic. While your workflow might vary depending on your image, this gives a good indication of how much life you can breathe into a Golden Hour image.
Note:
The golden hour is the time of the day after sunrise and before sunset. This is the time when the atmosphere looks magical and golden with beautiful hues of yellow, orange and red, long and soft shadows and leads to contrast and depth.
Get It Right In Camera
While cameras do struggle with reproducing the entire dynamic range, some parts of the image may be correctly exposed while others over or under exposed. There will also be the struggle of reproducing the wide range of colours present in the scene during the golden hour and hence when shooting the Golden Hour, we can give ourselves a sporting chance of getting a good shot with some simple things to consider when shooting.
- The most important of those is to shoot RAW as this can help you recover a huge amount of details and colours while post processing. As RAW does not embed the white balance data into the final image, we can easily adjust it in Lightroom, giving us a much more appropriate color.
- Secondly, bracket your exposures. Golden Hour images can have a very wide range of tones, difficult for the camera to capture fully. By bracketing, we can bring that tonal range more in line with what the eye sees by using HDR.
Correct The Exposure First
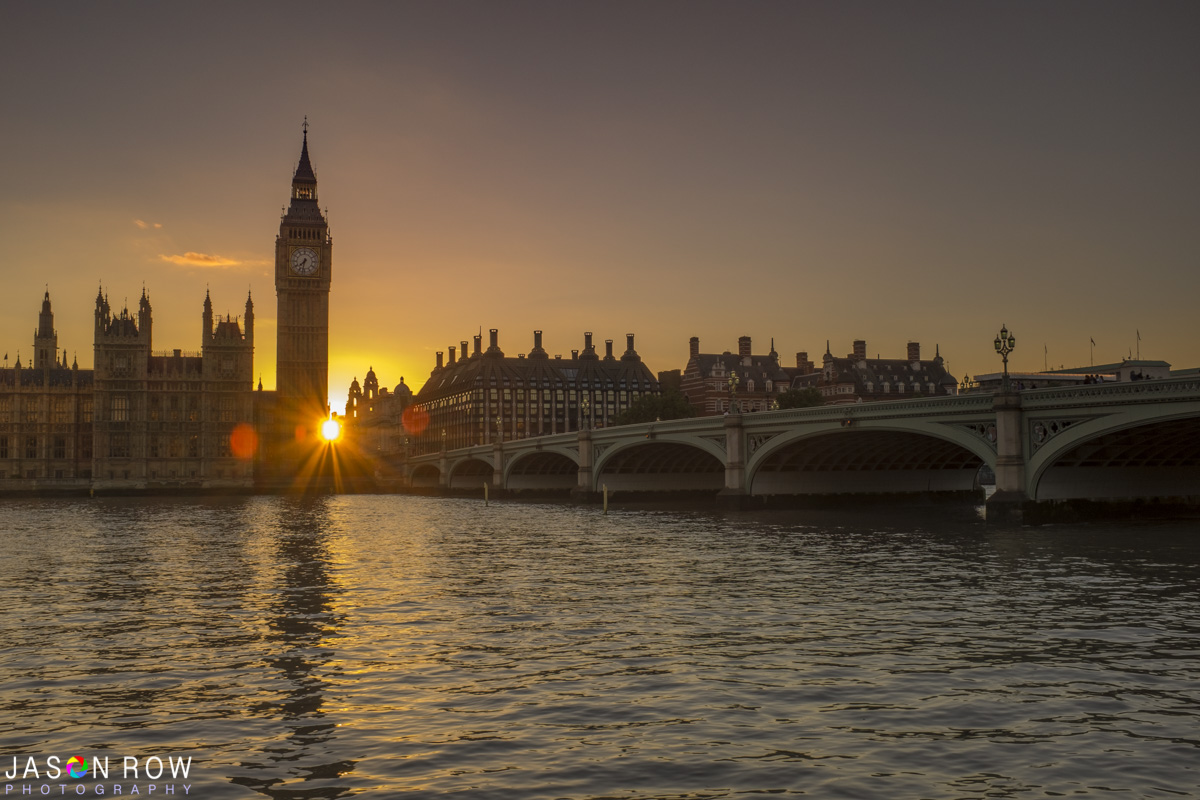
To demonstrate how to boost your Golden Hour shots we are going to use this shot of the Palace of Westminster in London.
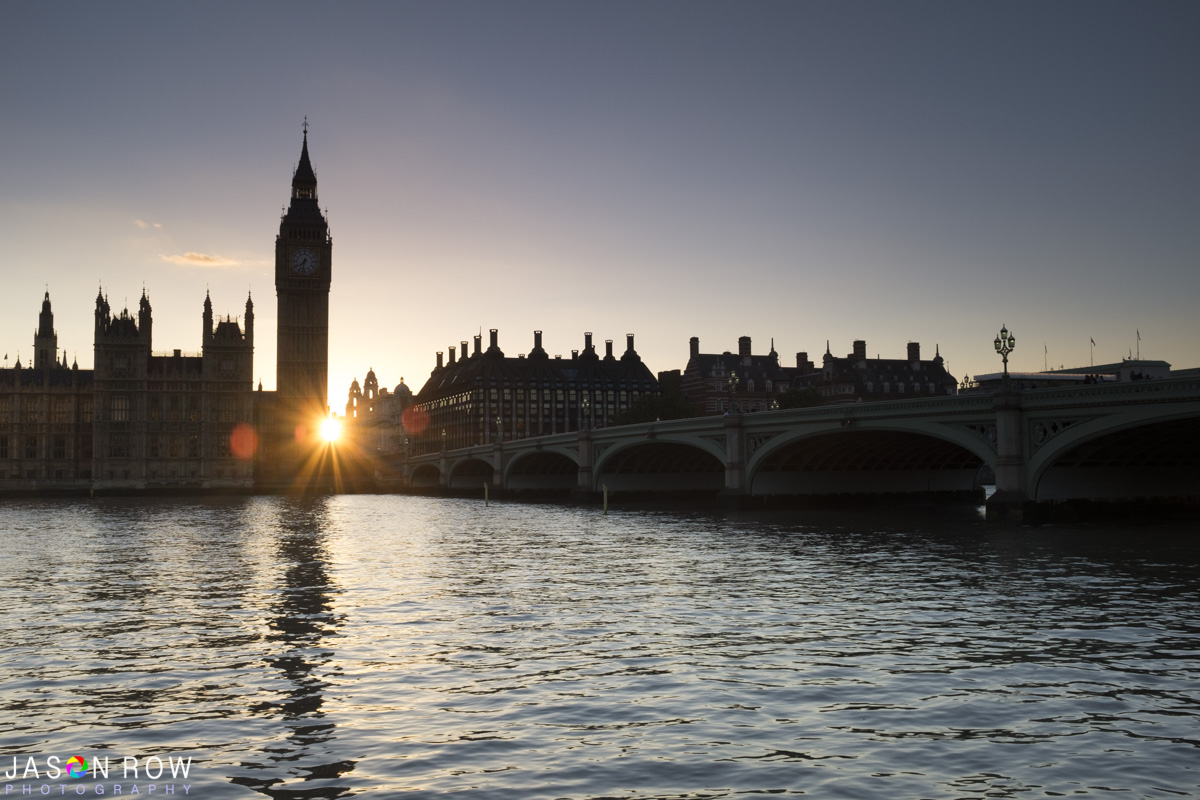
As you can see it’s quite obviously Golden Hour, but it is also very neutral and lacking any color or punch. To get it looking good, we start off by correcting the exposure. As shots at this time of day often have deep shadows, we need to work on getting some definition into them.
From the histogram, we can see we have a very wide range of tones from darkest blacks through to white highlights. By switching on the shadow/highlight indicators on the histogram, we can see just where we have issues.
In this shot the shadows are ok, meaning we can raise them without too much degradation. The highlights are blown out around the sun – although this is to be expected in a single shot.
The first thing we are going to do is reduce the exposure until just before we start to see clipping in the shadow areas. In Lightroom, this is denoted by blue indicators as seen here.
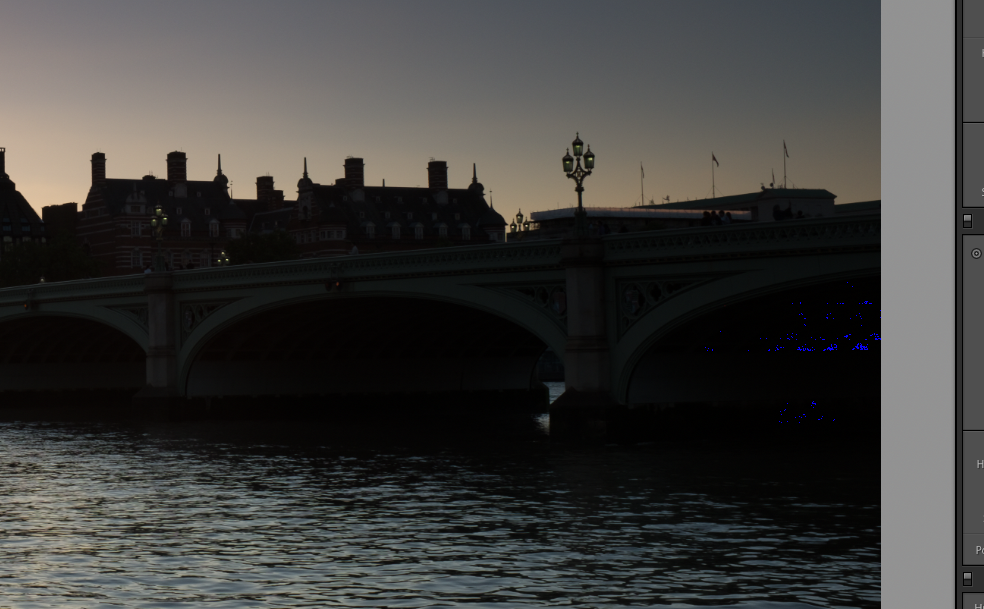
When you see this blue creep into the shot, gently raise the exposure until they disappear. The net effect of this is also to reduce the clipping in the blown highlights.
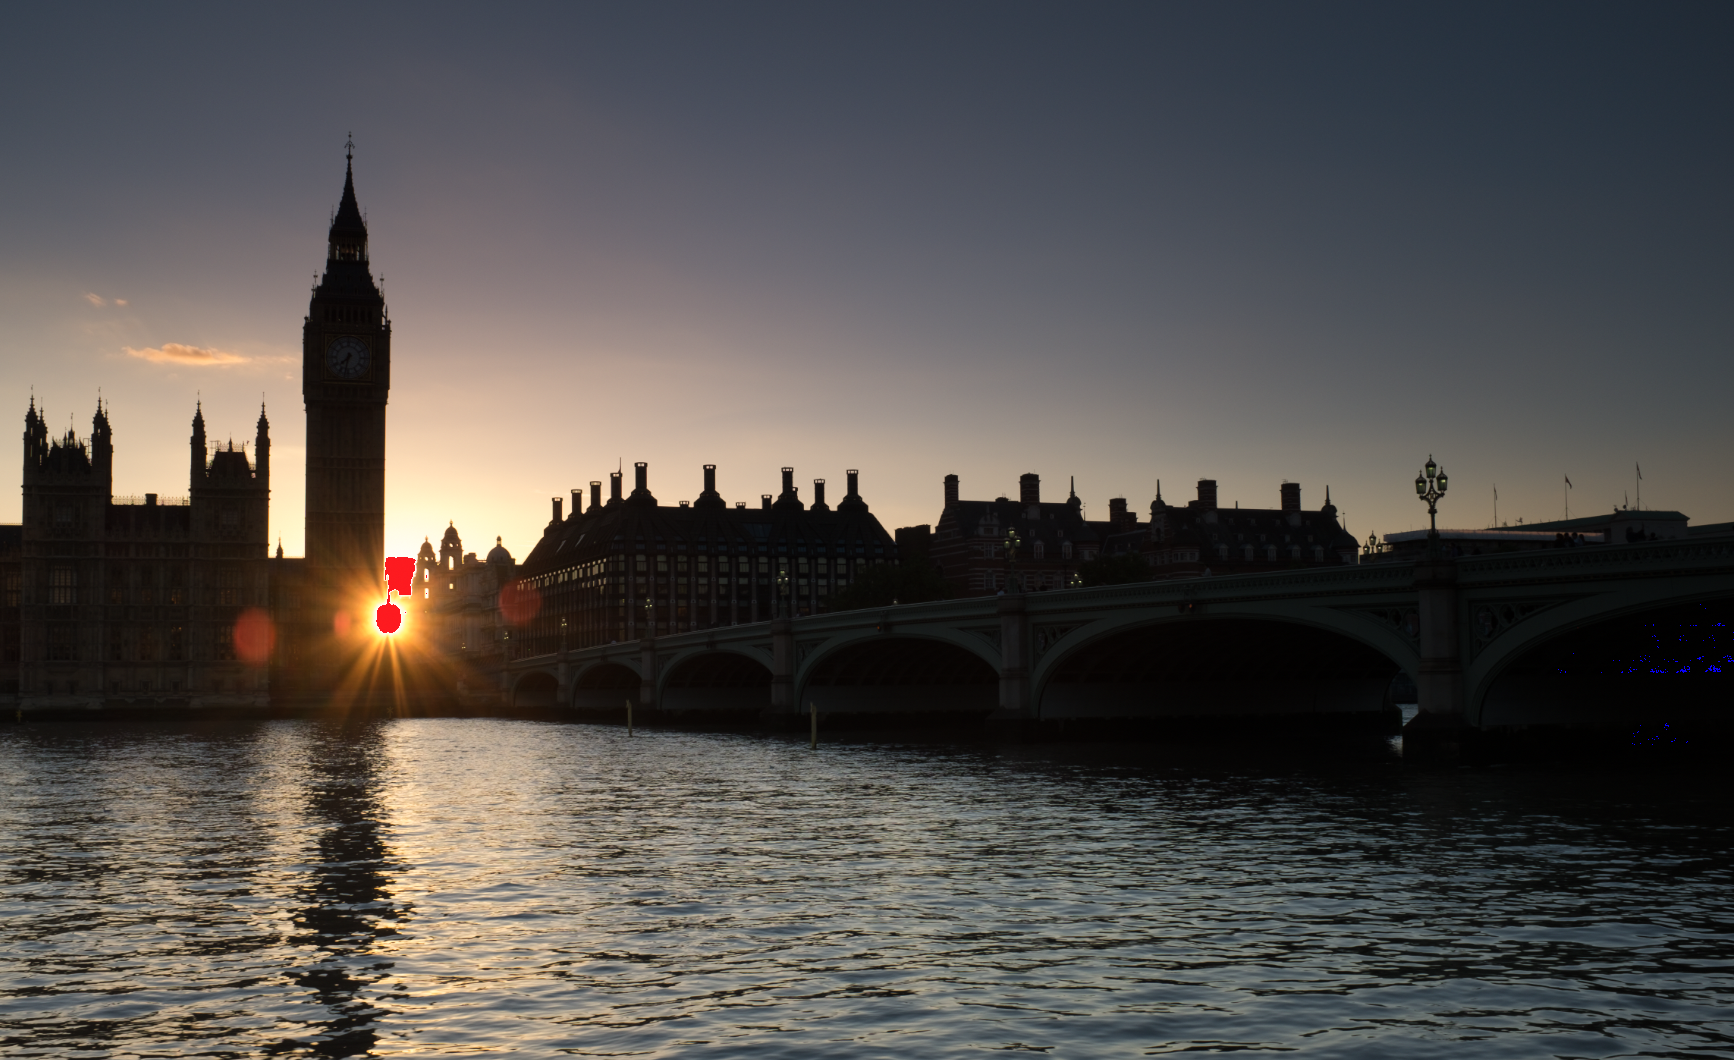
Next, we are going to raise the Blacks and lower the Whites until the light falls inside the histogram and we have no clipping.
Now we can raise the shadows to bring some light into the buildings. As we do so, the contrast gets flatter. We can correct this by re-adjusting the Blacks back to the edge of the histogram. We now gently move Shadows up and Blacks down until we have a nice balance.
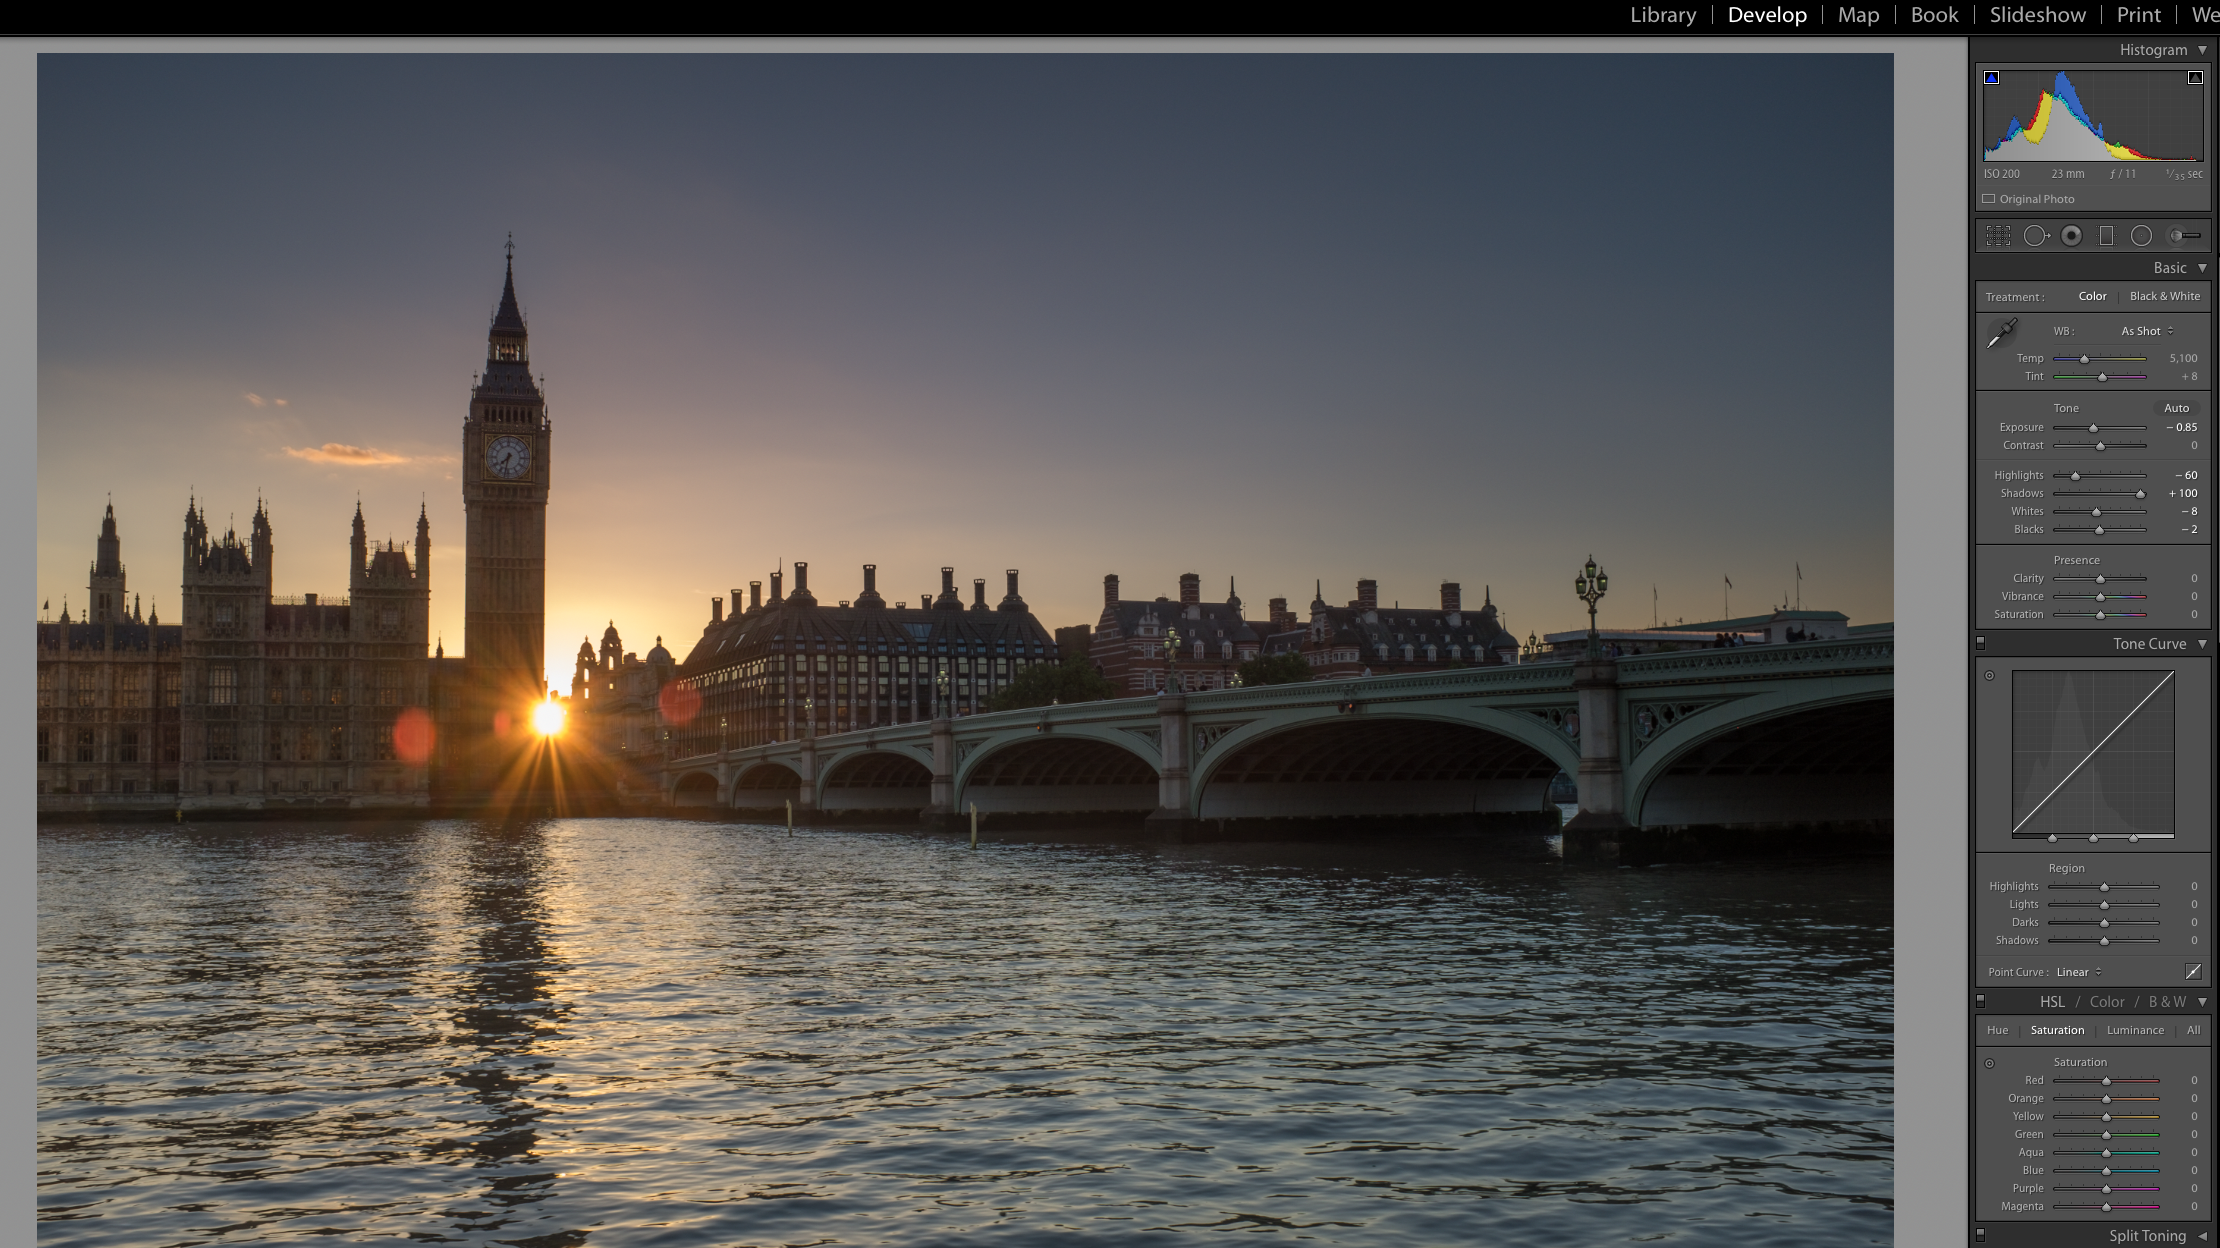
Next, we are going to add a little more definition to the sky. We do this simply by sliding the Highlights tool to the left. Keep an eye on the sky to avoid any banding issues. Once we are happy with the exposure it’s time to work on color.
Getting Golden
The first thing we will do is change the White Balance to something more “golden” like. As shot, this image had a White Balance of 5100k. That means the camera assumed the light was more like noon daylight than dusk or dawn.
So to bring the warmer tones into the image, we slide the White Balance up to around 6800k. This gives us a lovely warm evening feel to the shot. We could also change the tint a little using the Tint slider but in this case, it looks fine.
Fixing The Colours
Next, we are going to increase the saturation but only in the reds/yellows. To do this we go to the “HSL/Color/B & W” panel by scrolling down our tools. Make sure HSL is selected and from within that, Saturation.
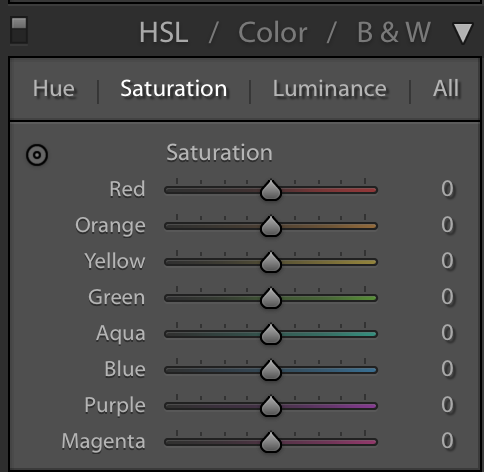
Now gently slide to the right the Red, Orange, and Yellow tools, again watching the sky for banding or over saturation.
You can also use the “Hue” section to correct the colours to your desired look. Use the “Luminance” section to adjust the lightness if a particular colour.
Recovering The Details
You can recover some lost details in the sky by adjusting the highlights slider. Try decreasing the highlights to get more sky and cloud details.Drag the shadows slider to the right to recover lost details in the shadow areas. For more contrast, you can use the tone curve to bring in the desired contrast in various tonal areas.
Boosting The Sky
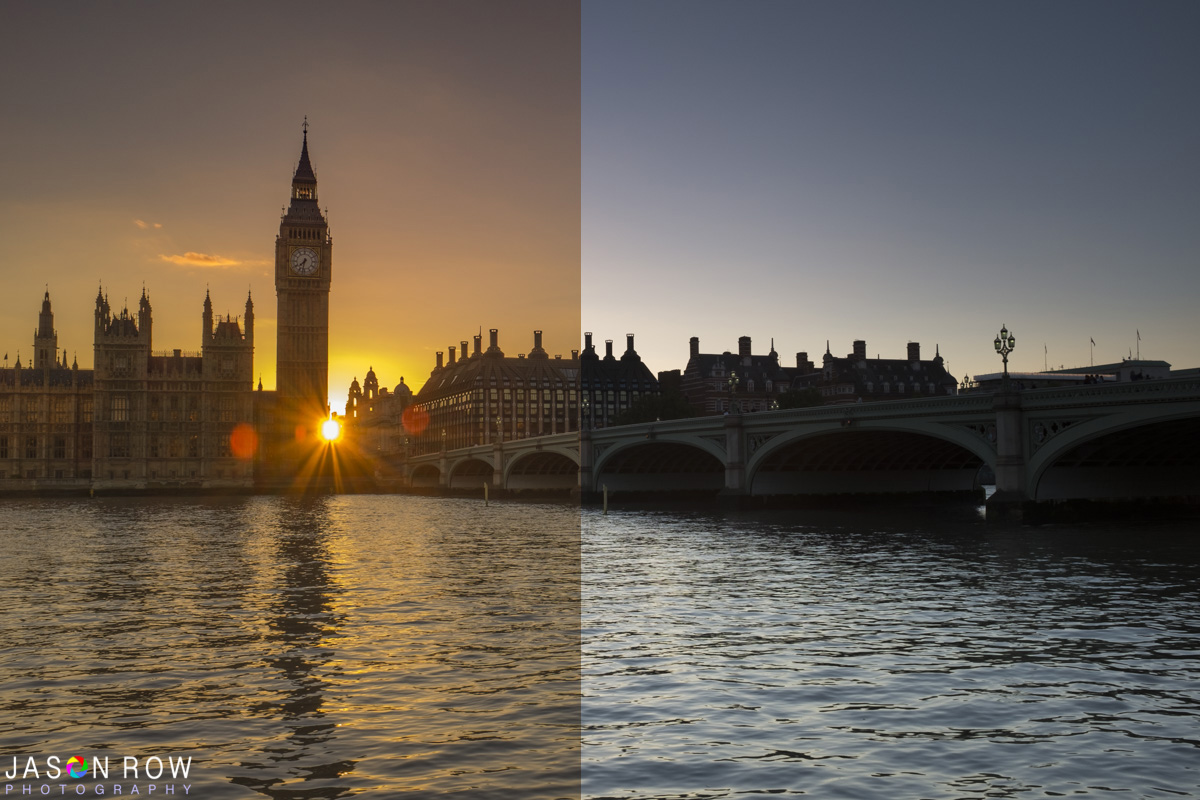
Lastly, we are going to boost the sky a little further. To do this we use the Graduated Filter tool.

We draw the filter down to cover the sky area. We now see that we can further boost the White Balance in just the area covered by the filter. We can also play with Clarity, Dehaze, and Saturation to get the right effect in the sky.
Split Toning (Optional)
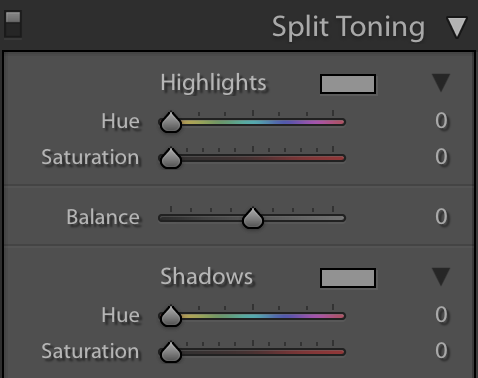
Split toning is often an underutilized tool in Lightroom but it helps greatly with adding colours to highlighted areas thereby helping to balance out the dynamic range and tones in the scene. Play around with the desired colours for highlights and shadows and you will be surprised to see what you can achieve with this panel.
Software like Lightroom combined with RAW image files can completely transform a Golden Hour image from the mundane to the beautiful. Using some of the tips in this tutorial you may well be able to breathe new life into some of your dawn/dusk shots.
Further Resources:
- 5 Tips for Capturing The Magic of Golden Hour Photography
- What Are The Golden And Blue Hours and How Do They Help Photographers?
- How to Capture Stunning Backlit Portraits During the Golden Hours
- 7 photography tips to make the most out of the golden hour
- Photography Tips | Shoot To Post: Natural Light Golden Hour Photography



2 Comments
Thank you! You did a great job explaining how to make golden hour shots better, but it also helped me understand some of the aspects of light room which is very helpful to me as I begin to use it more.
GREAT tutorial Jason. Appreciate any kind of LR-related workflow stuff you might publish.