It is something many a landscape photographer will be aware of, but many others may not. Diffraction is an obscure effect but one we should all be know about. You might have noticed it without really understanding what it is, a slight but perceptible softening of the image quality when using small apertures. You might put it down to poor focus, a bad lens or even camera shake, but very often it is caused by diffraction. Today we are going to take a look at what diffraction is and some potential ways to reduce or avoid it.
What is Diffraction?
Simplistically, we might assume the light going through our lens travels in a direct, straight line until it hits our sensor. In reality, most of us know that the purpose of a lens is to focus the light on the sensor, and in doing that it changes the direction of it and hence it will hit the sensor at a slight angle. Inside the lens of course we have the aperture, the iris that controls exactly how much light reaches that sensor. When the aperture is open fairly wide, it has little effect on the direction of the light, however as we close down the aperture, in increasingly changes the angle at which the light strikes the sensor and here is the root of the problem.
When the light passes through the aperture it is formed into a cone of light. At wide apertures, that cone is fairly narrow and the light hits the sensor more or less straight on. As we reduce aperture, the more that cone of light spreads out. Think of using a garden hose pipe. If you allow the water to just flow with no obstruction “aperture”, it comes more or less straight out of the pipe. Put your thumb over the pipe however, creating a smaller aperture and the water will spray out in a large cone shape.
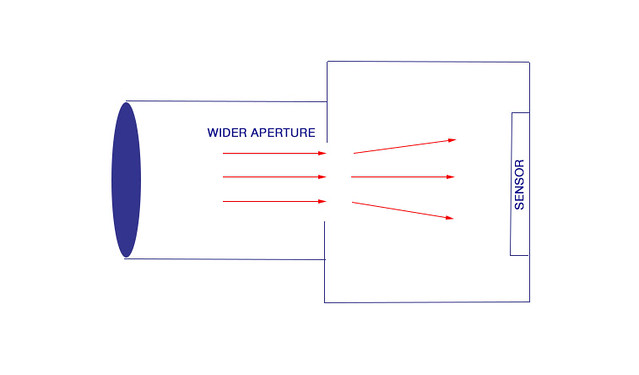
At wider apertures the light is bent less on its route to the sensor
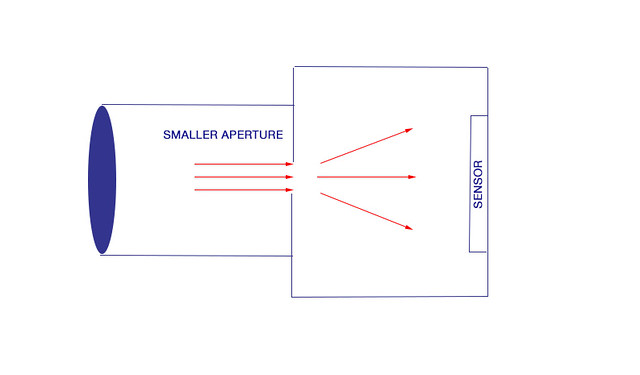
As the aperture closes, so the light is bent more, causing diffraction
Now when our cone of light hits our sensor, if it is smaller than than our individual pixels, diffraction plays no role. However if that cone becomes bigger than the individual pixel, it will strike two or more pixels causing a blurring effect and a reduction in apparent sharpness in the image. Now this is obviously a very simplistic explanation but having a basic understanding of it will help you to overcome it. As you might gather from this explanation, the smaller the pixel size of your sensor and the smaller the sensor, the lower the diffraction limit of the aperture. As a basic rule of thumb on APS-C sensors cameras such as the Canon 7D or Nikon 5200 the diffraction limit will be about f8. On smaller sensor camera it may kick in as low as f5.6 and on full frame sensors the limit is around f11. There are of course numerous apps and websites where you can calculate the diffraction limit of your camera.
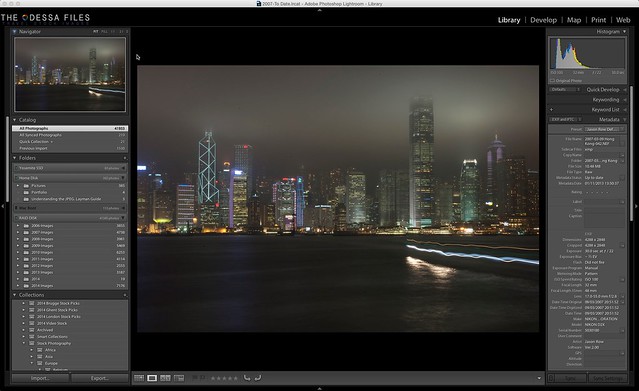
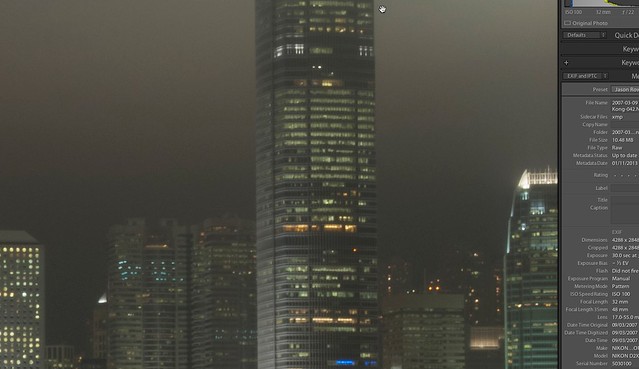
Shot at f22 on a tripod, this image looks fine on screen. by Jason Row Photography, on Flickr
Overcoming Diffraction
Ok perhaps this is the wrong wording, you cannot overcome diffraction, it is an effect of physics. However by being aware of it, we can limit it or work around it.
The first option is to ignore it. If you are only going one or two stops above your camera’s limit, the loss of quality may be so minimal in everyday use that it is not worth worrying about. Everyday shooting factors such as camera shake are more likely to be a problem than diffraction itself.
<Different sensor sizes have different diffraction limits, by Ed Kwon, on Flickr
If your image quality is more critical, there are two main options to deal with it. The first and most obvious one is to shot on or under the diffraction limit. This will eliminate the problem but may restrict the depth of field that you are trying to achieve. If you need that depth of field, say for a landscape or macro shot, then there is a workaround, focus stacking. Focus stacking works by taking a series of identically composed and exposed shots of the subject but changing the focus position for each shot. For example you might be shooting a beautiful landscape. With you camera set on or below the diffraction limit, you take the first shot so that the entire foreground is in focus. The second shot will take in the closer mid distance areas, the third the far mid distance and the last shot will be at infinity. In Photoshop you can then stack all of those images to create a massive depth of field without diffraction. A detailed explanation can be found here: https://www.lightstalking.com/photography-tutorial-focus-stacking/
As the title says, you should not be distracted by diffraction, but by being aware of it, you can reduce or workaround it. For anyone working at smaller apertures a basic understanding of diffraction will lead to increased sharpness in your images.


1 Comment
Heard the term before bit never thought much about it. I now know why my landscapes didn’t have the sharpness I wanted…many thanks for this clear, concise explanation.