Today we are going to look at how to get an ethereal look in Lightroom. I'm going to take one of my photos and walk you through the process step by step.
Ethereal: delicate, light, out of this world. It’s a look that has become very popular in photography in recent years, especially when combined with the right subject. Perhaps the most common subjects for the “ethereal” look are backlight people in fields of hay or pretty flowers on a contrasting background.
Ethereal shots are often helped by having a nice shallow depth of field and attractive bokeh. But how do we go from the standard, out of the camera shot to an ethereal-looking image?
If you have a recent edition of Lightroom, it’s pretty easy and here's how
The Photo We Are Using.
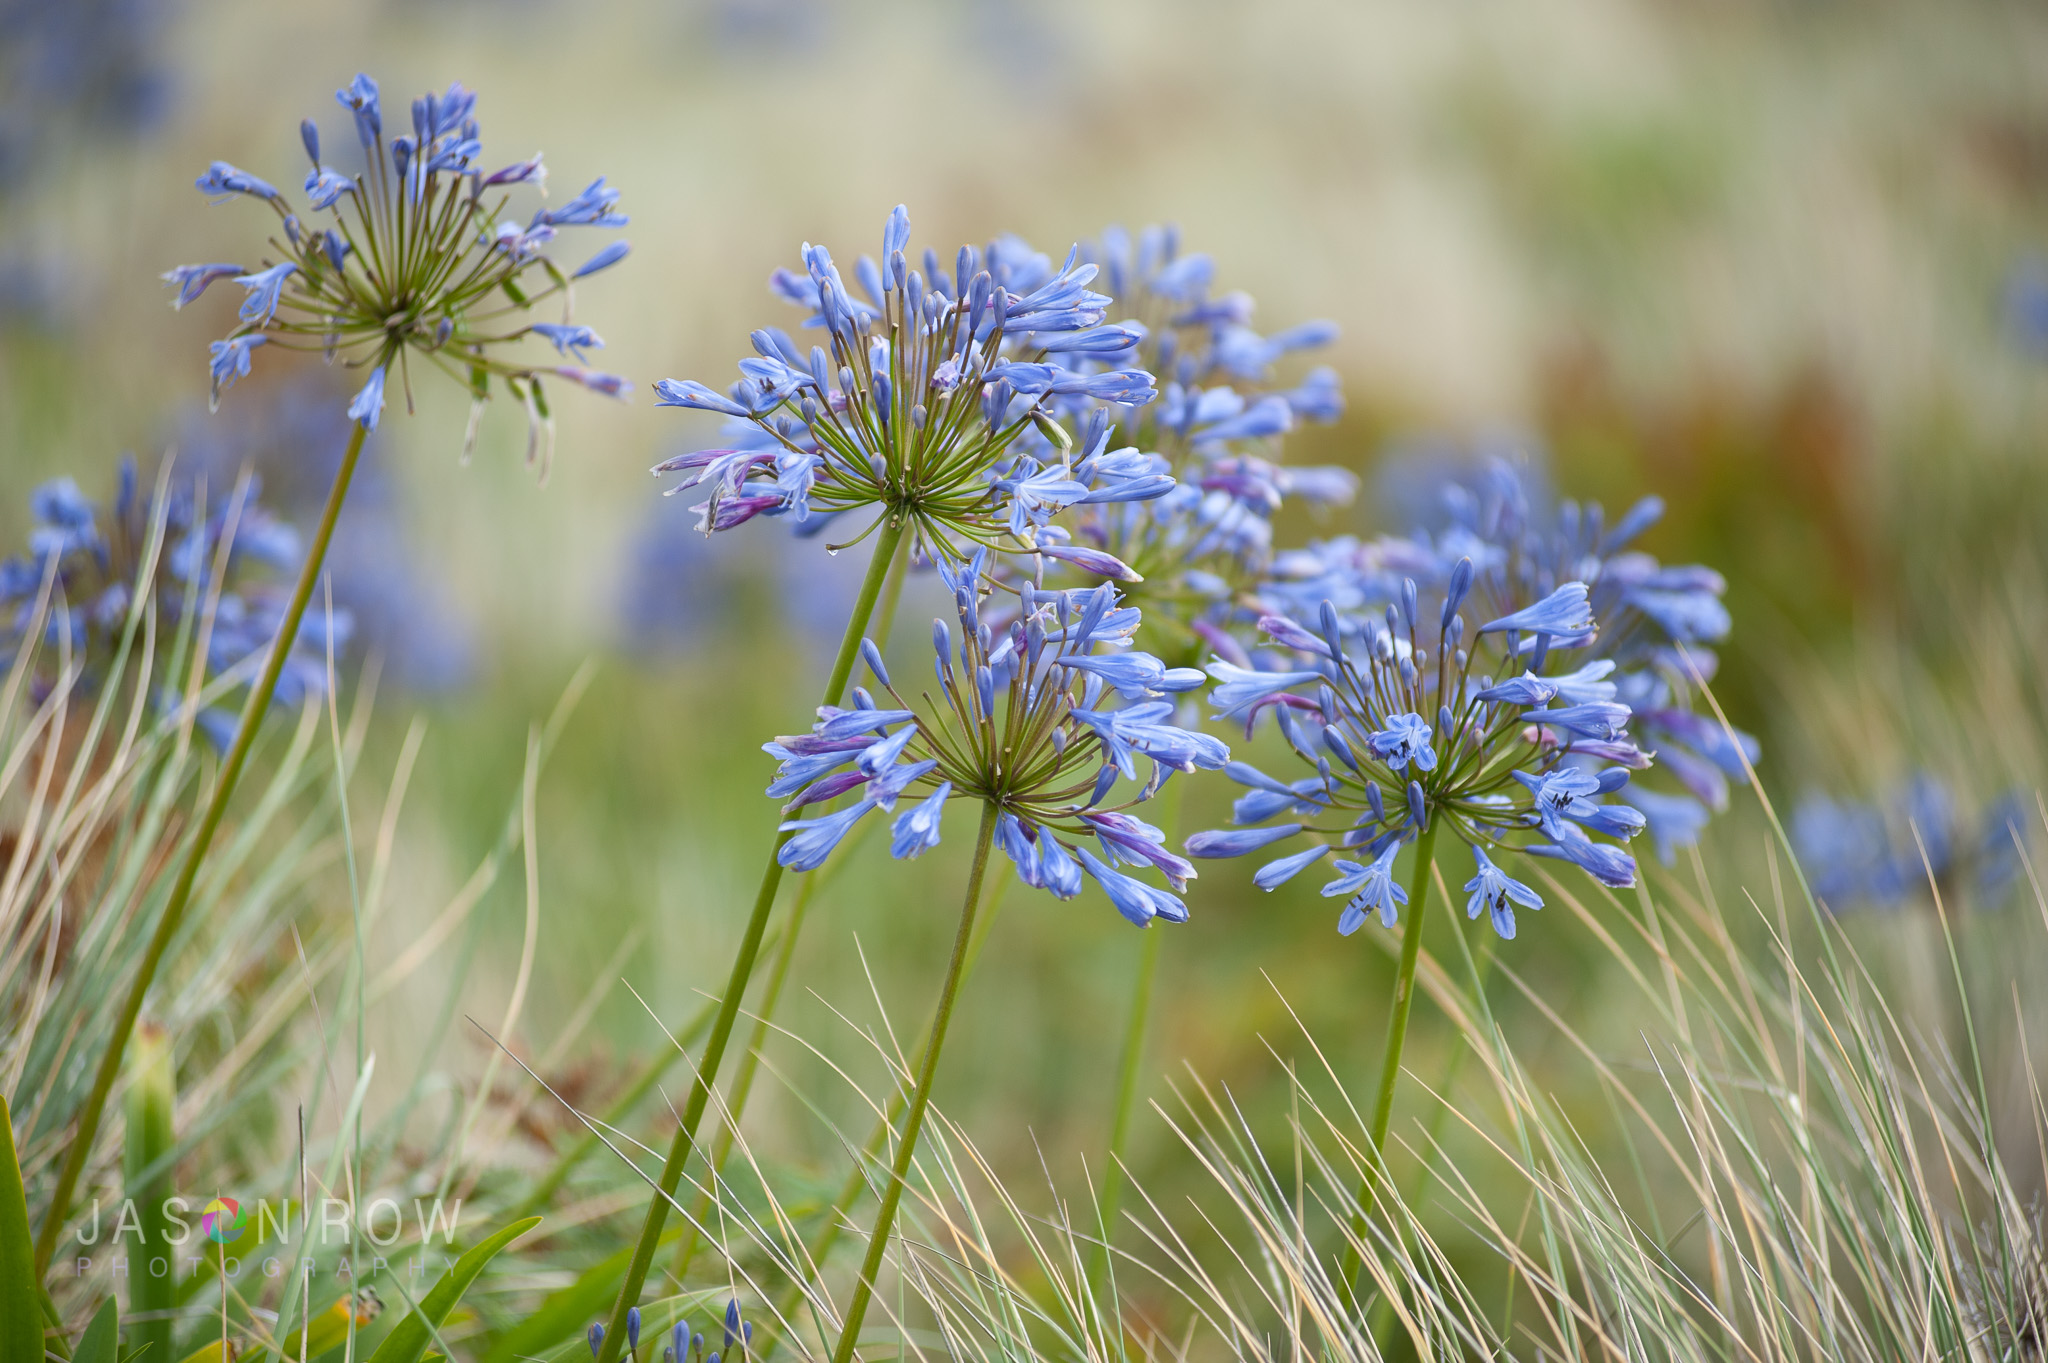
As you can see, its a pretty shot of some blue flowers against a defocused grass background. To the left is a single dying flower, so we will incorporate that into an ethereal looking background whilst boosting the look of the flowers in the front.
To separate the flowers from the background we will use Lightroom’s brush tool and incorporate the Auto Mask tool. We wrote an article about Auto Mask not long ago, you can find it here.
Masking The Flowers
The first thing we need to do is to get the flowers into the Develop Module. This is done by selecting Develop from the tabs at the top right of the screen.
Below the histogram, we see the crop and selection tools. The tool we need is the Adjustment Brush tool on the far right. Select this but for the moment make sure Auto Mask at the bottom is not selected.
We have set a nice big brush size, with a 50% feather and 75% flow. At the bottom left of the image, we have selected the Show Selected Mask Overlay. This will show the areas that we have masked in red, making it easier for us to select.
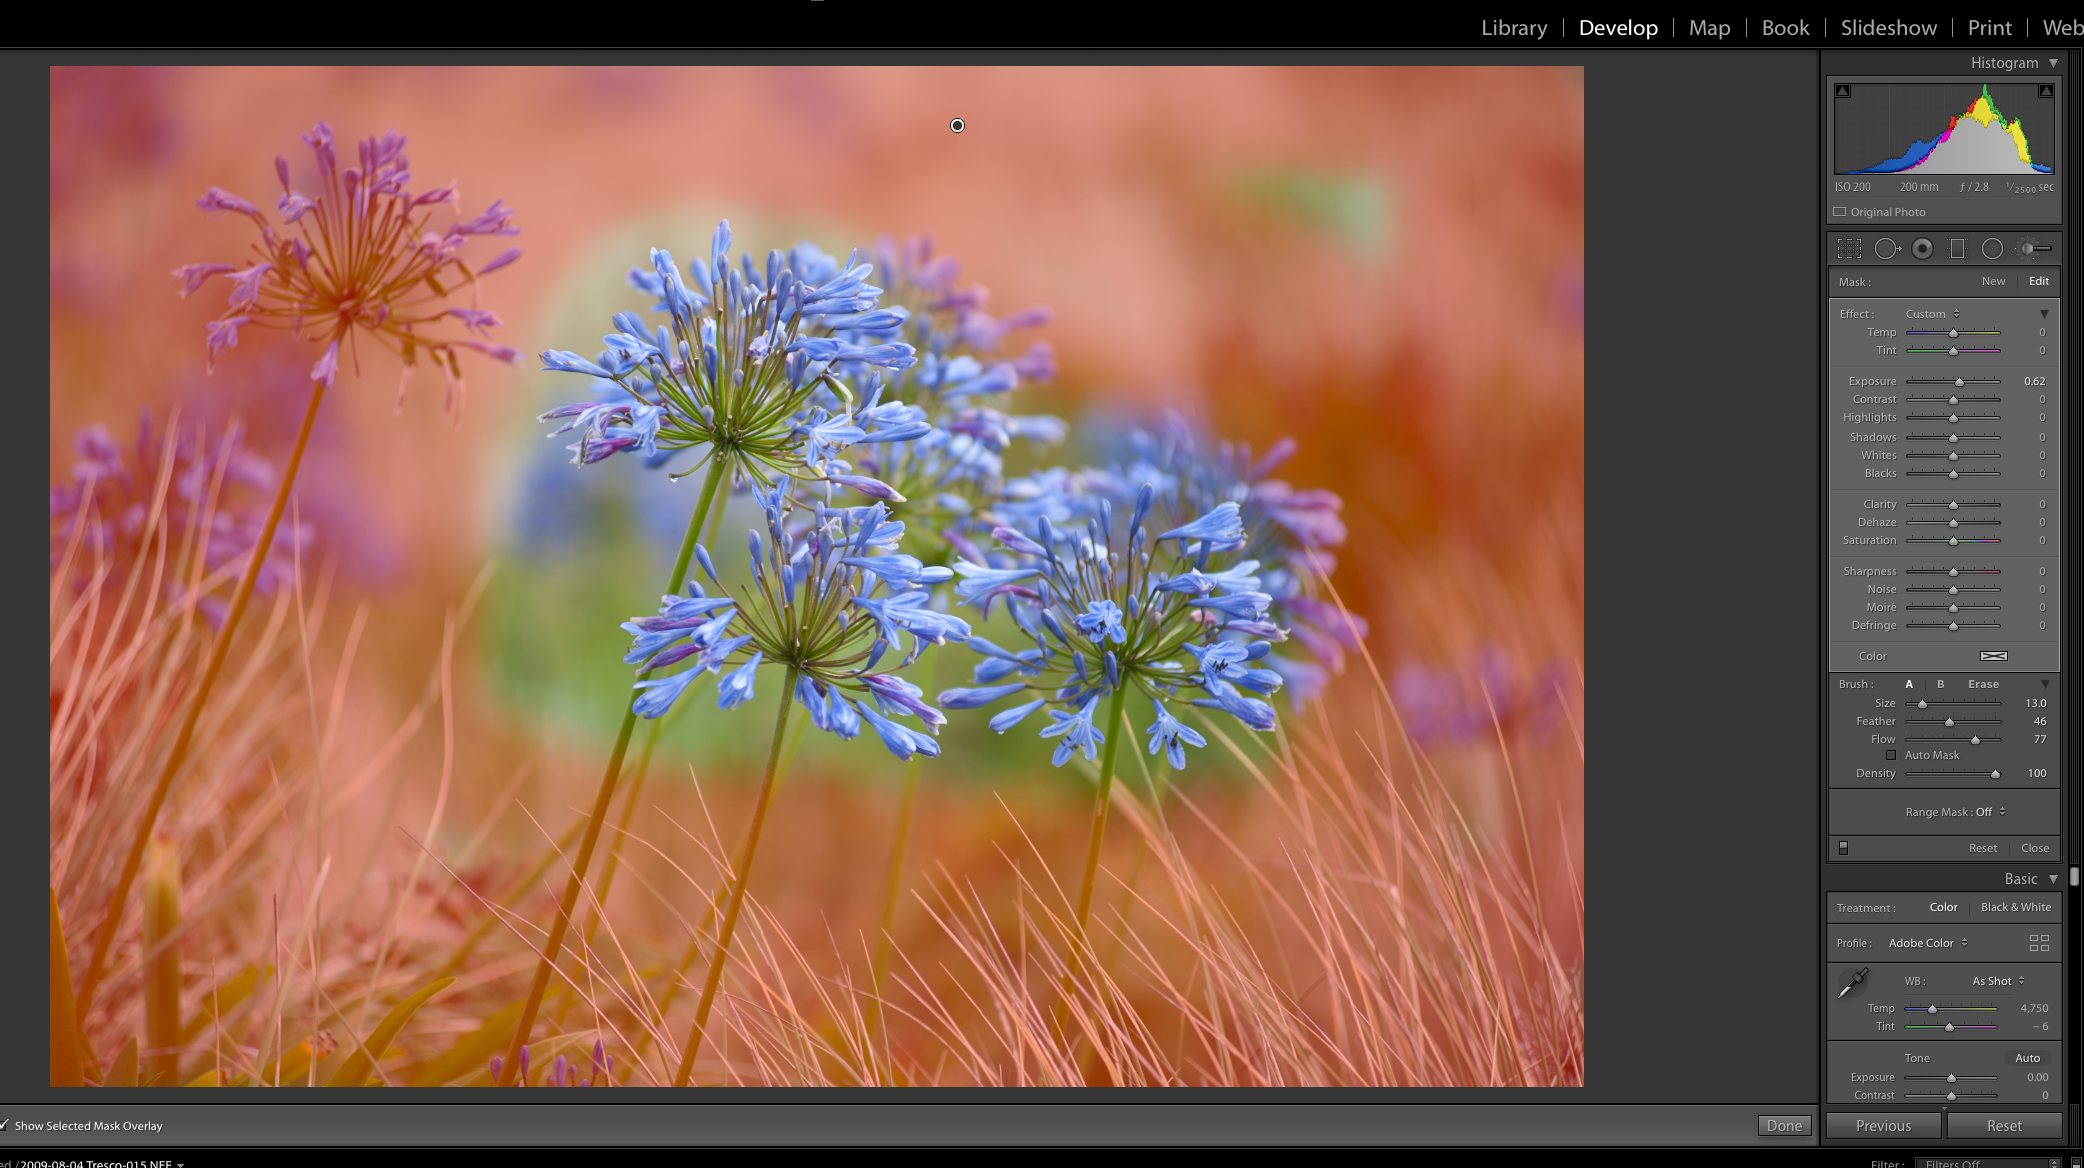
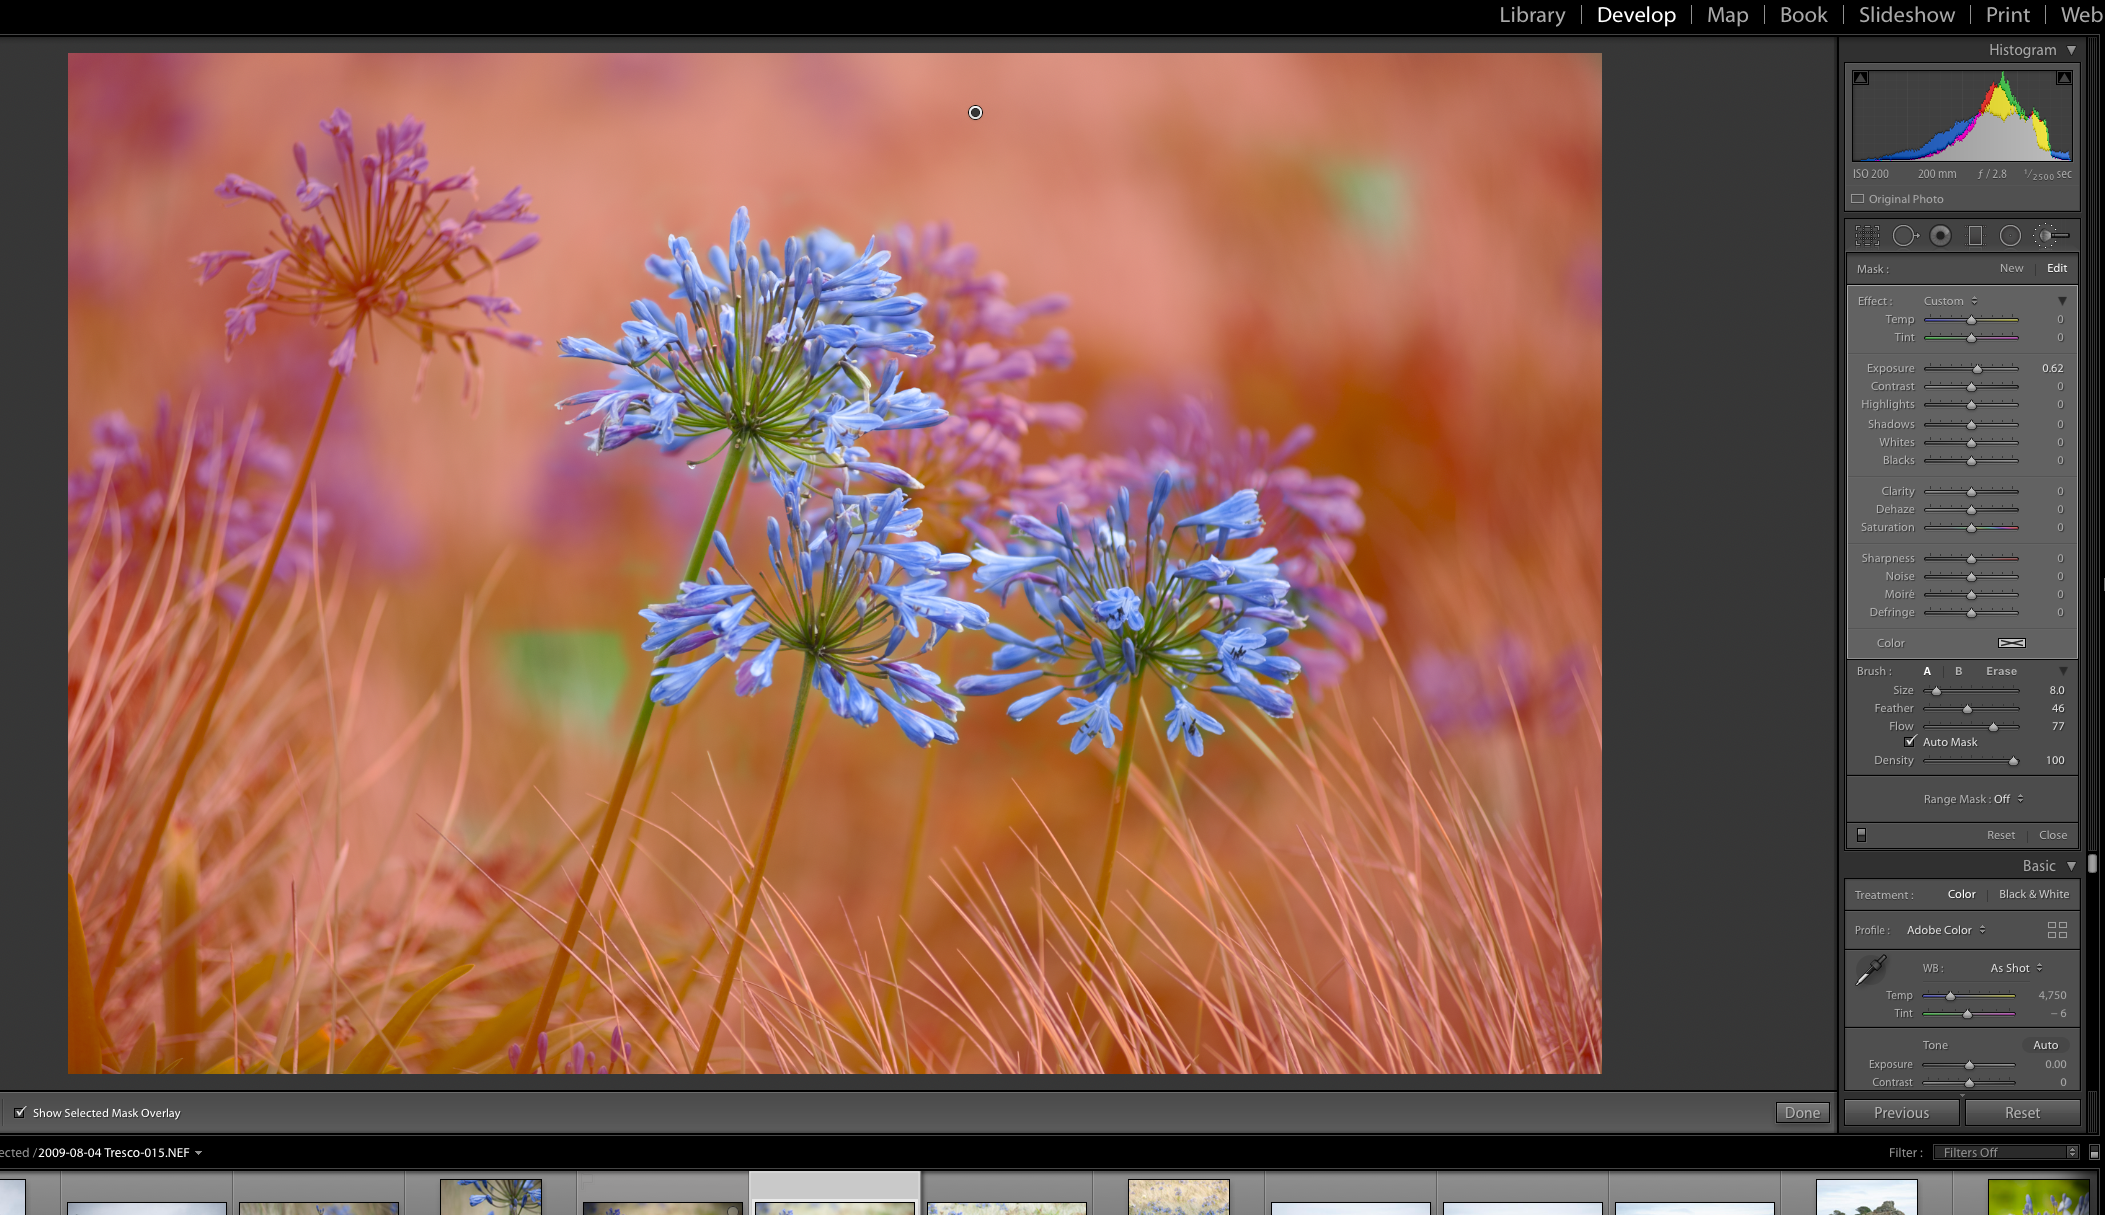
First, using the large brush we have painted a mask around the flowers covering all of the rest of the image. Next, we reduce the size of the brush and switch on Auto Mask in order to paint around and inside the petals of the flowers. We have zoomed in to make this easier.
Going Ethereal.
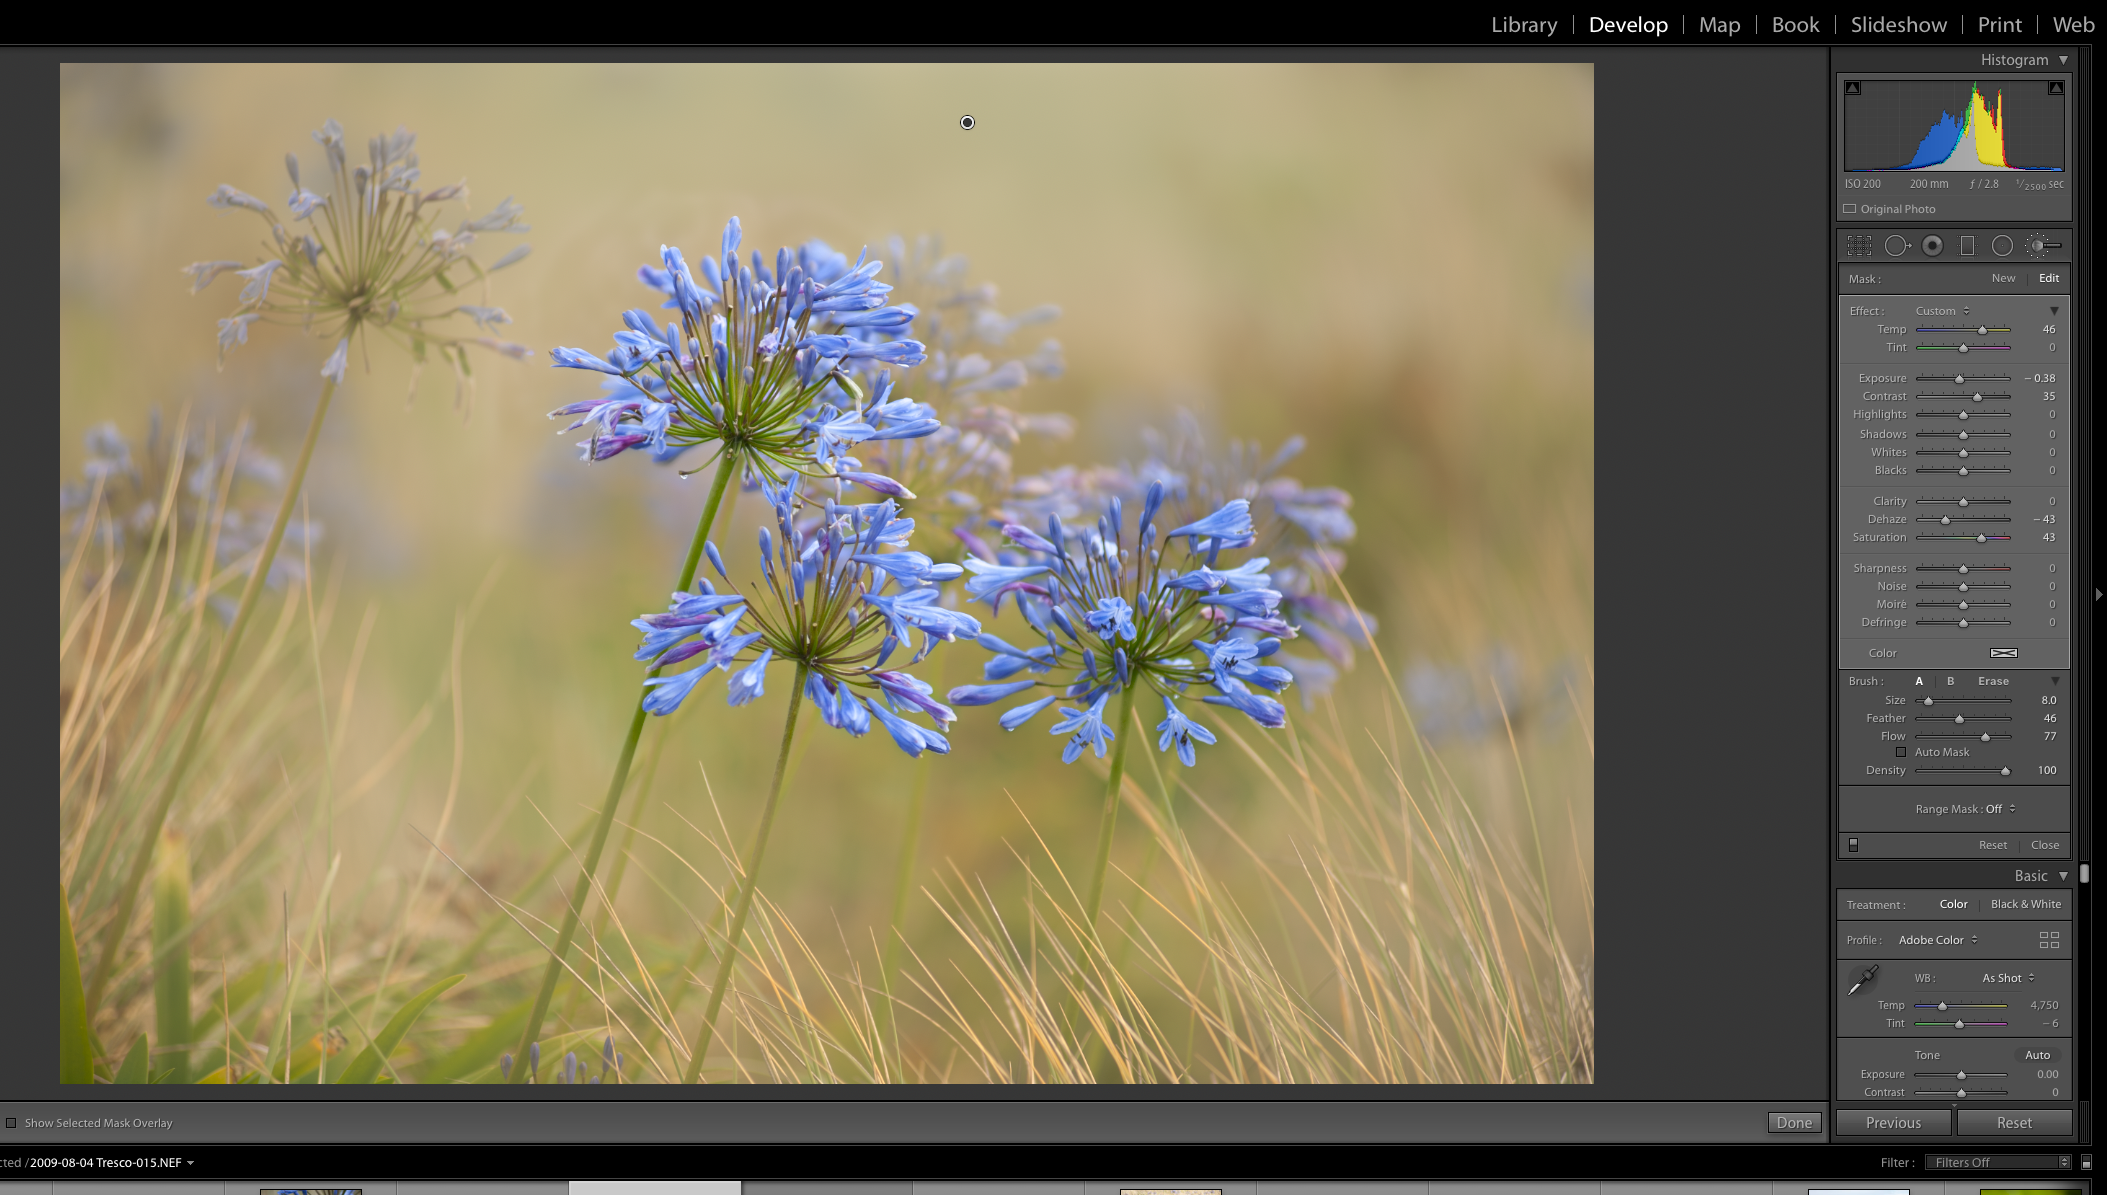
For this image, we want the blue flowers to stand out against an ethereal background. At the moment the grass in the background is relatively green so we will change this to a more yellow look. With the Adjustment Brush mask selected, we raise the colour temperature to +40-50. This instantly adds yellow to the masked areas and makes the flowers stand out better.
Ironically, to get a dreamy look, we use a tool designed to make images sharper, the Dehaze tool. By sliding it to a minus figure, we remove sharpness and introduce a nice looking soft blurriness to the masked area.
The problem is, that Dehaze has also increased our exposure making the image look too bright. It also now lacks contrast. To counter this we have simply reduced the Exposure slider to -30 and added contrast to +35. Lastly, for the mask, the grass lacks any saturation, so we will boost that by sliding saturation to +40.
Punching The Flowers.
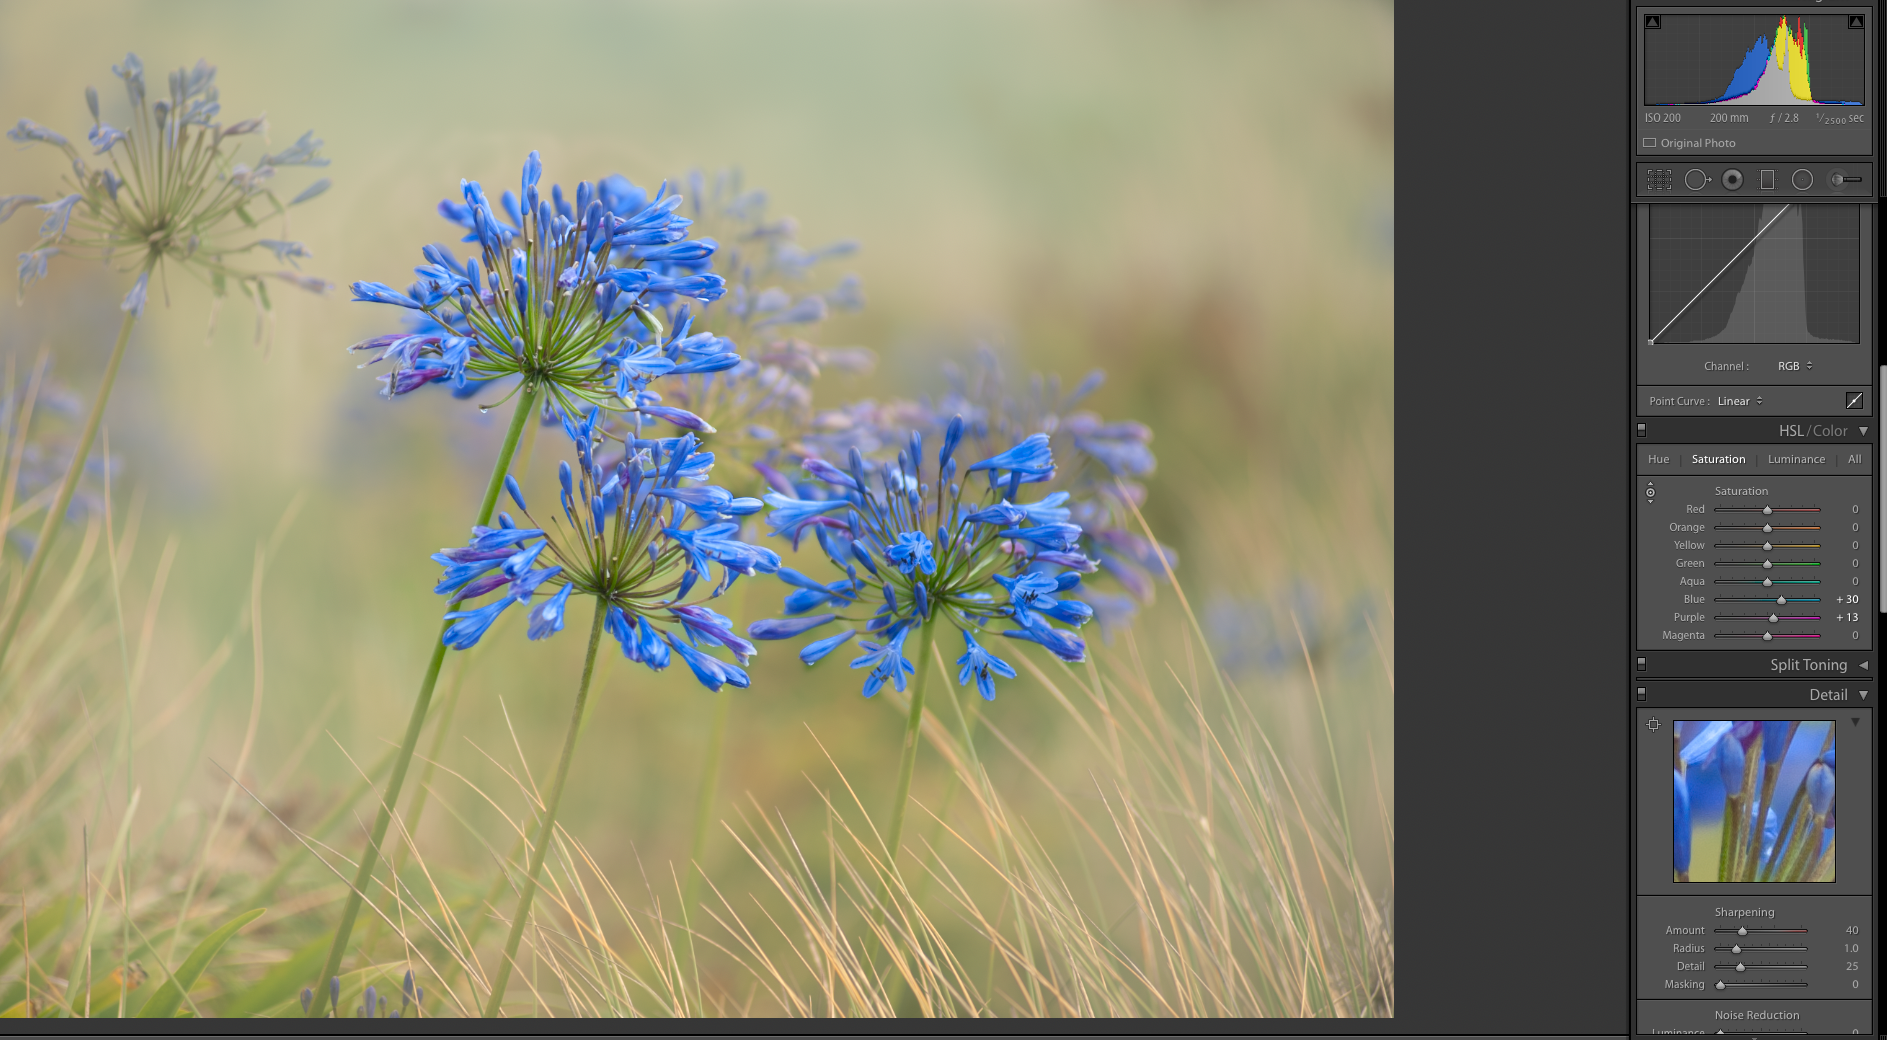
Whilst we now have a nice ethereal looking grass, the flowers are lacking in punch. To make them more striking we need to return to editing the full image. To do this click on Done at the bottom right of the image. We now scroll down the Develop Module tools until we get the HSL or Hue/Saturation/Luminance.
Selecting saturation first we click on the tiny circle icon just below Hue. Now we move the mouse over an average blue area of the flowers, click and drag up. Lightroom has isolated the blue and increased the saturation for it. We can also change the luminance of the flowers a touch using the same technique.
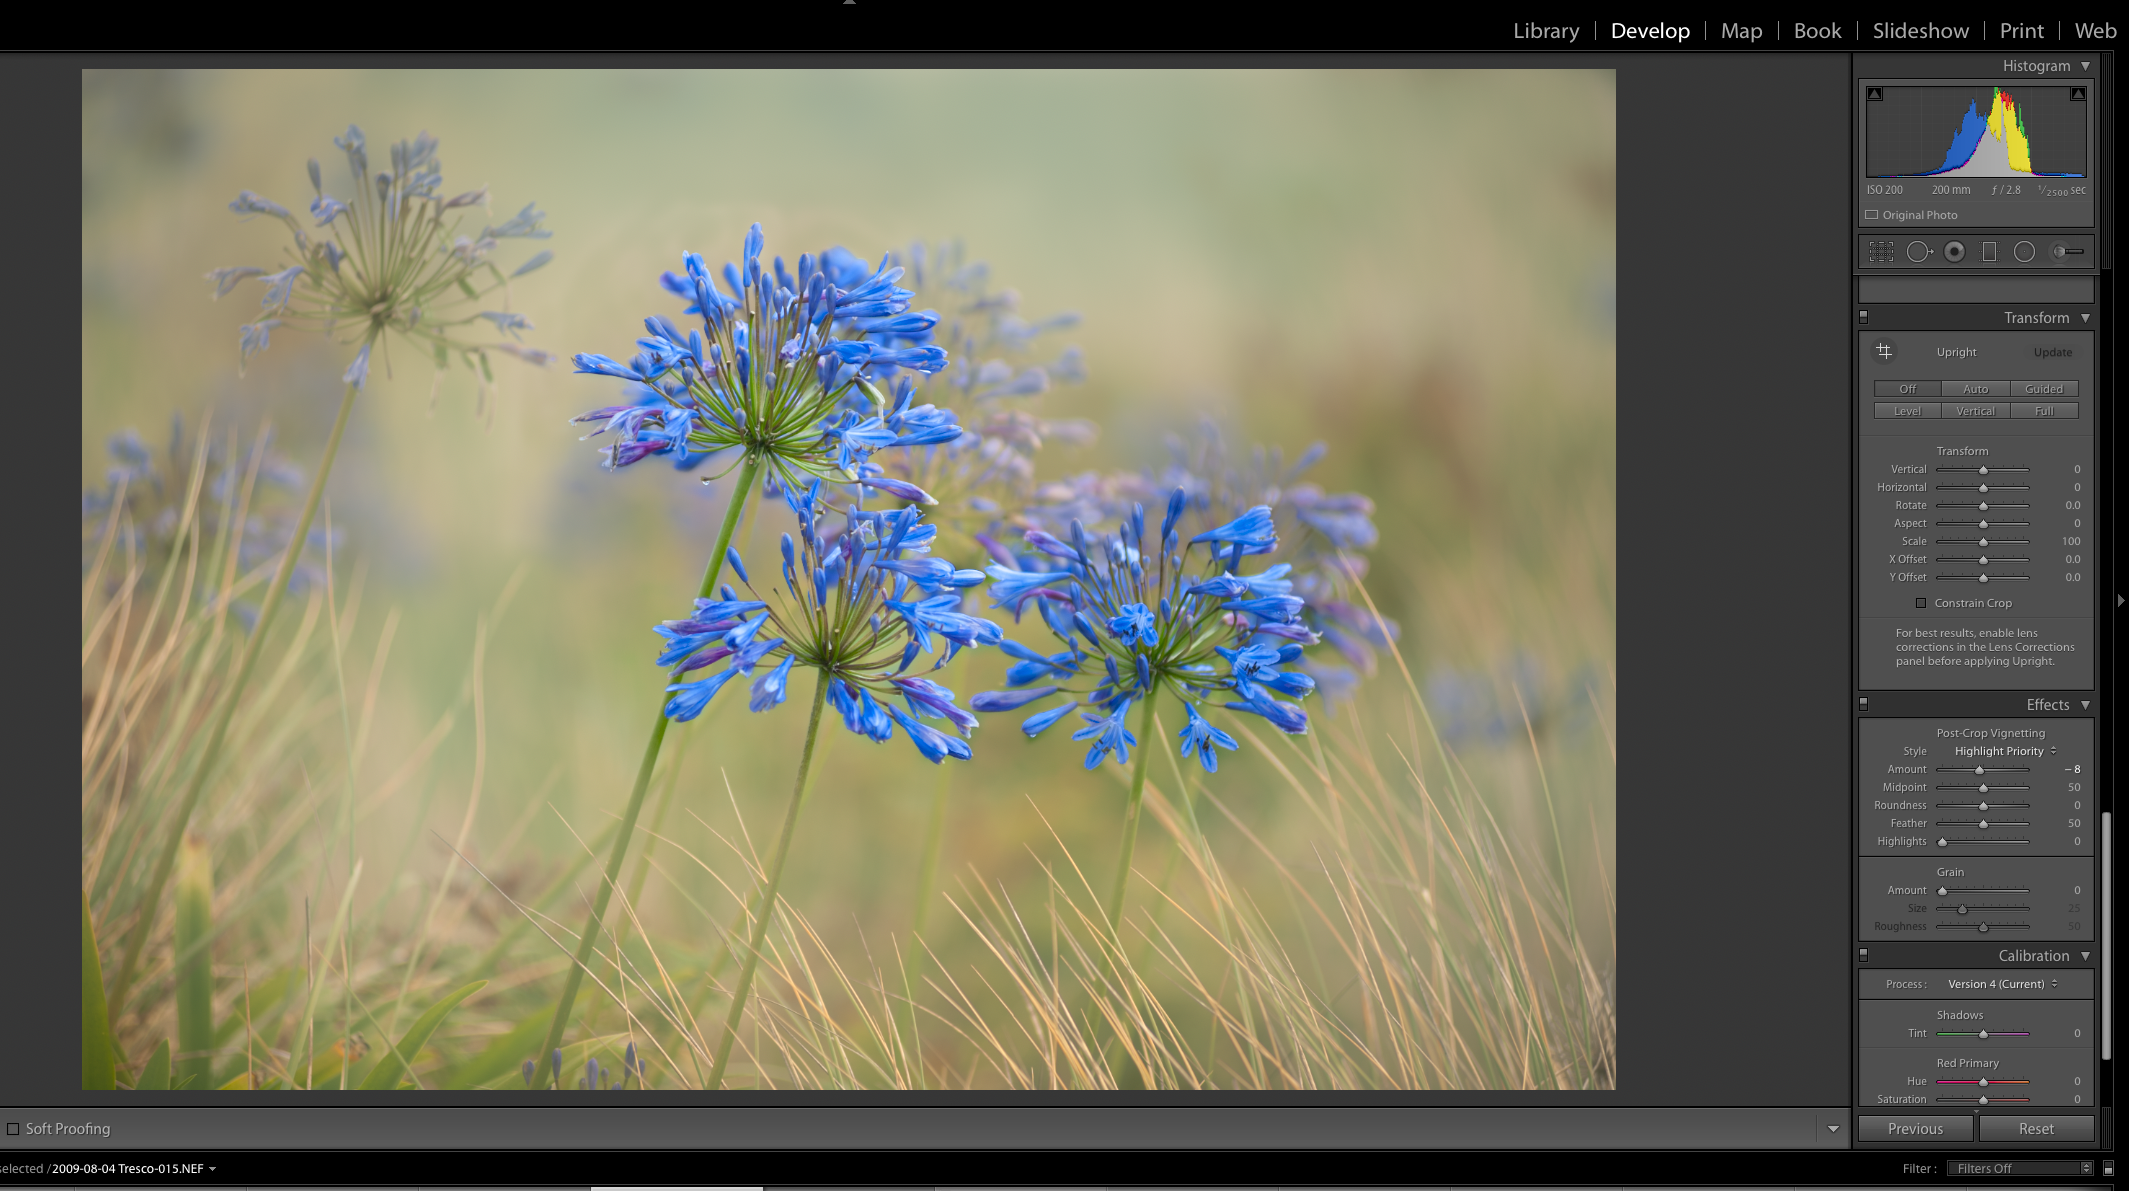
The final touch is to add a very slight vignette to draw the eye into the image. To do this scroll down the Develop Module tools to Effects. We have applied a Post-Crop Vignette of -8 to give us minimal darkening of the corners.
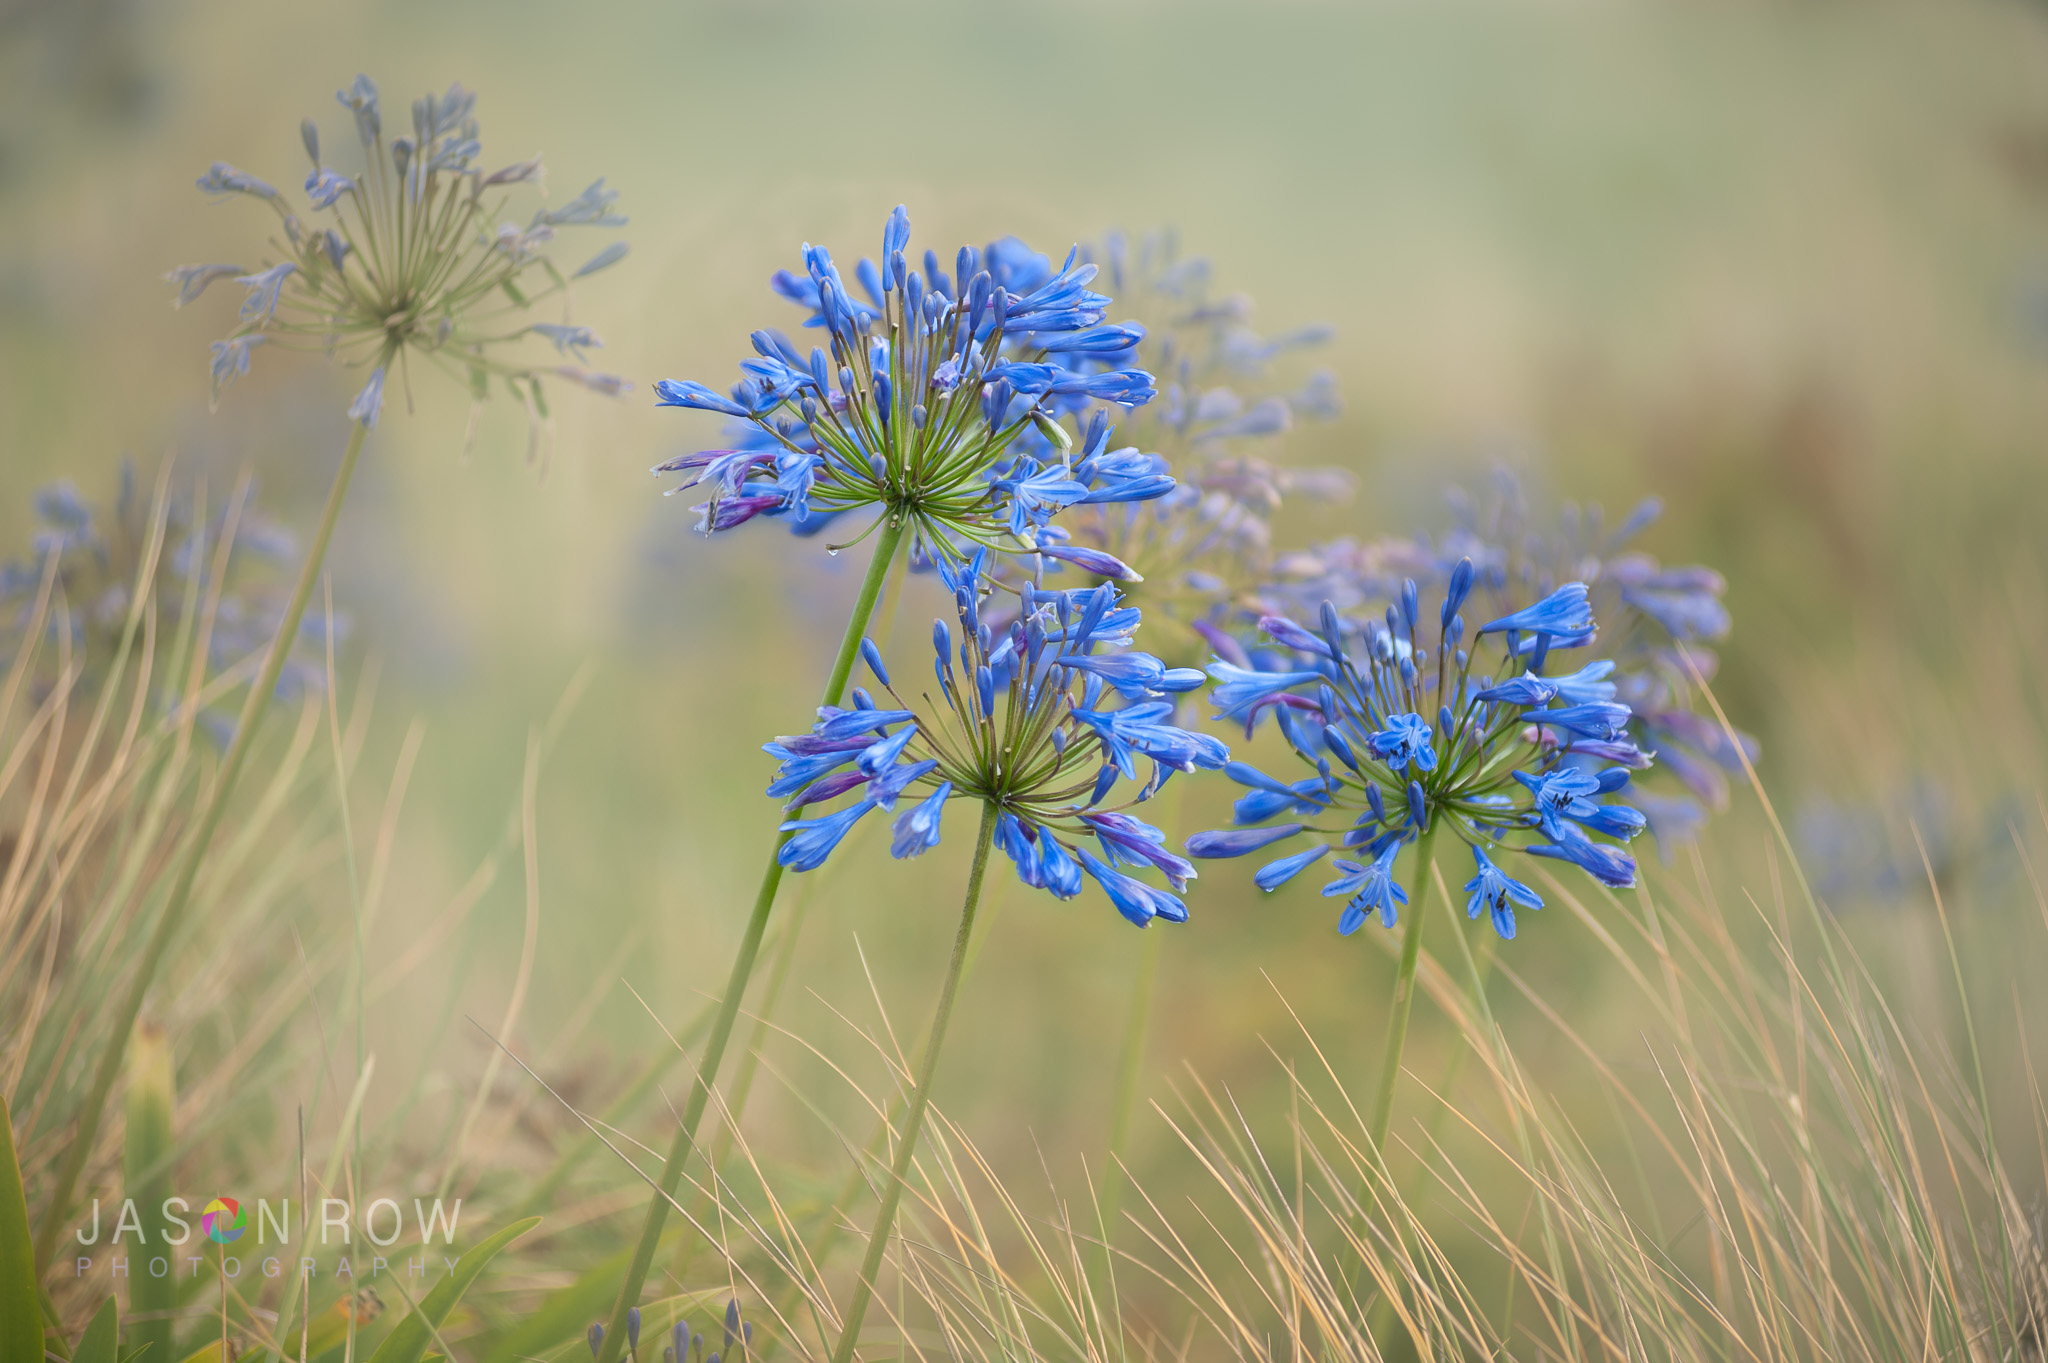
The Ethereal look is pretty easy to achieve in Lightroom. You can choose to mask like we did for this tutorial or apply to the whole image. Using combinations of minus dehaze, exposure, contrast and color temperature you can make any suitable image look other-worldly.
I hope you enjoyed learning how to get an ethereal look in Lightroom. If there is a quick editing process you'd like to see outlined in future posts, or if you have a comment or question about this process, please tell us in the comment section below.


3 Comments
I have learned a lot this morning from your tutorials, and in particular this one. Looking for an image to work on. Thanks! kkp
Enjoyed this tutorial. Very helpful. I would really like info on using the ‘Transform’ in Lightroom.
I have added Transform to my list of upcoming articles.