One reason that long exposure photography is so compelling is because it offers an altered view of the world we normally see. Slow shutter speeds allow us to perceive motion in a more conceptual manner that the freeze frame effect of fast shutter speeds.
Clouds blur as they sail across the sky, people and lights leave trails to suggest they were in a hurry as they moved into and out of a scene, water takes on a surreal sheen.

This is relatively easy to accomplish in low light conditions — exposure times are necessarily long in the dark. It is possible, however, to do long exposure photography in the daytime.
In practice, daylight long exposure photography isn’t any different from what you’d do at night, but it does require one additional accessory that you may not have in your camera bag.
Below I will cover what that accessory is, as well as provide a few basic tips for long exposure photography in general.
Get A Neutral Density Filter
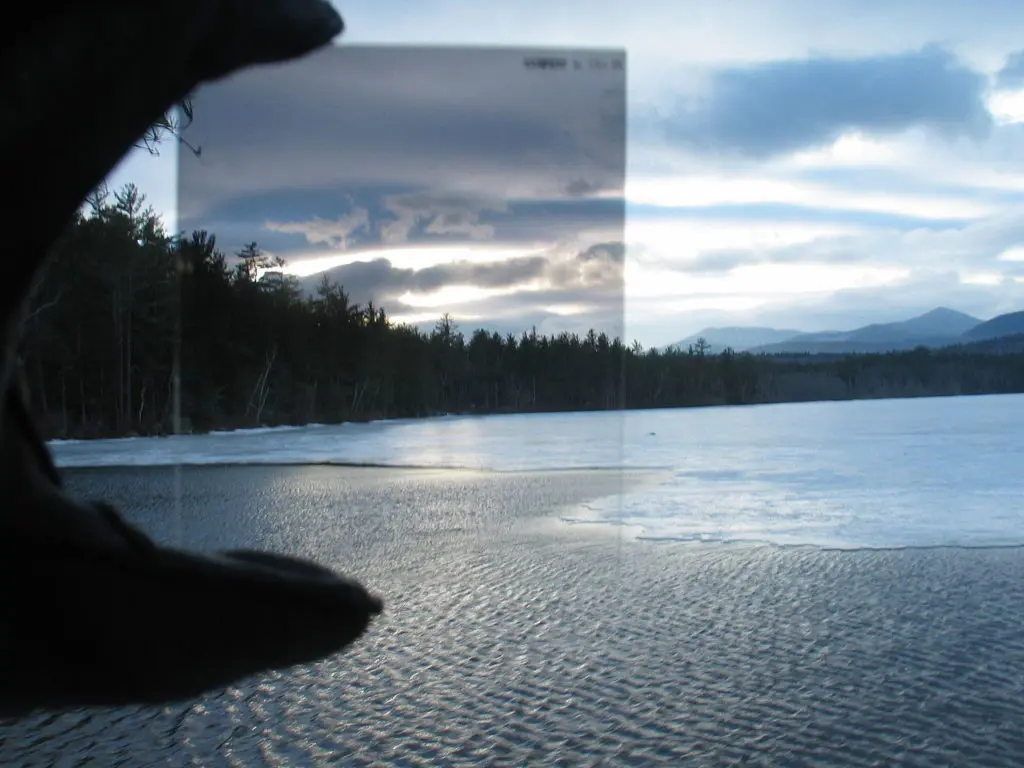
For daylight long exposure photography, you will need a neutral density filter. But not just any ND filter. An ND filter is designed to block out light without introducing any sort of color cast onto the resulting image, so it should be obvious why you’d need to use such a filter in daylight conditions.
So, What is a Neutral Density Filter?
A Neutral Density filter is one that is designed to block out light without introducing any sort of color cast onto the resulting image, so it should be obvious why you’d need to use such a filter in daylight conditions. The result of using a Neutral Density filter is that it allows less light to pass through the lens and reach the camera sensor, than when there was no Neutral Density filter.
Neutral Density filters come in different strengths and there are ways to identify or measure their strengths.
When Should You Use a Neutral Density Filter?
Look at the scene in front of you and decide how you want the scene to be photographed. Scenes where water has slight ripples, slowly moving waves (no crashing waves), waterfalls, moving clouds are all good subjects for long exposure photography using a Neutral Density filter. You will create a smooth and surreal mood in your images using an ND filter.

Ways to Measure the Strength of Neutral Density Filters
You will find that ND filters are typically labelled as “ND2” or “ND4”, in reference to the amount of light the filter keeps from entering the camera. A neutral density filter labelled as ND2 cuts the amount of light reaching the camera’s sensor in half — this is a one-stop filter.
An ND4 is a two-stop filter. An ND8 is a three-stop filter. These ND filters probably aren’t going to be strong enough to facilitate sufficiently long shutter speeds in daylight.
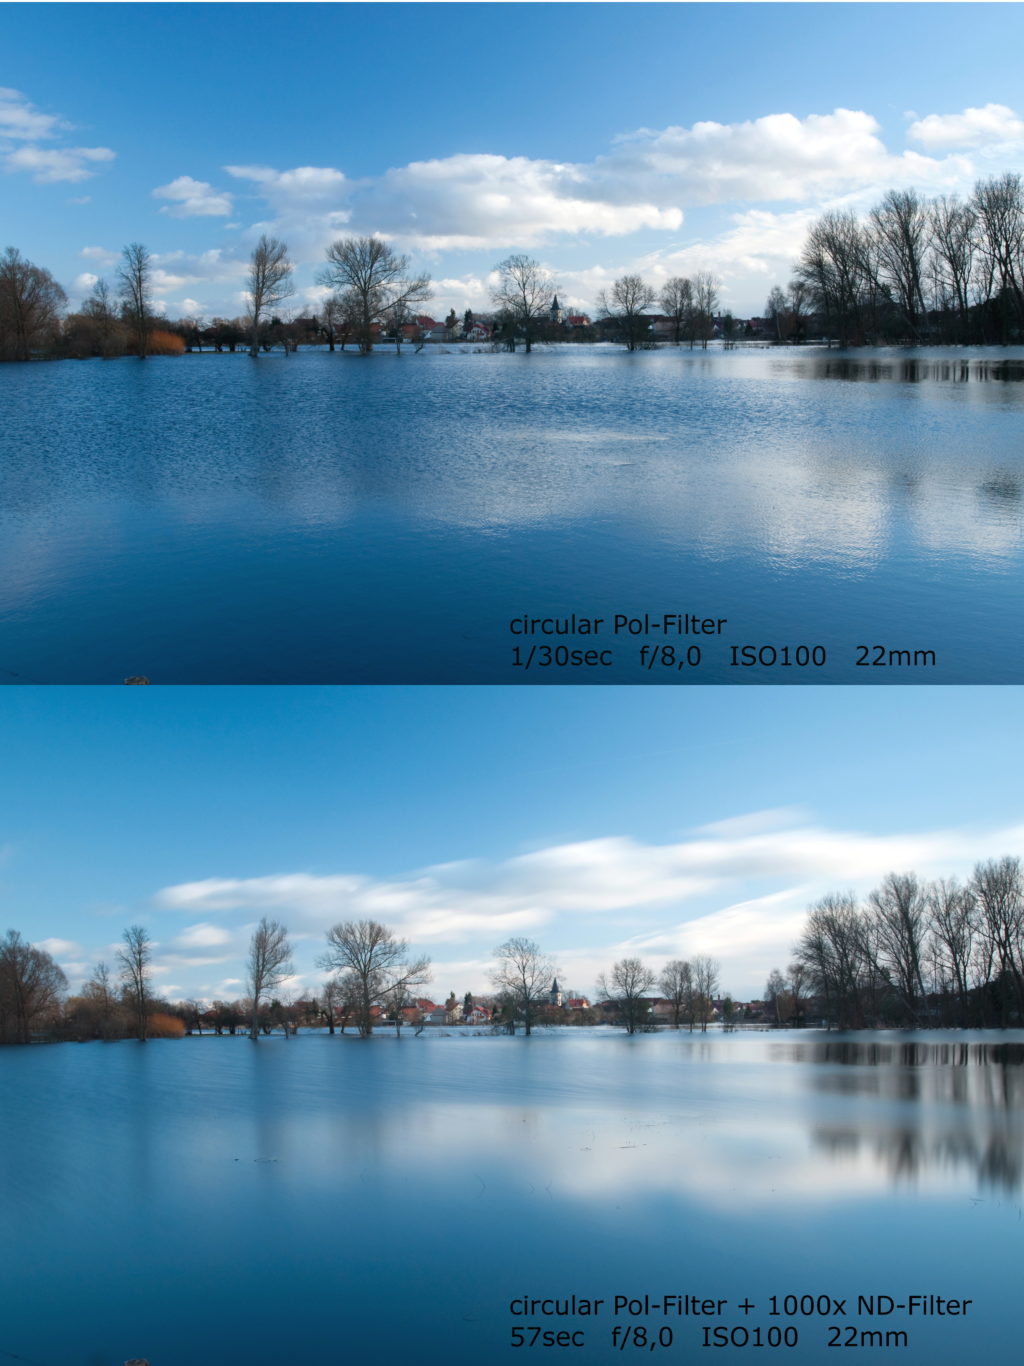
To do this properly you’re probably going to need a filter that blocks ten stops of light, or an ND1000. Good quality 10-stop ND filters can be had for a reasonable price these days (less than $50USD), so it’s a worthwhile investment even if you don’t use it all the time.

Some manufacturers even make filters that can block 16 stops of light and they can be pretty expensive. You can start with an ND1000 for some really good long exposure photographs.
Types of Neutral Density Filters For Long Exposures:
Neutral Density filters come under basically two categories:
- Usual plain Neutral Density Filters – these filters reduce exposure uniformly across the entire frame
- Graduated Neutral Density Filters or the Grad ND – these filters come as soft and hard Grad ND with an opaque region on top that gradually changes from opaque to clear at the bottom. The Grad ND filters are filters used to achieve dramatic skies with well exposed foregrounds (light from the sky is blocked and not from the foreground). The soft Grad ND filters are used when photographing cityscapes or landscapes that may not have a well-defined horizon whereas a hard grad ND filter can be used where the scene has a well defined horizon, for example seascapes.
Besides the above, there are also two types of filters depending on the way they are attached to the lens.
- The Screw-On Type – these filters screw on to the front of your lens and these come at a cheaper price. You could use this while starting out on long exposure photography, but make sure that your focus does not change when you screw on the filter to the lens.
- The Filter Holder Type – these filters slide into a filter holder in front of the lens and so you do not have to worry about the focus changing. Besides, these filters provide better quality images and are a lot more expensive compared to the screw-on types.
Note: By all means it is best to avoid variable ND filters as these can leave strange lines, colours and artefacts in your image. Moreover these filters are quite expensive.
Use A Tripod
This isn’t optional. I don’t care how good the image stabilization in your camera or lens is, it simply isn’t going to be of any use when working with exposure times that could realistically be longer than 2 minutes.
A sturdy, reliable tripod is the first line of defense against blurry images. Be sure to deactivate any image stabilization while your camera is attached to a tripod.

Activate Mirror Lock-Up
If you’re using a mirrorless camera you can skip this if you’d like. For most everyone else, mirror lock-up is a feature that allows you to minimize camera vibration by flipping the mirror up before you press the shutter button.
Depending on how intense the so-called mirror slap is in your camera, using this feature may or may not make a significant difference but you might want to use it as a preventative measure. Or you could just use Live View.

Compose And Focus First
A 10-stop ND filter is quite dark and your camera is unlikely to be able to autofocus with such a dense filter in front of the lens. You may very well get autofocus to work on occasion, but it’s a waste of time, really. The more efficient method is to compose and focus your shot, turn off autofocus, then attach the filter to your lens.

Switch To Bulb Mode And Use A Remote Shutter Release
Your camera likely has a slowest shutter speed of either 30 or 60 seconds. For anything longer you must turn the camera bulb mode, which keeps the shutter open for as long as you need. A remote shutter release will allow you to fire the shutter and keep it open for an extended period without having to touch the camera.
Calculate The Correct Exposure
There are multiple ways to go about getting the right exposure for this situation but I’ll cover the most painless method here. Be sure you set the camera to the lowest ISO setting. Set an aperture that produces the most depth of field without introducing diffraction — something like f/11 or f/16 is ideal, but you’ll need to know the strengths and weaknesses of your lens to be sure.
Now, as you focus and compose (before attaching the ND filter to your lens), take note of the meter reading the camera gives you. Once the ND filter is attached you will need to compensate for the decreased light.
There’s an app for that. NDCalc and Neutrally are two such examples. Simply enter the baseline shutter speed metered by the camera, select the ND filter strength and the app will supply the adjusted shutter speed required for a proper exposure.

Shoot Raw
This is pretty standard photography advice, but it’s particularly pertinent here in light of the fact that some ND filters can, in fact, leave a color cast on the final image. Shooting raw improves your chances of being able to correct the color cast in post. There are, however, times when the color cast can’t be satisfactorily corrected — these times call for conversion to black and white.
Some Important Tips When Using Neutral Density Filters:
- Always keep your filters clean so you get neat images.
- You can use ND filters in combination with CPL filters or a combination of ND and Grad ND filters depending on need and as long as these do not create weird artifacts and color casts. Sometimes it may not be the right thing to do!
- You could always take a test image to check the image for sharpness across the frame so you know you will not be wasting long exposure times with the filter on trying to take images where the entire frame is not in focus.
- Always test run your camera as some camera sensors can heat up during very long exposures. Check to see how much exposure your camera can handle before it creates hot pixels in your image due to sensor heating up.
- It is also best to cover the viewfinder with some sort of tape or cloth to avoid light leaks and this depends on where the sun is with respect to your camera.
- Buy good quality ND filters for better results.
Final Thoughts
Over time you’ll discover that there are other factors to account for (film photographers, don’t forget about reciprocity failure), but with the tips provided above you should be well on your way to creating fantastic long exposure photos…in the daytime to boot!
Long exposure photography, despite its apparent complexity, can be relaxing and rewarding. To me, the level of involvement needed is offset by the end result. If you want more on Long Exposure Photography, take a look at The Complete Guide To Long Exposure Photography over at Photzy.


3 Comments
Excellent article, Mr. Little. I’ve always been a bit intimidated about using an ND filter, but kept seeing them offered as built-in features on many high-end cameras, so I began to wonder what I’m missing.
Now, with your help, I feel confident about purchasing one, and incorporating it into my photo shoots. Thanks for sharing this terrific info and your amazing cityscapes. Looking forward to advancing my technique! All the best!
Very helpful article! I now feel informed enough to experiment with and ND filter. Thanks.
This is how a tutorial should be presented. Detailed and easy to read