There are four Lightroom tools that add a bit of sharpness (not to be confused with the action of sharpening) to an image. These include Contrast, Clarity, Sharpening and Dehazing. Understanding how they work is important in optimizing adjustments. Overdoing these can make a photo look fake, overdone and over processed. Not applying enough could mean just another ‘nice' photo.
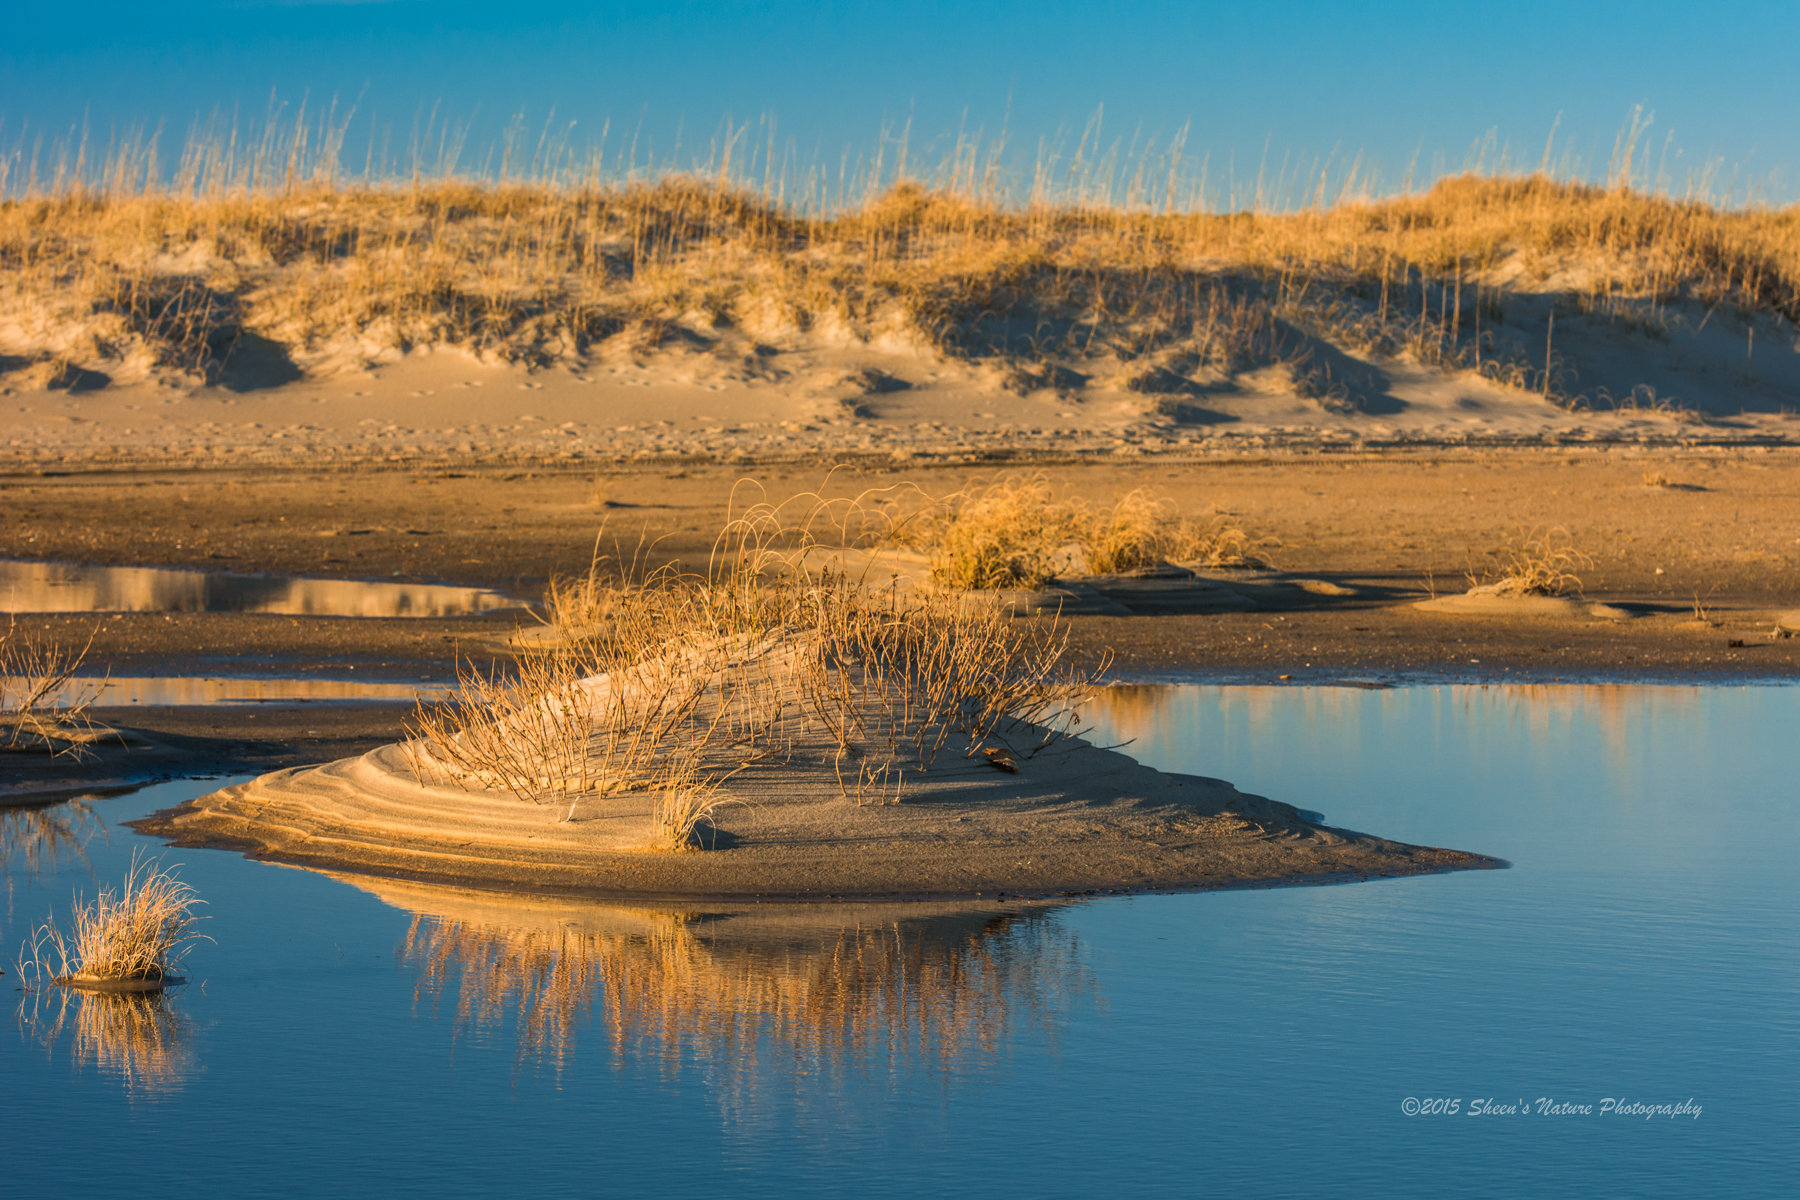
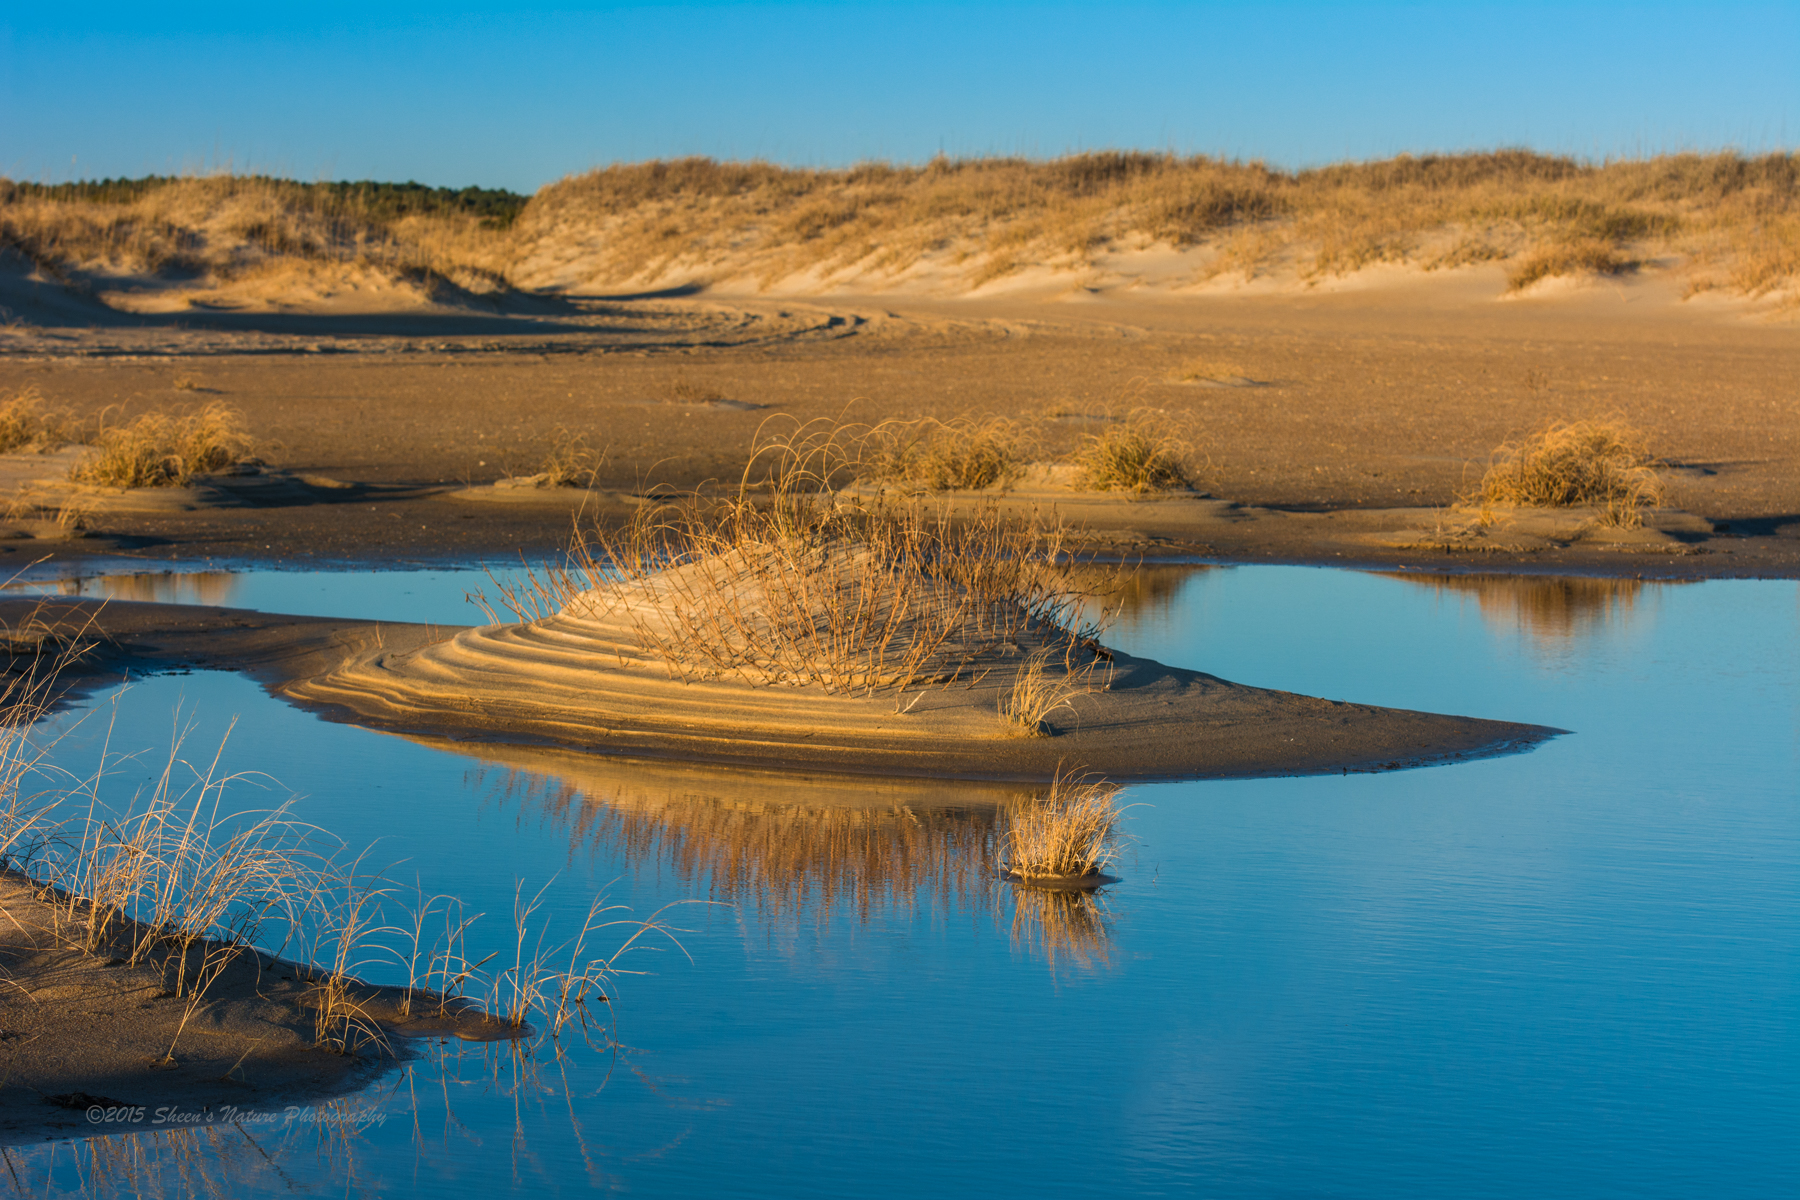
The processed photo below was taken in Cape Hatteras, North Carolina at sunset in the winter. The sun was setting and the golden hour had emerged.
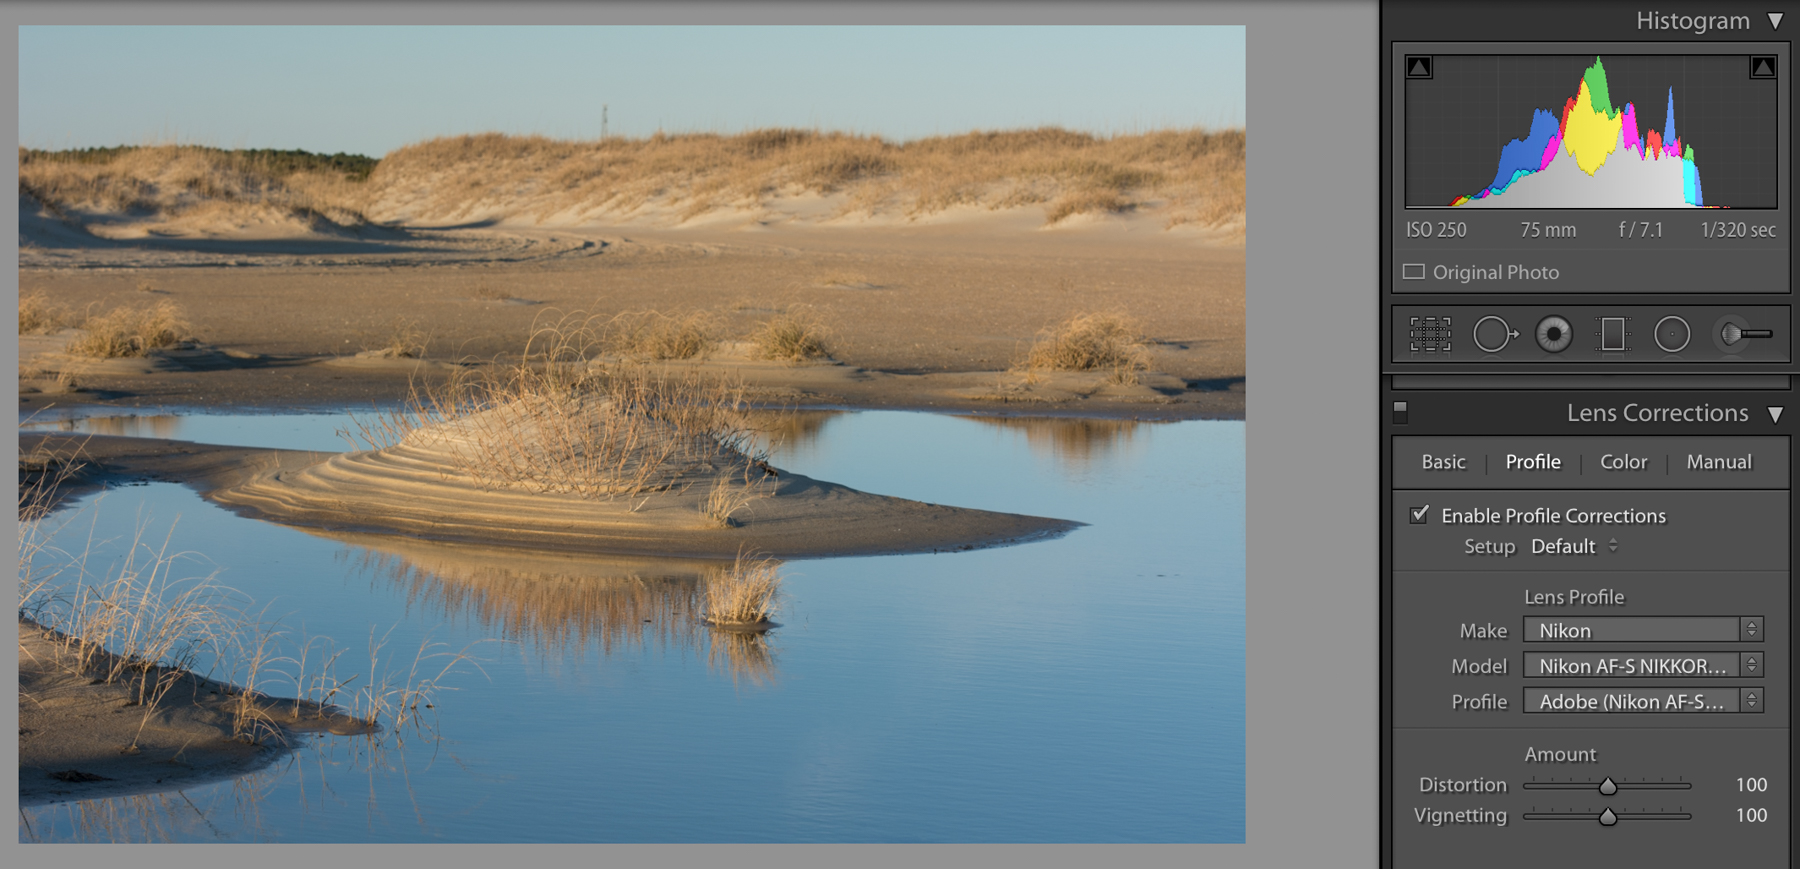
We'll cover these four tools and how they work independently. The RAW below was taken in the same series as the photo above. We'll use this file to make our adjustments and include its histogram.
The file looks quite plain and dull, just waiting to be processed. The only modification was checking the Lens Profile Adjustment.
The Keys to Using the Contrast Tool for Punchier Images
When working with the Contrast slider and pushing it to the right (located in the Basic Panel in Lightroom), the adjustments darken the darker mid-tones and lighten the lighter mid-tones across the entire image. When working with the Contrast slider right and left, observe what's happening in the Histogram.
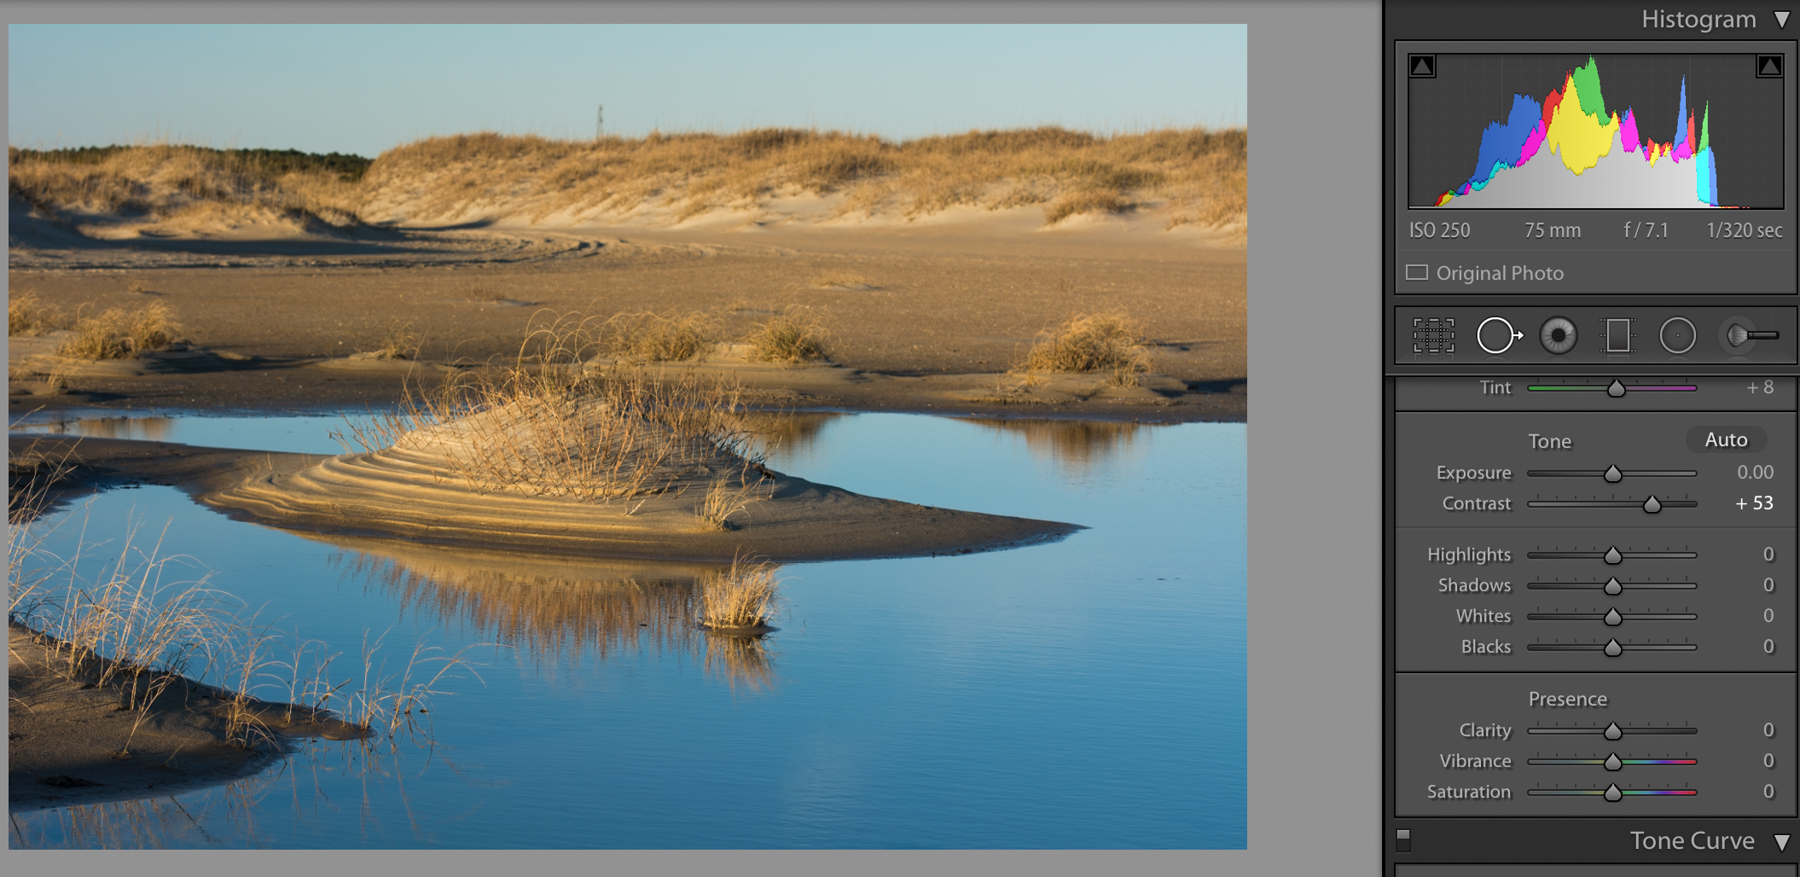
When the slider is pushed to the right, contrast between the lighter and darker midtones increases. This is reflected by the broadening of the histogram. The photograph may appear brighter and more rich.
When the slider is pushed to the left, the histogram gets pushed closer together. There is less contrast between the lighter and darker midtones.
When files are loaded into Lightroom, the histogram of a photo that was taken in bright conditions will be reflected with a broad histogram that you may choose to further modify. Conversely, the histogram of a photo taken on a dull, dreary day will be reflected with a more narrow histogram that you may choose to further modify.
Clarity Can Work for Punchiness Too (But You Should Know the Difference With Contrast)
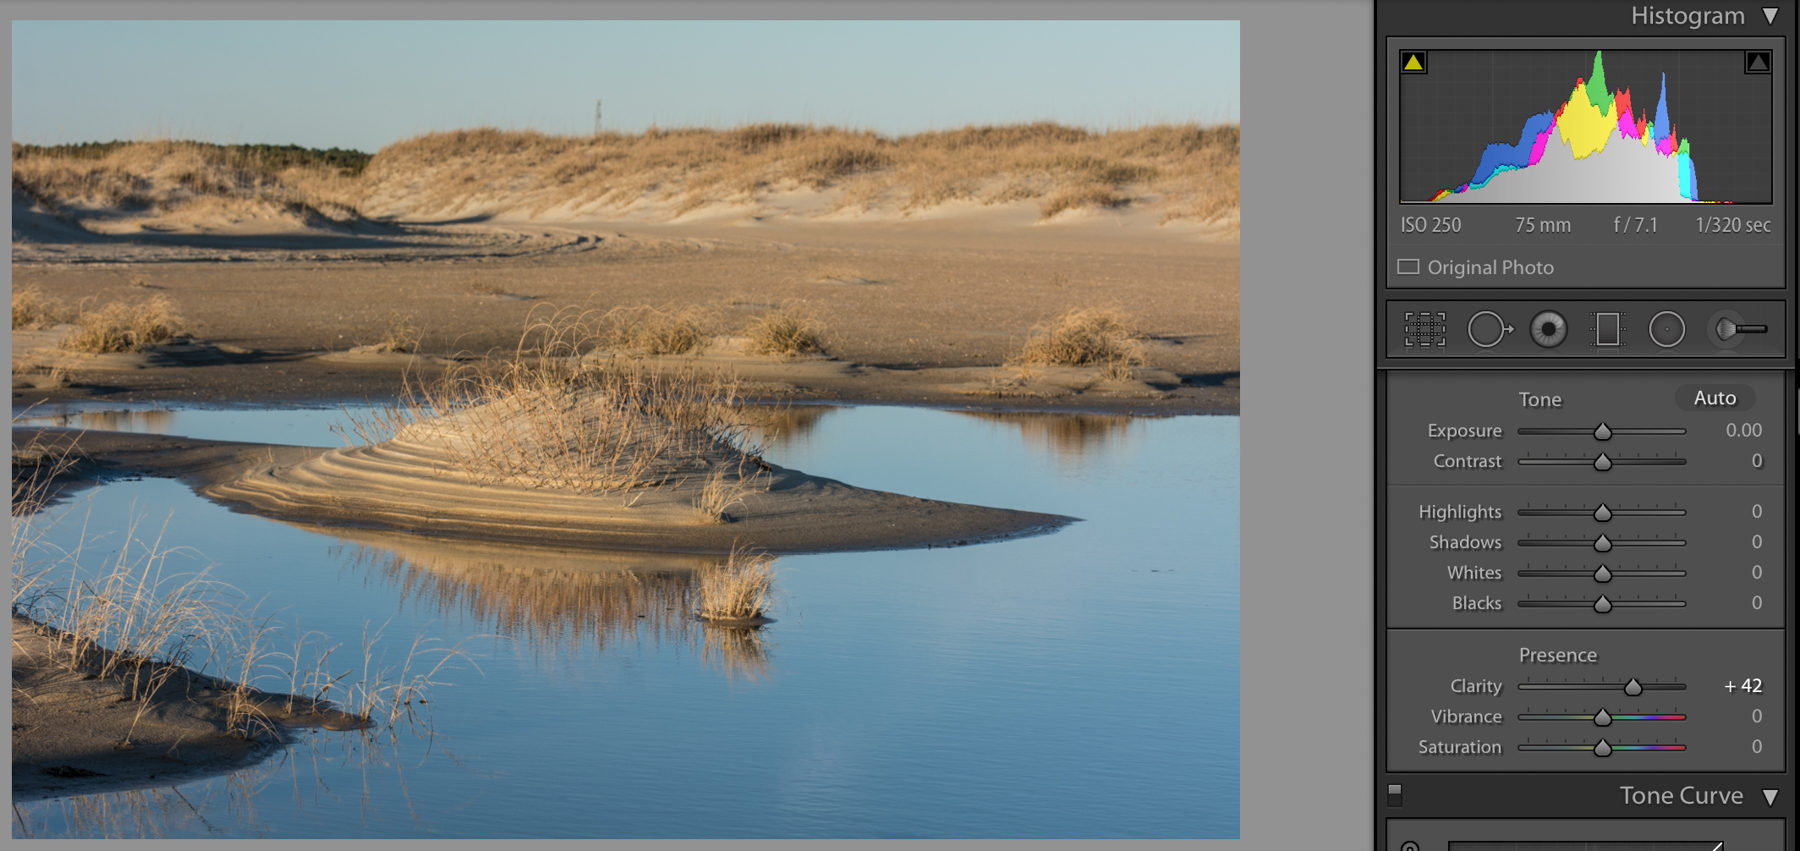
Clarity is similar to contrast in that it impacts the mid-tones of an image. By moving the Clarity slider to the right, the contrast increases in the mid-tones. Increasing clarity will reveal more texture and detail. The lighter side of the edges brighten and the darker edges, darken. A photo of leaves, trees, fluffy clouds may call for more clarity as these details add depth, dimension and impact. With too much clarity – shadows, lines and halos look harsh.
By moving the slider to the left, the contrast decreases. Decreasing clarity softens the details. When processing a photograph of a person, less clarity may be desired to soften skin and not bring attention to lines, shadows and wrinkles. Too little clarity diminishes lines and creates an overly soft image.
What is the difference between Contrast & Clarity since they impact the midtones? Using the contrast slider increases the contrast of your entire photo. When applying clarity, it increases the contrast in the midtones.
How to Use The Sharpening Tool Properly
Sharpening (underneath the Detail Panel in Lightroom) – makes adjustments to the pixels by lightening the lighter pixels and darkening the dark pixels. The impact is that edges appear more clear and defined. Too much sharpening can look crunchy and pixelated.
When a RAW file is imported into Lightroom, it automatically applies some sharpening. My personal preference is to take it to zero before applying any additional processing adjustments. I apply sharpening in the later steps of my workflow.
After all adjustments were applied, here is the processed image:
The Dehazing Tool is a Welcome Addition to Lightroom
In June of this year, Adobe Lightroom introduced Dehazing. This slider when moved to the right, removes atmospheric haze. When moved to the left, the haze increases.
Local vs. Global Adjustments
In Lightroom, adjustments in the Basic, Detail, Tone Curve, HLS, Split Tone, Detail, Lens Corrections & Effects are all global adjustments. The above adjustments plus many others can be applied in local, targeted areas by using Lightroom's Graduated & Radial Filters and Adjustment Brush.
Summary
Adobe Lightroom is one of the most powerful post producting softwares on the market and it continues to improve with welcome additions such as the dehazing too. The subtle differences between some of the tools, however, mean that photographers should take the time to learn the exact difference. Doing so will result in images that more closely match the vision of the photographer.


9 Comments
“In June of this year, Adobe Lightroom introduced Dehazing”
I could not find this in LR6, so I did an update, and I still cannot find it. Ver 6.2.1
It’s in the Effects panel at the bottom – kind of strange place for it.
Bob, the Dehazing feature is only available in Lightroom CC 2015, and not the standalone version. Presumably it will appear in LR 7 standalone.
Rgds,
Howard
Might only be available in Lightroom CC as CC has continuous new features added. My understanding is new features for standalones are only added with each new reiteration of Lightroom. I’m not positive though…
There are a couple of free presets you can download an install into LR6 for Dehazing.
The way the title of the article was worded I thought there was going to be a discussion of when each aspect was best used and how to use them together effectively. Dehaze was glossed over and I don’t think it was used at all in the final result. I tend to use it first and the go up and work with the contrast and clarity sliders to get the best results.
Thank you. This discussion and training material is exactly what I have been searching for. My photos just don’t have punch. The sliders are difficult for me to use collectively. At every photo exhibit I visit, the artists have 30×40 images that truly rock with punch and visual appeal. Now I move forward with confidence.
How To use dehaze tool for juste a part of thé photo ?
Lyse
Dehaze can now be used from the Adjustment Brush panel
Just paint over the parts of your image you want Dehazed