You might think that you have a great camera. You might also think that you have the latest and greatest LCD monitor and in both cases, you are probably right. The problem is that when these two devices talk to each other about color, they do not understand each other. Put simply, when you are working with your images on your monitor, unless you have calibrated it, you are probably not seeing the image the way the camera took it.
ColorMunki Smile

Perfect for creative and photo hobbyists striving to take the next step forward in digital imaging
Monitor calibration used to be an expensive and time-consuming procedure, but these days it should be regarded as an important part of any photographer’s workflow. When my Pantone Huey decided to not work anymore, I foolishly labored on for a long time without color calibration. However, recently I returned to the fold with at the purchase of the basic but very useful ColorMunki Smile and today I would like to share my experience of it.
First Impression
The Smile comes from X-Rite, one of the leading names in color calibration tools. In the box you get the calibrator itself. This is surprisingly hefty when compared to my old Pantone Huey and has a reasonably long USB cable complete with a useful counterbalance weight. The only other item is a CD with the drivers and calibration software.
Installation is a breeze, you install the drivers and software before plunging in the calibrator. The software will connect to X-Rite allowing you to register the product, download updates and get useful tips and information.
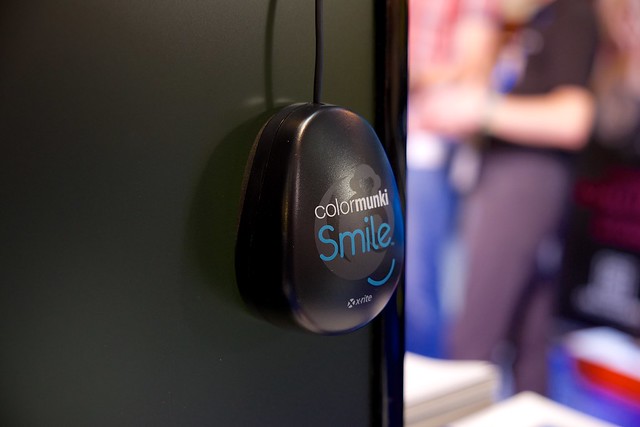
Simple and effective, the ColorMunki Smile. Photo by Kārlis Dambrāns
The ColorMunki Smile is aimed at enthusiasts and perhaps freelancers who do not have the budget or the desire to use more advanced calibration tools. As such it lacks some of the more advanced features as ambient light correction, manually setting white balance or controlling gamma. With that said, from what I understand, the Smile’s underlying technology is based on older versions of X-Rite’s more advanced calibration hardware and it can produce results on a par with those products, albeit without the bells and whistles.
Calibration Procedure
The calibration process itself is a simple 4-5 minute procedure. When you start the software, it will switch your monitor to full screen mode, with setup icons at the bottom. Pressing the Green start button will check to see if you have the calibrator plugged into a USB and then display a reference outline for you to position it on the screen. I found that it was not easy to get the calibrator to balance exactly in the right position even by moving the counterweight on the cable. It also tended to twist away from the screen. I suspect that I can sort this issue out by removing any twists in the cable and spending some time placing the counterweight properly. For the first calibration, I simply lightly held the hardware against the screen.
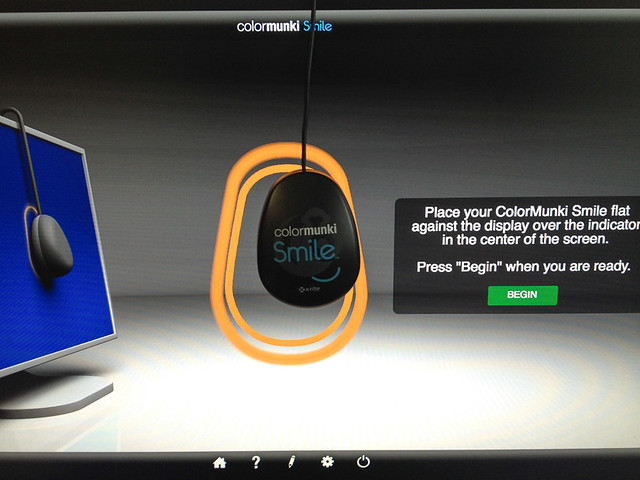
Positioning the calibrator can be a little finicky
Once the software has detected the calibration unit, you simply click on the Begin button and a color box appears underneath. This cycles through a full range of colors before showing a completed screen. Here you can quickly compare the old profile to the new. My screen was way off despite using Apple’s built-in visual color calibration app. Neatly the tool will also detect other monitors attached and ask if you wish to calibrate them too.
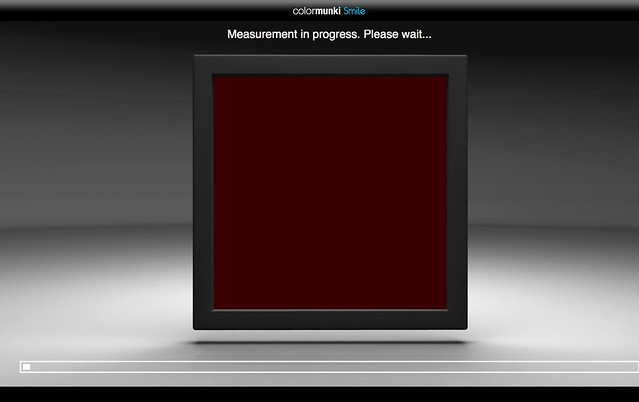
Calibration is a simple one click affair
Under the settings options you can set reminders to calibrate, check for software updates and define whether you are using an LCD or LED screen. You can also connect to X-Rite’s website to check that your software is up to date.
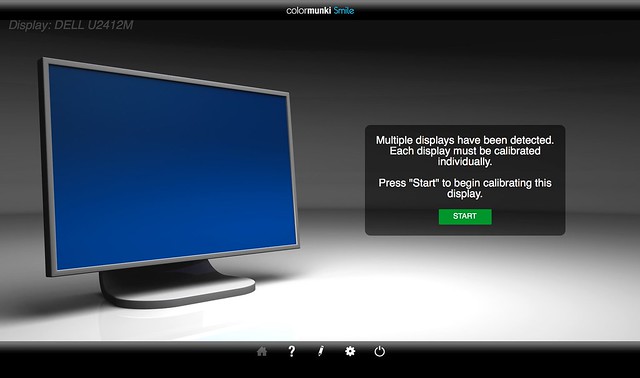
ColorMunki automatically detects extra monitors
ColorMunki Smile
Perfect for creative and photo hobbyists striving to take the next step forward in digital imaging
Color calibration has for the last few years, been in the reach of any photographer. The Smile is not aimed at people who do lots of high-quality printing or photographic business’s using multiple computers and screens in their workflow. It is however an excellent product for those you want simple but effective color calibration for their monitors, but need to have the confidence that what they are seeing on screen is a good representation of the original image.


5 Comments
good review. I also have the original Huey system and when it begins to falter I will give consideration to the product you just reviewed.since I have long sold my printers, I only need calibration for web view monitors only. thanks
Bice review, thanks. I have an older x-rite calibrator which also suffers from not sitting flat on the screen. The solution I’ve found to be very effective is to simply tilt the screen back when you place the calibrator on it and let gravity do the work for you 🙂
You don’t say what the cost of this item is?
The price will vary wherever you live. I bought mine in Belgium for 80 Euros
You can find them on Amazon. About $90 American.
https://www.amazon.com/X-Rite-CMUNSML-ColorMunki-Smile/dp/B009APMNB0/