With the ever-increasing popularity of astrophotography, photographers are constantly on the lookout for information on getting the best night sky photograph that they possibly can. One of the settings that can be confusing for most photographers is the camera's inbuilt noise reduction feature. Should you turn noise reduction on or off for astrophotography? Read to find out more about this setting.
Night sky photography or astrophotography involves long exposures and higher iso values than normal daylight photography. As a result of these two factors, “long exposure” and “high iso” there are high chances that an astro-photograph can have evident noise, which can be quite an unwanted thing and a huge challenge for anyone looking to create a neat photograph free of noise.
Also, taking into account some factors like
Grab your Milky Way Photography Blueprint for free right here.
- The possibility of shooting the Milky Way when you have a limited time period each year when the Milky Way is above the horizon for you to photograph.
- Looking at the few days with clear skies in this time period when you can photograph the Milky Way, etc.
It is important you do your best to get everything right in the images you are creating. Not only that, some photographers may travel miles away from their homes in search of dark skies and so whatever the situation, getting your images clean without much evidence of noise is essential in astrophotography.

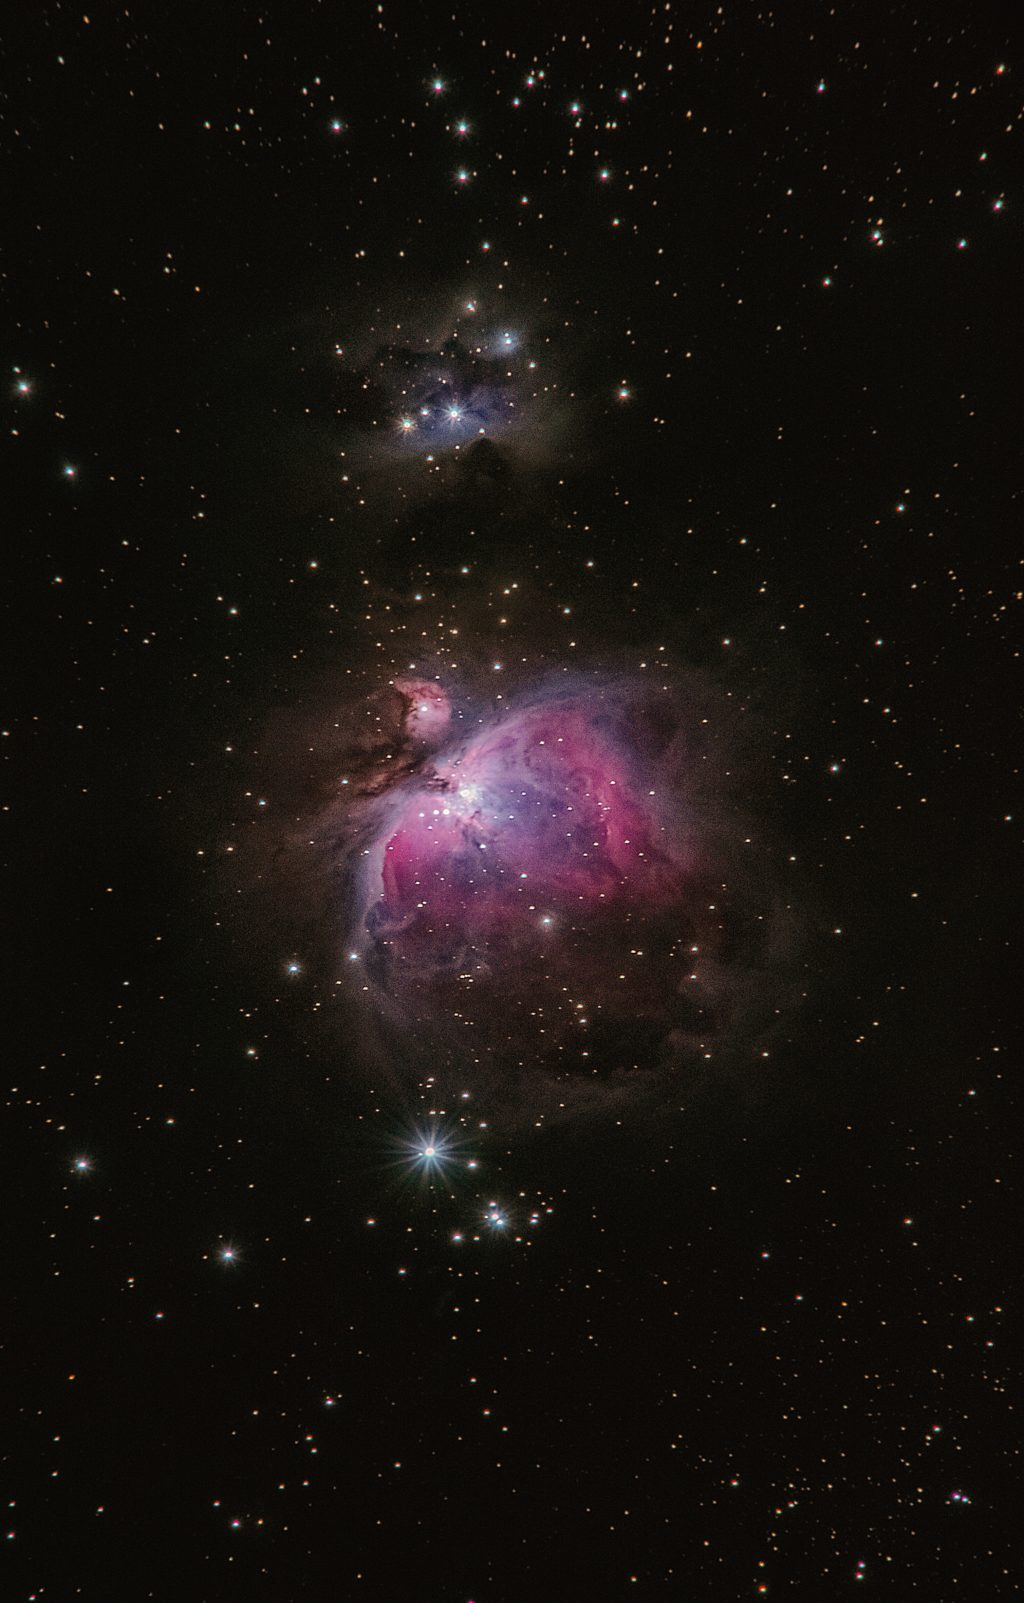
Image by Benjamin Voros
With the advancement in camera technologies, photographers are able to make astrophotography with cameras of almost all levels and types. These cameras come with better low light performance, allowing the photographer to shoot at higher iso values, but one of the biggest challenges faced during astrophotography is thermal and digital noise.
What is Thermal and Digital Noise?
During long exposures, the camera's sensor is exposed for a longer period of time and higher iso values are used to get the correct shutter speed without causing star trails in images (not taking into account any tracking).
- Exposing the sensor for long periods of time heats up the sensor causing more noise (thermal) in the form of hot pixels.
- Using higher iso values will increase the sensitivity of the sensor, also leading to more noise (digital).
What Does Noise Look Like?
Noise in photographs looks like irregular coloured pixels or grainy spots rendering the details of the image less sharp. These are pixels that do not represent the correct colour or exposure of the scene and can make the image look quite awkward.

This is how noise looks in photographs – this is for illustration purpose only. Image by MartinThoma
What is the Solution to the Above Problem?
Since the above two factors of high iso and heat due to long exposure cannot be avoided, and they are going to create digital noise in your photographs, you need to find a way to reduce or eliminate it through some means. Obviously, it has to be noise reduction either in-camera or while post-processing!
Cameras These Days Come With “Noise Reduction” Features:
- Long-exposure noise reduction
- High iso noise reduction
Long exposure noise reduction can be applied to raw files in-camera, whereas high iso noise reduction is only applied to jpeg files in-camera. With astrophotography, the advice is to shoot only raw files.
So if you are just shooting a couple of jpeg files, then you can turn on high iso noise reduction and it is better to keep it normal. Bear in mind this can take away the sharp details from your stars. The same with long exposure noise reduction – keep it on if you are shooting a couple of jpegs.

The question is – should you turn noise reduction on or off for astrophotography? Before going into whether you should turn this feature on or off, let us quickly look at what this feature does.
What Does The Long Exposure Noise Reduction Feature Do In The Camera:
- The long exposure noise reduction feature takes two photos in sequence
- The camera takes a normal exposure called a “Light-frame” which is a normal exposure of the scene that you have composed and are shooting.
- If long exposure noise reduction is turned on, what the camera does is, once the “Light-frame” is taken, the camera takes a “dark frame” with the shutter closed this time and for the same exposure time as the “Light frame.” This time the camera is recording the thermal signal in the camera. The dark frame may appear empty or blank, but what it does is, it records the noise and hot pixels that would have been recorded in the light frame as well.
- The camera then subtracts the noise and hot pixels in the dark frame from the light frame which leads to the removal or subtraction of noise in the final image.

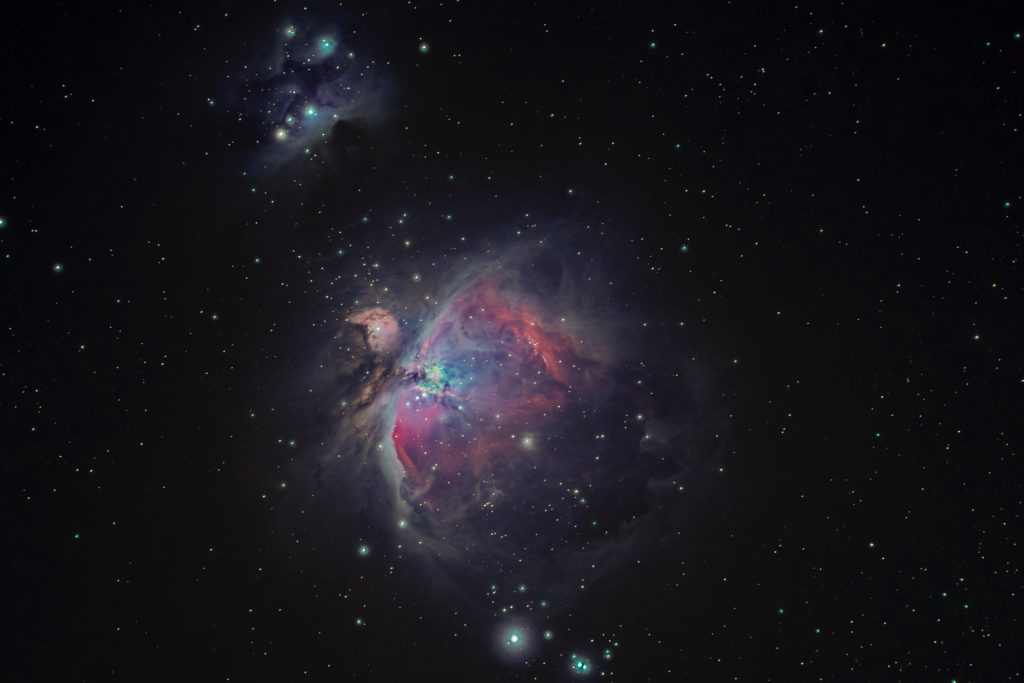
Image by Patrick Untersee
Here Are Some Disadvantages Of Turning On Noise Reduction For Astrophotography:
- Doing noise reduction in-camera can lead to losing signals from faint stars that will be hidden in the noise. Even some bright stars can sometimes be rendered quite dim after using an inbuilt noise reduction feature. This is because the camera perceives these tiny spots as being noise – basically, noise reduction kills the fine details in your star or astro images.
- Noise reduction increases processor activity causing internal heat in your camera
- You lose a lot of imaging time waiting for the camera to process the noise reduction process. In fact, it takes twice as long or sometimes, even more, to get your images taken. For example, if your exposure is for 20 seconds, the camera takes another 20 seconds or more to process the image after the exposure time, when noise reduction is turned on and this is because the camera takes two exposures instead of one as discussed above. It depends on cameras and some older cameras may even take a lot of time to process the images.
- When shooting for star trails, this delay in processing time for noise reduction will lead to huge breaks in star trails.
The best thing to do is, have high iso noise reduction to normal and turn off long exposure noise reduction for jpeg images. This will still consume some time while processing your images and is not recommended when you shoot star trails.
For raw files, turn both “High iso noise reduction” and “long exposure noise reduction” off, as you can shoot dark frames manually and remove thermal noise and digital noise while post-processing.

Image by Denis Gažík
If you are willing to wait between shots, then you can turn noise reduction on, but be warned again that sometimes the camera can render the faint stars as noise and eliminate them.
Since there are some amazing applications like Lightroom, Photoshop, etc. that can perform noise reduction, it is highly recommended to shoot in raw and reduce noise while post-processing. Or, you can manually shoot the dark frames yourself by covering the lens and subtract the noise from the light frames while post-processing. This way, you do not need to shoot a dark frame after each exposure, but rather a few at the start and end of the shoot. Bear in mind that the dark frame needs to be taken at the same temperature as the light frame as the noise levels in the sensor varies with camera temperature.
Another method to reduce noise in astrophotographs is to use an image stacking method where you shoot a number of images at least 5 to 10 images and stack them during post-processing. The images are aligned and averaged while stacking. This way since noise is recorded in different areas in each frame, they are subtracted or eliminated in the final image.
You can also use noise reduction plugins/applications like Nik DFine or Topaz DeNoise (which works as a standalone application too!) for Lightroom and Photoshop.
To conclude, for astrophotography, noise reduction in the camera is not advisable, be it high iso or long exposure noise reduction.
Do you shoot photographs of the night sky? If yes, do you use the noise reduction feature in the camera or not? Please let us know why in the comments section below!
Further Learning:
If you would like to achieve results like these without spending a fortune on gear, then you might like to check out Milky Way Mastery by the folks over at Expert Photography. It is well worth a look.
In it, you'll learn…
- The exact camera settings we use 98% of the time – make good shots foolproof!
- Why most panoramas fall flat… and how to make yours great
- The lazy person's way to know if your photos are over or underexposed
- How to capture more moments by triggering shots automatically
- Where and how to focus for maximum results
- The do’s and don’ts of white balance and colour temperature
- How to use “the 500 rule” to know the ideal shutter speed for avoiding motion blur in the stars
- The only processing software you’ll ever need and how to make it easy to use
- And much, much more…


5 Comments
I’ve tried night sky photography with and without noise reduction (RAW only either way) and have now permanently turned it off in the camera. Not only did noise reduction increase the processing time and remove some of the fine details, but every now and then it also introduced some camera shake. So, definitely opting for noise reduction in post processing. Another thing to thank about – how often have you heard a non-photographer look at a night sky image and say, “Ugh – look a all that noise!”
Hi Theresa, thank you for sharing your experience. Really helpful 🙂
I use my Nikon DSLR cameras (D850 & D7500) almost solely for astrophotography. In-camera noise reduction is a definite OFF for all varieties.
For astrophotography shooting RAW is a must, and noise reduction for is achieved in multiple pre-processing steps. (Pre-processing meaning the processing that happens to the raw files on a computer before beginning the optional ‘beautifying’ activity normally done by photographers in Photoshop or Lightroom or such.)
For astrophotography you will normally take multiple hours worth of photos from the same subjects. For example 80 times 5-minute exposures makes 400 minutes or close to 7 hours of imagery. That’s the whole night. While you want to take the dark-frame photos too, don’t waste your precious night-time on that. After you are done with taking your night-sky pictures, put the camera in the fridge, to keep it at a similar temperature, and set it to take another 400 minutes of dark photos while you sleep or go to work.
The dark photos are not subtracted one by one from the real photos. They are combined in an image stack to ensure that really only the persistent noise that is identical in each frame is retained for noise reduction, in order to prevent the removal of faint stars.
There is also something called bias frames. These are the same as dark frames except at the fastest shutter speed possible. These record the electrical noise generated in the sensor caused by the initial flow of electricity. The same processing principles are applied here and the final stack is used for removing this type of noise from the actual photos too. Also, this is used for removing noise from the dark frames!
The photos are also processed with something called flat frames. Those are not for noise reduction though, but accurate vignette removal. These are shots made with the lens/telescope in the exact same focus/aperture/focallength as during the shooting of the sky, but against an even bright white light, giving a perfect image of just the vignette. These frames are noise-reduced using the dark and the bias, and then stacked, before processing your sky photos with them.
Note that the camera feature not mentioned in the article, ‘Vignette control’, needs to be switched OFF too!
Once the actual photos have been processed like this they are all stacked together too. This removes noise levels even further and really helps pick out the super fine faint details.
Only after all of this can a more standard noise reduction algorithm be used to make the image prettier, like the one that is built in-to the camera. But this is many hours of processing after getting the images off the camera already. Note the wording “to make the image prettier”. All the previous noise reduction steps are to make the image more accurate, where as the to-be-avoided in-camera noise reduction , and this end-of-pre-processing noise reduction is for beautification only. Specialized software, like PixInsight by Pleiades Astrophoto, has noise reduction routines for this that are optimised to better recognize what is a star and what is noise, instead of just general purpose noise reduction.
Did anybody say astrophotography is easy? Lol! 😀
Wow! That is a lot of work Steffen. Thank you for sharing this with us!
Thank you for your help! I have just started learning stacking and calibration frames. I didn’t know if I should use in camera noise reduction or not. I’m using a Canon t3i +yeah I know it’s old, but I needed a camera to get back into photography). I figured I didn’t need “Long Exposure Noise Reduction” turned on since I am using calibration frames. But now I know!
Happy shooting!!🤘