While editing photos can be rather fun and creative, it’s quite easy to make photo editing mistakes, especially if you’re an amateur. No matter your current level of knowledge, you probably want to make sure that your edited photos don’t look surreal in a bad way.
The following 7 photo editing mistakes are quite common among amateur and semi-professional photographers but at the same time, they are easy to avoid or fix if you’re fully aware of them. After you have become confident with the basics of Lightroom, these are the mains mistakes you will want to avoid.
1. Too much skin smoothing
This mistake is extremely common among inexperienced portrait photographers. If you want to smooth your model’s skin, take it slow and compare your original and edited images continuously so that you can decide when it’s time to stop. You definitely need to stop before the skin begins to look plastic. The Barbie doll look is not flattering at all – it just emphasizes your poor editing skills!

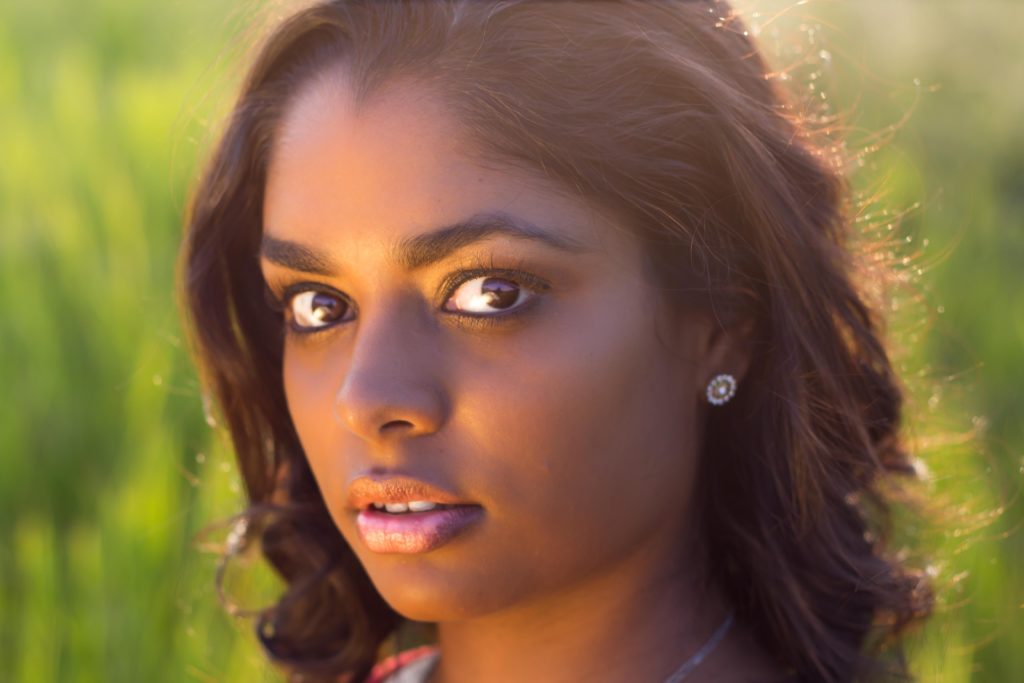
2. Over-editing the eyes
This is another common mistake in portraiture. You simply need to remember that the whites of a person’s eyes should not be sparkling white (the same goes for teeth). You should also avoid oversaturating the eye color because this can make your model look like an alien! There’s nothing wrong with editing the eyes a little bit, but be subtle and understand that the extreme enhancements of eyes look rather weird and even creepy in the worst case scenario.
3. Overusing HDR
Images with HDR effects can be breathtaking when edited properly, but this takes a lot of practice. Just like any other effect, HDR should be used in moderation. Also, this effect should be used mainly in landscapes and product photography – it makes portraits rather rough and contrasty and it enhances any kind of skin imperfections. You also need to set up the camera right (and use exposure bracketing!) when taking the photos to make sure they transfer to the HDR effect you would like to create.

4. Sharpening to correct focus
Trying to fixed out-of-focus images with sharpening is almost always a bad idea. The painful truth is that not only will sharpening not fix an out-of-focus image, but it may also even make it worse. Sharpening can easily result in halos, artifacts, and noise. Instead of trying to fix your out-of-focus images in Photoshop, spend more time checking your camera settings while you’re shooting.

5. Too much contrast
Learning how to enhance and control the contrast in your images (by using Curves and Levels) is an important part of editing routine and every photographer should learn how to do it properly. Again, avoid anything that looks extreme – blacks that are too black and whites that are too white look cheap and incompetent. Too much contrast means loss of precious details in your image and you probably don’t want that.

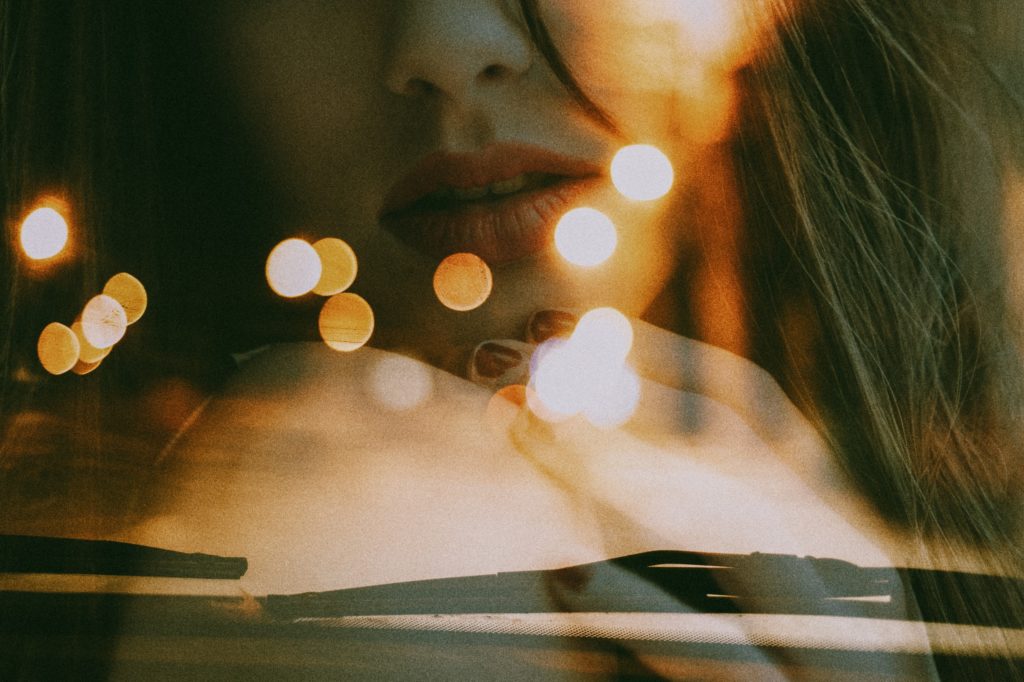
6. Fake bokeh
Bokeh tends to look magical, especially in portraits. It adds a certain softness and dream-like quality to images. However, good bokeh requires a proper gear (such as prime lenses with wide apertures) and it can’t be faked in Photoshop. The natural separation between the subject and the background cannot be achieved by simply blurring out the background. Instead of trying to master various blur filters, you should better get a fast portrait lens.
7. Not calibrating your monitor
You may think that monitor calibration matters only to photographers who print their works, but that’s not true. You should make sure that the colors you’re seeing are the real ones and that everyone else sees them in the same way. If you edit your colors on a calibrated monitor, they will appear in the right range to anyone who looks at them, either online or in print.

Avoiding these mistakes will simplify your photo editing routine and make your photos look more refined and more professional. When in doubt, just recall that less is usually more and that pulling various sliders in Lightroom or Photoshop just to make an image ’’pop’’ is not the best approach.


