We've all been fascinated by the moon, even trying to photograph it at least once. But it can often prove to be a pretty difficult task to accomplish. The moon almost always comes out either too small, too bright, or just blurry. Photographing the moon, as every other celestial object in the sky, requires previous knowledge about the specific object and the way the camera works. Not that you need to be a graduated astronomer, but some general knowledge is necessary.
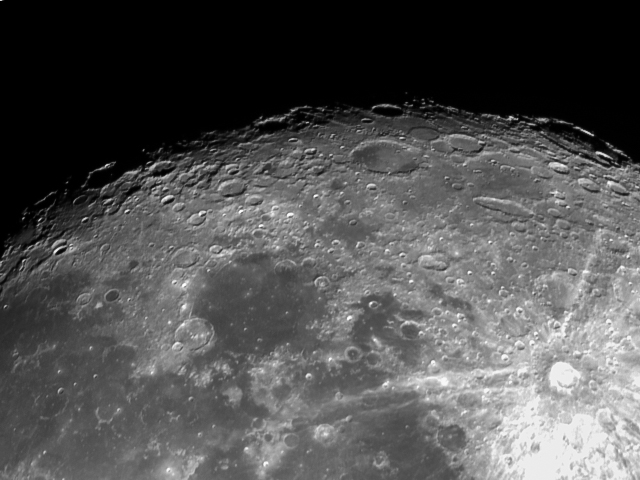
Photo by bobfamiliar
1. Understand the Moon
First of all, knowing how the light falls on the moon will affect your images. When there is a full Moon it is usually at its brightest, but this also means that the light is flat. That said, you’ll get an image of the moon with no structure whatsoever, nor any sense of depth or more than two dimensions. If you catch crescent moon, however, you’ll get more detail in all the ridges and craters it has, which will make it more interesting.
2. Choose the Right Camera Settings
The moon is usually the brightest thing in the sky (after the Sun, of course), so you will need faster shutter speed to capture the details. If you go slower it will just blow out the highlights and it will appear as a white (blurry) blob. Since the moon is in motion and is very far away, long lens with longer shutter speed will have higher chances of vibrations (which is inevitable) and moon motion will result in blown out smudged images. Last time I photographed the moon I had to go down to 1/200th of a second at f/8 on 400mm. Using a tripod, of course.
3. Put the Moon in Context
Photographing only the moon in the sky will result in an image that almost every photographer, and non-photographer with super-zoom point-and-shoot camera has made. We always see the same side of the moon, therefore if it is just the moon that you see on the picture it is the same image that million of people have already done. But if you put the moon in context with buildings or a landscape of some sort, then it becomes a different story. For example, you can photograph moonrise over buildings in the distance with super telephoto lens and make the moon appear as if it were bigger than the buildings itself. It would take a bit fiddling with the point of view, distance and moon position, but it is doable. About 1000mm in focal length is required to fill the frame with the moon. If you are shooting with a crop sensor, it is easily achievable by fitting a lens which is about 400 mm long, 1.4x tele converter and you get 896mm, or if you can get your hands on a 800mm lens you won’t even need the converter, just put it on a crop sensor and you are set.

Photo by Juanedc
4. Keep the Size of the Moon in Mind
Well moon size is pretty much always the same right? Except when it is a super moon right? Yes the moon is always the same in size, even the so called super moon. The thing that changes is our perception. Supermoon is a bit lower sometimes when it gets close to other objects like mountains, buildings and so on, and our brain sees it as bigger. However when the moon is in the sky away from any other object the brain registers it as smaller (even though it is always the same). If you were to photograph the moon with the same lens and camera when it is a super moon and regular full moon you’ll see that the size difference will be around 1%, which practically is no difference.
5. Capture an Unusually Large Moon Using Longer Lens
If you use a longer lens you can make the moon larger in the image, but if it is just the moon, it doesn't really matter. Remember that the longer the lens the more zoom compression you get, meaning you can make the moon appear huge next to a building or any other object. That is when things get interesting.
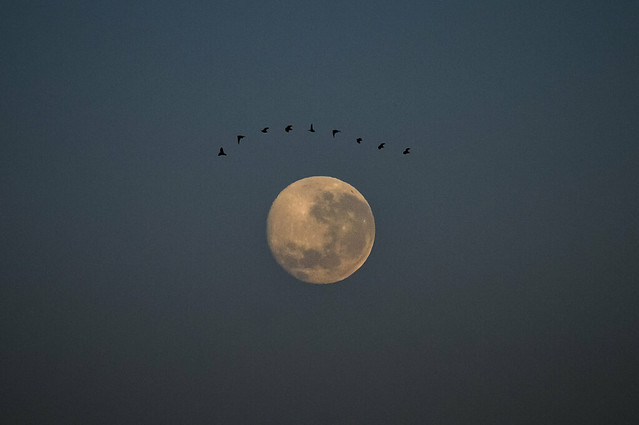
Photo by emiliokuffer
6. Adapt to Different Scenarios/ Lighting Conditions
Moon brightness will make everything become a silhouette. Therefore you’ll have to adapt to that, whether it would be compositing images, or somehow lighting the rest of the image up. You will need to adapt to different moon-to-ground scenarios in order to achieve good images. Not saying that silhouettes don’t work, if you manage to pull a good silhouette image, that would be great.
Finally, the goal is to create an image which isn’t just the moon. Being unique and creative is part of the job as a photographer. Everybody can take a shot of the moon, but your job is to stun everybody with your shot and make them ask themselves “How did he do it?”.
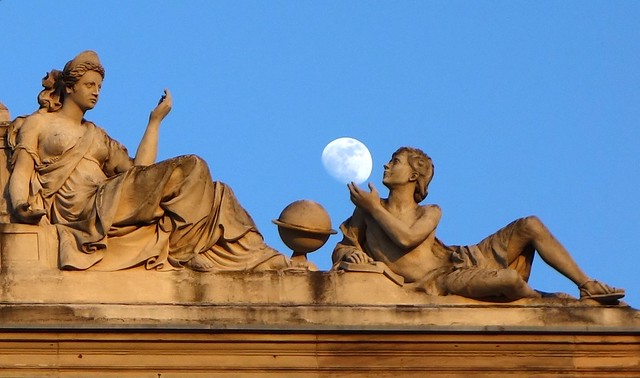
Photo by notfrancois


4 Comments
https://dougmoon.smugmug.com/Birds/i-N9Zq8RT/A
Lots of other moon shots on my website.
Nearly all of my moon shots have sucked. I will apply the techniques I just learned here. Thank you.
I will try these techniques. I usually have a terrible time!
If I am not mistaken then a 2400 mm lens is required to fully fill a 35mm image with the moon. That would be from the top of a horizontal image to the bottom, making the moon 24mm high in the image. Thus the moon takes up 1mm in an image for every 100mm of lens focal length. As well, your comments about the moon only appearing larger when close to the horizon are of course entirely correct. But the moon’s orbit is eccentric.and when it is at its closest approach to earth it is noticeable larger when high in the sky than when it is at its farthest.