If you have seen some of the portrait retouching videos on the internet, you have probably stumbled upon the term “frequency separation” at one time or another. I have also mentioned it on several occasions in my posts here, and after receiving several requests to make a tutorial on it, I decided to devote a post specifically to the topic.
In general, frequency separation is a portrait retouching technique which focuses on retaining as much texture as possible. Why is it called frequency separation? I’m not sure yet, but I guess it refers to the detail frequency, because you do separate the fine detail (a.k.a texture) from the coarse detail (a.k.a tone), right? The name doesn’t really matter, after all. It is a great technique to work with and it produces pretty astonishing results.
Often, the issue with it is that much of the blemishes are seen due to the fact that they have different color from the skin around it. Thus, instead of heal brushing it to death and hope that the texture won’t be messed up, you can affect only the tonality without ever touching the texture. That is the power of frequency separation.
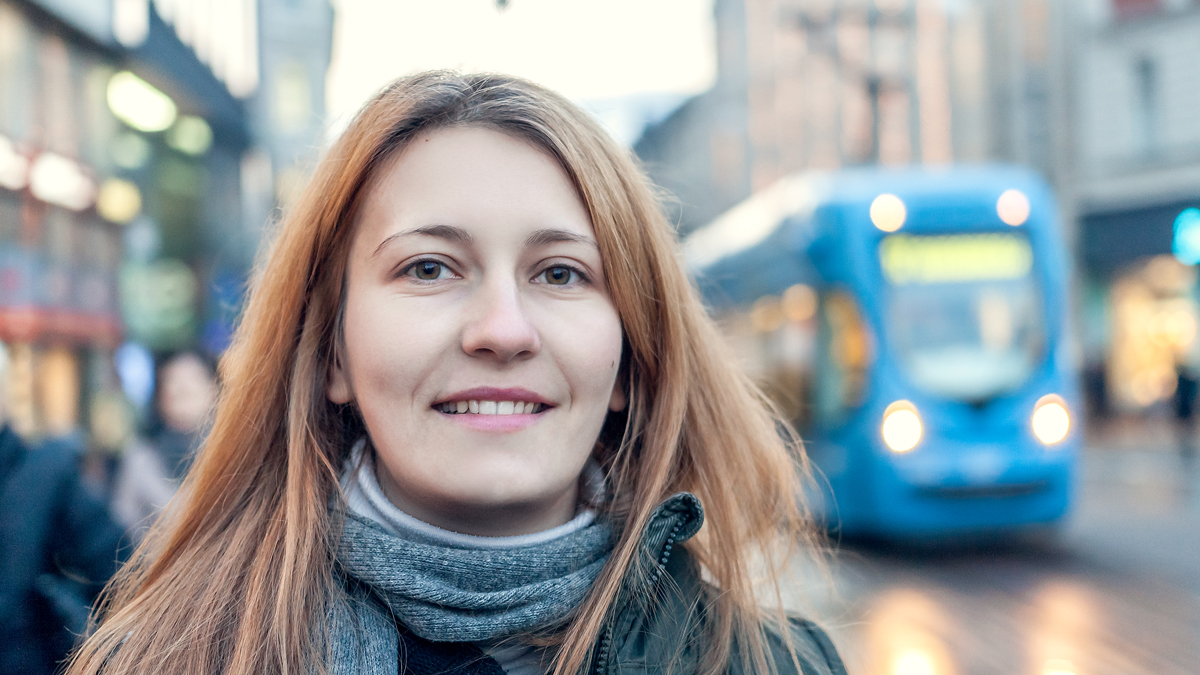
So, how do you do it? Firstly, open Photoshop with the picture you want to retouch. For simplicity, I’ll retouch this picture on the go so you can see the steps and the effect.
I would like to add that since frequency separation as technique is really keen on every single detail, make sure you have prepared the image properly. That means, clean out all the excess noise and do not sharpen too much. You can always sharpen later. Though sharpening won’t do much damage if you sharpen beforehand, the tiny amounts of halo can create some artifacts which will complicate the retouching a bit.
Preparation For The Process
Duplicate the original layer twice (you should end up with 3 layers). After you have duplicated the layers, turn off the bottom layer (the locked one) and group the remaining layers.

Rename bottom layer in the group as “Tone”, the top as “Texture”. You can use different names, but I’m used to these, and when I end up with 30-50 layers to the final edit, it is easier to navigate through them when they have a name that describes what the layer is about. I suggest you do the same.
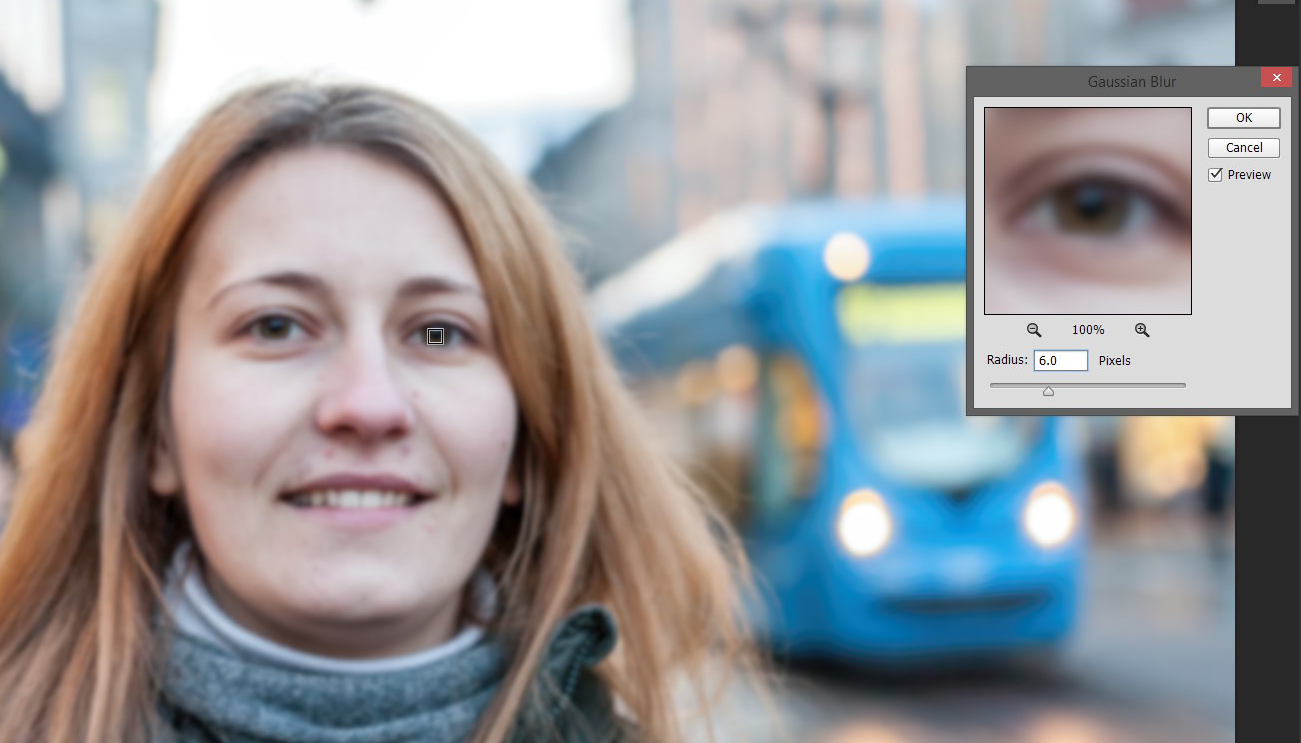
Turn off the texture layer and select the Tone layer. Once you have that, go to Filter -> Blur -> Gaussian blur. Blur to about 5-7 pixel radius, depending on your image resolution. If you are working with higher or lower than usual resolutions you’ll have to pick a radius by eyeballing it. You’ll lose all the details if the blur is a little more after the point. That should be the guiding point.
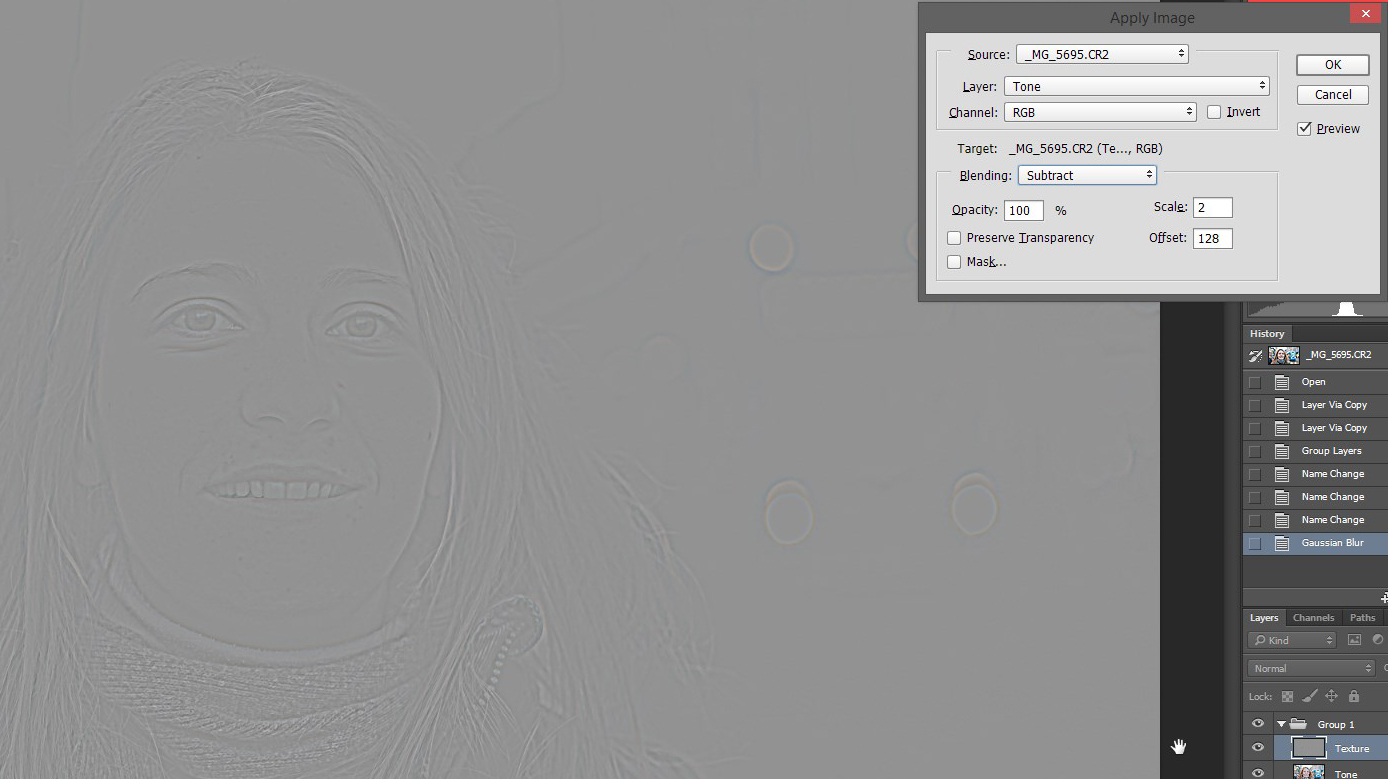
Turn on the texture layer, select it, and go to Image -> Apply Image… and then in the Layer drop down menu, pick the Tone layer, leave Channel as it is (RGB, with Invert check box unticked). In the Target part, for Blending set Subtract, with Opacity at 100%, Scale at 2 (Scale can take values from 1 to 2, 2 bringing the finer details, 1 bringing the rougher details, and fine is what you need). For Offset you need to use 128, that will put the details on 50% gray background which later will be use to blend the images properly. Preserve Transparency and Mask should be left unticked. Now hit OK.
On the Texture layer you should put Linear Light as blending mode. That will blend the Texture layer with the Tone layer to achieve the exact result as the original image. You can check if you have done everything right by turning on the background layer (the locked one) and then turning it off and on the group with the two layers for frequency separation. If there is no change visually, then you did everything right. If the image is a bit soft, the tone layer was blurred too much. In that case, you can’t just replace it with another blurred layer since the apply image was done as a difference from the originally blurred layer. You’ll have to do the procedure from the beginning. Blur, then apply.
Retouching
The idea is that the larger color deformations are repaired on the Tone layer, while small blemishes (detail deformations) are repaired on the Texture layer.
Tone Layer
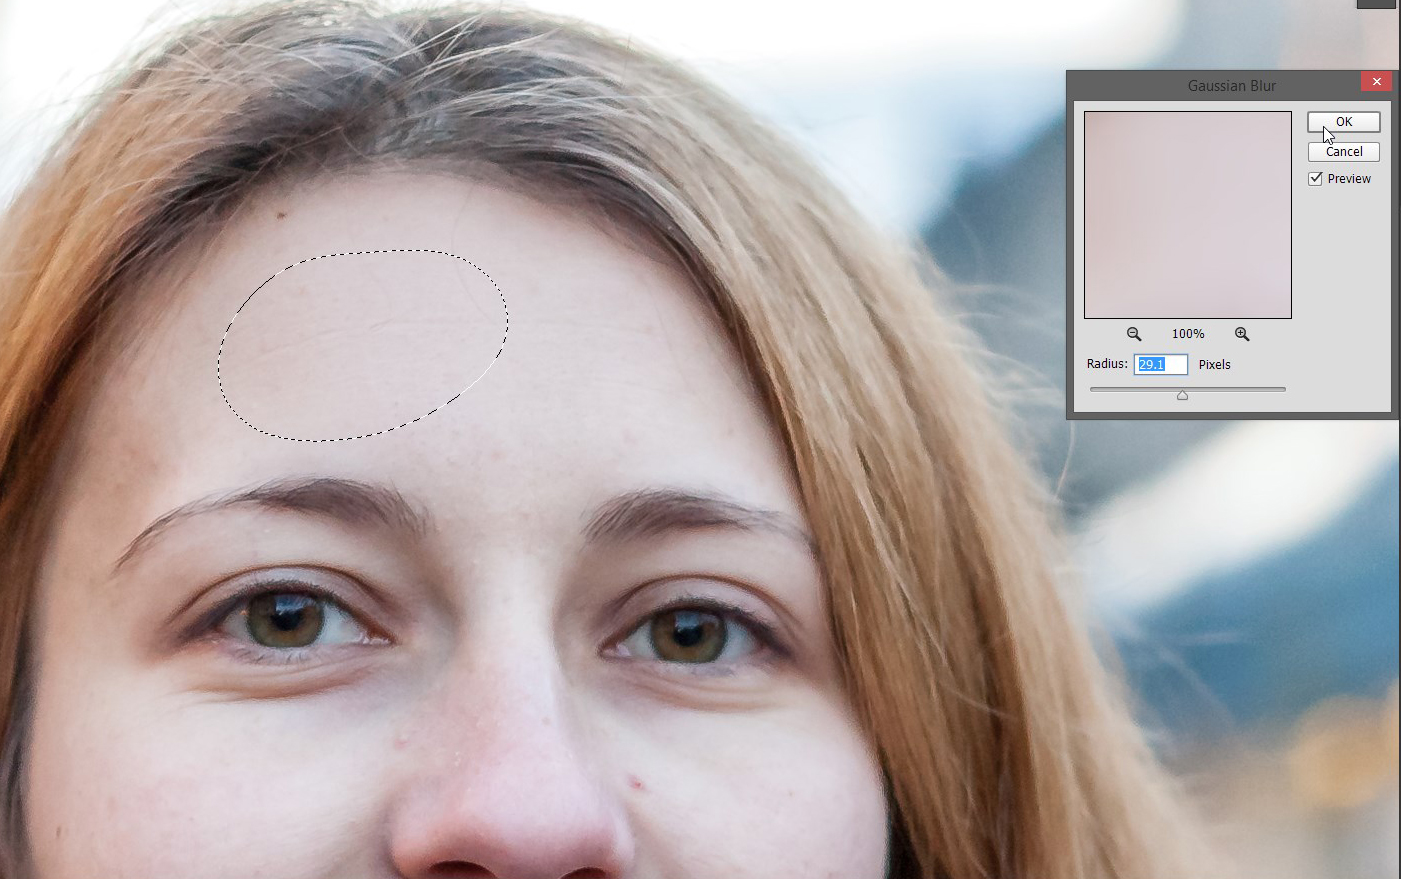
Lasso and blur repair
If you want to even out the tone a bit, you can select and blur it out even further. I tend to use the lasso tool, set to decent amount of feather (around 40px in this case) and select the area which I want to even out. Afterwards I’m using gaussian blur for the evening out. The radius is often quite high, 10-50 pixels, depending on the amount of smoothing I want to achieve.
Clone stamp
When you need to do some finer adjustments, you can use clone stamp tool on the Tone layer. Now, in order to achieve smoother transitions, you can set the Clone Stamp Tool to Lighten or Darken, depending on the scenario. By using the softest brush, and opacity of around 20% you can do fine adjustments to local areas without having too much trouble. If you want to even out the area even further afterwards, you can do the blur technique, but it is better to do it on a duplicated layer, then mask out if it bleeds somewhere you don’t want it to do.
Make sure that your Clone Stamp tool samples from the current layer only, not current and below. If it samples from the layer below it, it will bring texture back to the tonal layer and mess things up.

Dodge And Burn
Dodging and burning in frequency separated image is cool for the very same reason – you don’t affect the texture, just the tone. Thus you should create a new layer between the two separated layers, which you will fill with 50% gray. You set that layers blending mode to overlay, and suddenly it disappears. That layer is actually there, but due to the blending mode you can’t see it. But what you will see is the dodging and burning that you will do on that layer. This way, if you mess up something, just take a brush with the same color, and it will act as an eraser. Brush out anything you don’t want and you are set. You have non destructive retouching right there.
Color Correcting
For example, there are red patches on the skin on your portrait which are too big to be cloned or blurred out, but you want them gone. This can be done by adding a Color/Saturation adjustment layer under the Texture layer, so it will affect only the Tone layer, you can even clip it to it if you want. The trick here is to edit just the red channel, which you will choose from the drop down menu. Increase the saturation to 100% and shift the Hue to some weird but highly visible color. On the color bands below the sliders move the small slider to select the red frequency that affects only the patches you want to affect (the lips will be affected too usually, but you can mask that out later), once you are satisfied, reset the hue and saturation, then shift the hue slowly until you see the patches blend with the skin nicely. And you are set.

Texture Layer
Clone Stamp
Why Clone Stamp instead of Healing Brush? Because Healing Brush does unnecessary math, which won’t find enough data for the calculations it needs and mess the texture up. With Clone Stamp you just manipulate the given texture with minimal losses.
You should use the Clone Stamp tool with slightly soft brush, something around 75%, to avoid hard edges, but to avoid mush texture as well. Set the Clone Stamp tool to sample from the current layer only.
The accuracy of the samples don’t matter that much here, due to the fact that there is no tone, just texture, so you can sample skin texture from areas with different tonality and it won’t matter. The texture will be retained. Just avoid sampling the eyebrow on the skin and vice-versa.
Sharpening/softening
If you think that the image has too much texture for your taste, you can soften the image (lose some of the texture) by blurring it very slightly, using noise reduction, dust and speckle removal, any number of detail destructive filters out there. You can even use a layer mask on the Texture layer with a brush with low opacity to make the layer slightly transparent and use the Tone layer below to act as a smoothing agent.
For sharpening, you just sharpen the texture layer with any sharpening method you prefer, whether it is Unsharp Mask, or Smart Sharpen, or simply duplicating the texture layer (a bit harsh and ugly sharpen, but can be used with low opacities).

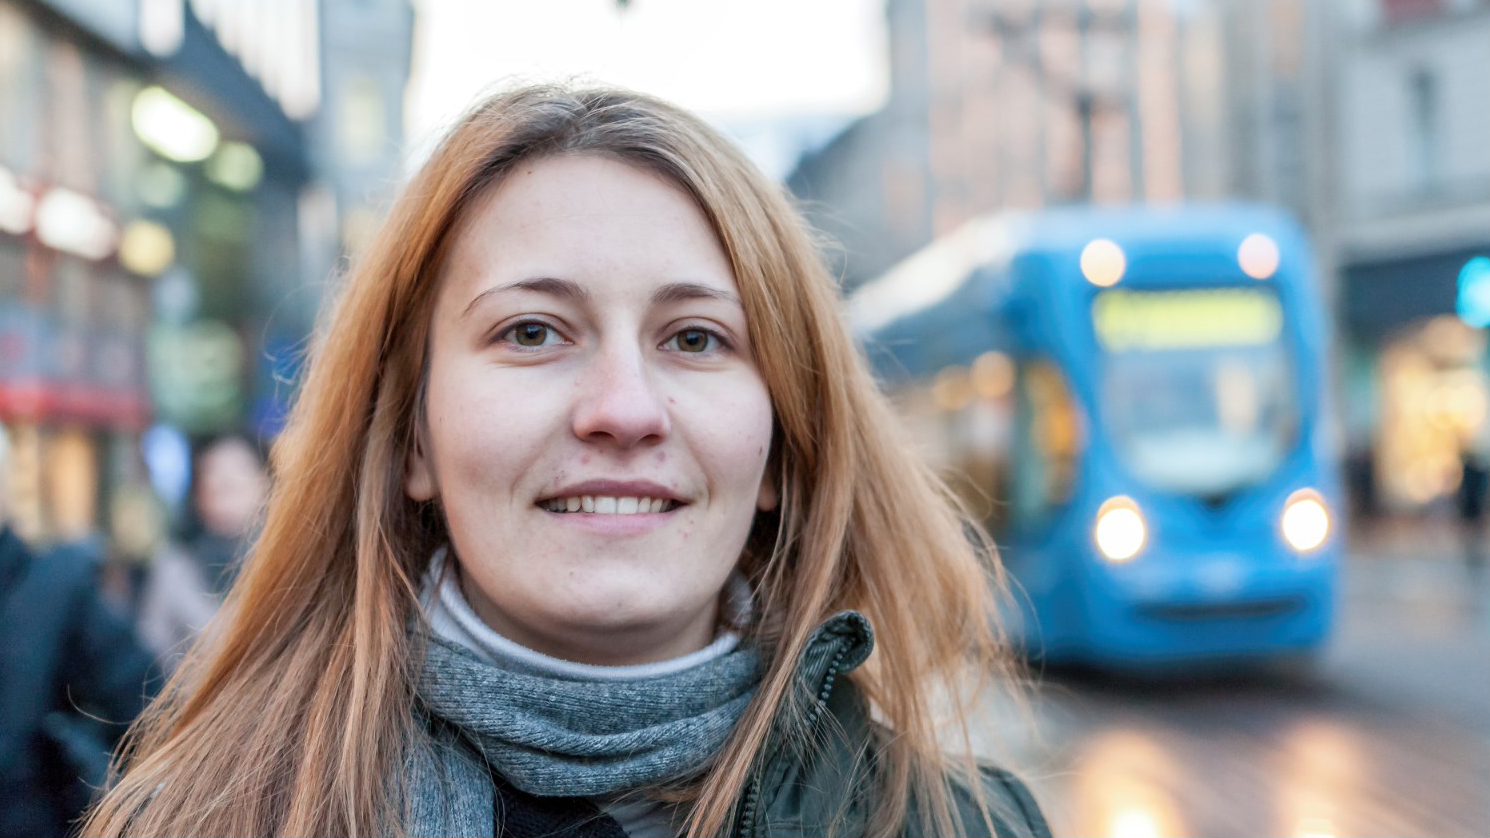
All that is left now is to work on the image until you are satisfied with the result, merge the two layers together, and you are set.


2 Comments
Brilliant tutorial. Thanks so much.
Absolutely brilliant! I have been trying to follow tutorials on this for months and always get to a point where something doesn’t work! This time it was crystal clear. Probably better in print than asa video?
Thank you so much.