Since the rough edit in Lightroom is complete, I can now take a dive in Photoshop and finish with the final touches. Make no mistake, there is a lot more work to be done here, and it will take some trial and error until the final result is achieved. I know you see most photographers on YouTube and such do it from the first try, but before recording the video they probably did the edit and know exactly what to do when repeating it in order to look like they hit everything from the first try. If you are just tuning in, you can read the Lightroom edit article by clicking here.
The Photoshop Edit
Just for the record, I do a lot of masking and I am using a pen tablet to do it. As I have written before I recommend you using one too since it speeds up your workflow quite a bit. Accuracy is an added bonus.
Frequency Separation
Right out of the bat I will start with frequency separation. This technique is fairly new to my workflow, since I’ve been using it for something like a year now, but I can’t imagine a better way to do the retouching part on the portrait. Having complete control over the texture and tone separately is something that every portrait photographer seeks. To see how frequency separation is done in detail, click here.
I will copy the background layer two times (press CTRL+J two times), and the first copy will receive a blur of 8 pixels (this will depend on the image resolution you use, usually a range of 5 to 10 pixels is chosen, you’ll have to experiment with that one), while the second will get an apply image from the Edit drop down menu, the layer section will have the blurred layer selected, blending: subtract, scale: 2, offset: 128. The second layer should have the blending mode set at linear light.
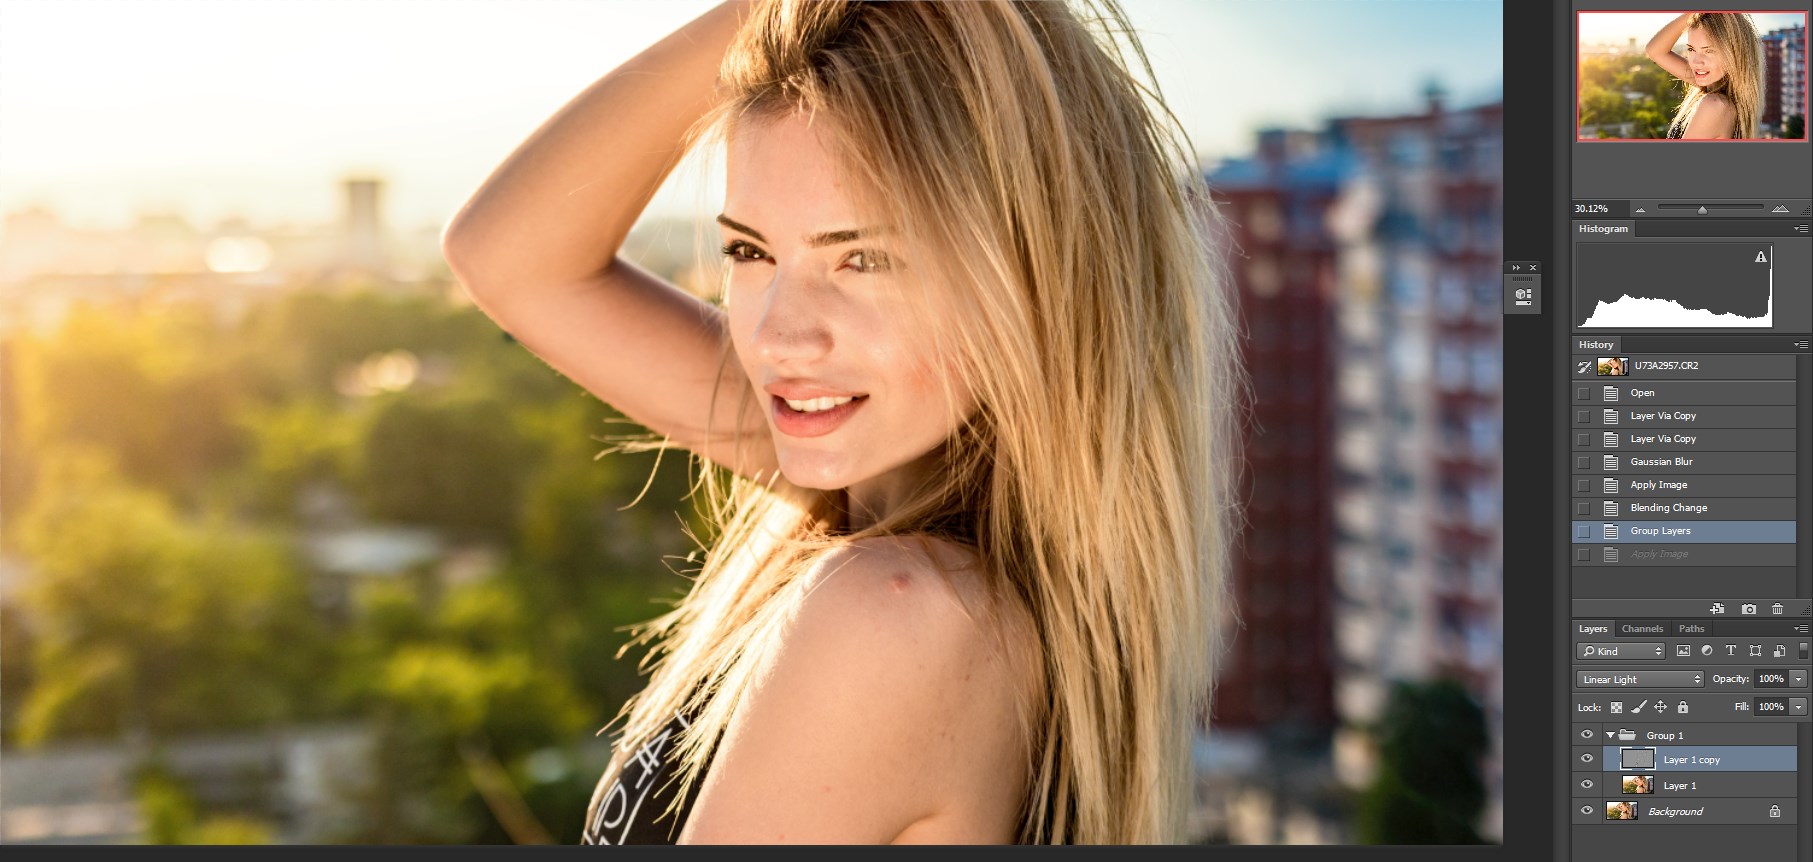
On the blurred layer I will do the tonal corrections, while on the second layer I will affect the texture. On the blurred layer I’ll be using lasso tool with 15 px feather, and then I will blur the selection according to my liking. Usually it is a gaussian blur of 15-20 px.
On the texture layer I am just using clone stamp tool (since healing brush works horribly there due to the lack of information) to repair what I feel necessary to repair.
Have in mind that bigger blemishes need to be repaired on both layers.
For frequency separation, shortcuts that you will be using constantly are:
- L – Lasso tool
- S – Clone Stamp
- CTRL + D – Deselect
- CTRL + F – Repeat previous filter
- [ or ] – For decreasing and increasing brush size
- Shift + [ or ] – For increasing and decreasing brush hardness

After more than two hours correcting everything and anything, it is time to go on the next step.
Grading and Final Touches
After I am done with the frequency separation, which takes its toll, I tend to take a break. Staring at the screen for that long usually takes its toll on your eyes and you can’t see things properly. You might think that you are good, but take a 5 minute break and look through your window away from your screen and you’ll notice that when you look back things look quite different. This is due to the fact that your eyes get used to the chromatic differences in the image and they compensate for it.
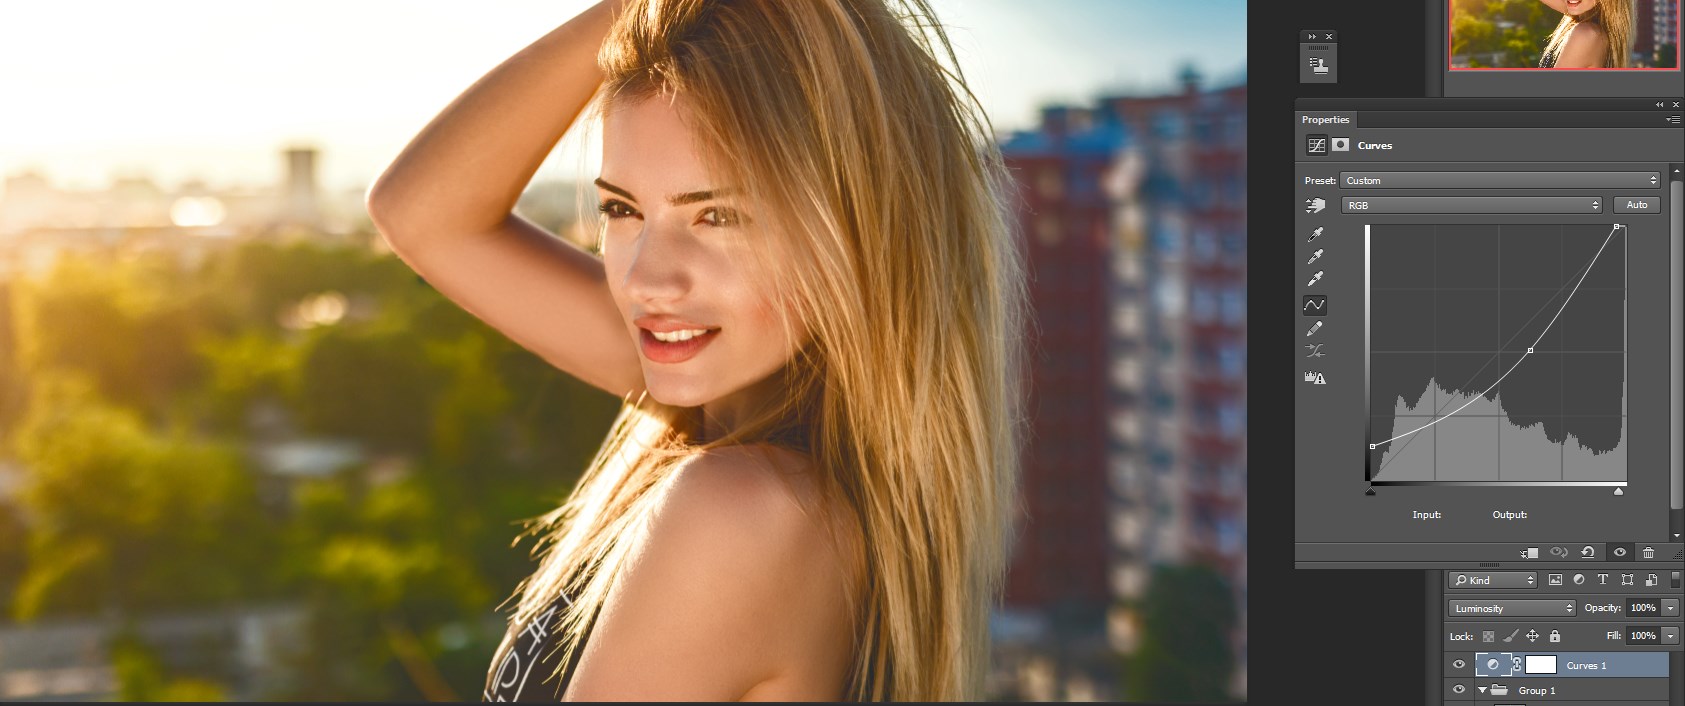
Curves
Anyhow, since I am aiming for a tad film like look I am going to add a curve adjustment layer. This one will have its blending mode set to luminosity since I don’t want the colors affected right now.
Atmosphere
Next I will add a new transparent layer, and sample a color which is near the sun (a color which is bright yellow/orange) and with a large soft brush I will drop one click over the sun (brush size of 5000px with 0% hardness). Lower the opacity of this layer to your liking – the goal is to add atmosphere a tad. If this image was shot on the ground instead of the rooftop, I would have added dust and pollen particles in order to make it feel more natural, but since it won’t occur on the rooftops, there is no need of them.
Grain
I can add grain in Photoshop, but since I want to work non destructively, I will now save the image as PSD in the same folder where the original file is, thus Lightroom will load it instantly. In Lightroom Grain will be in the Effects box just above Dehaze.
Sharpening
Since I didn’t do sharpening, I will do it now, also in Lightroom, with the following settings:
- Amount: 100
- Radius: 0.5 (1px is also fine)
- Detail: 25
- Masking: 70
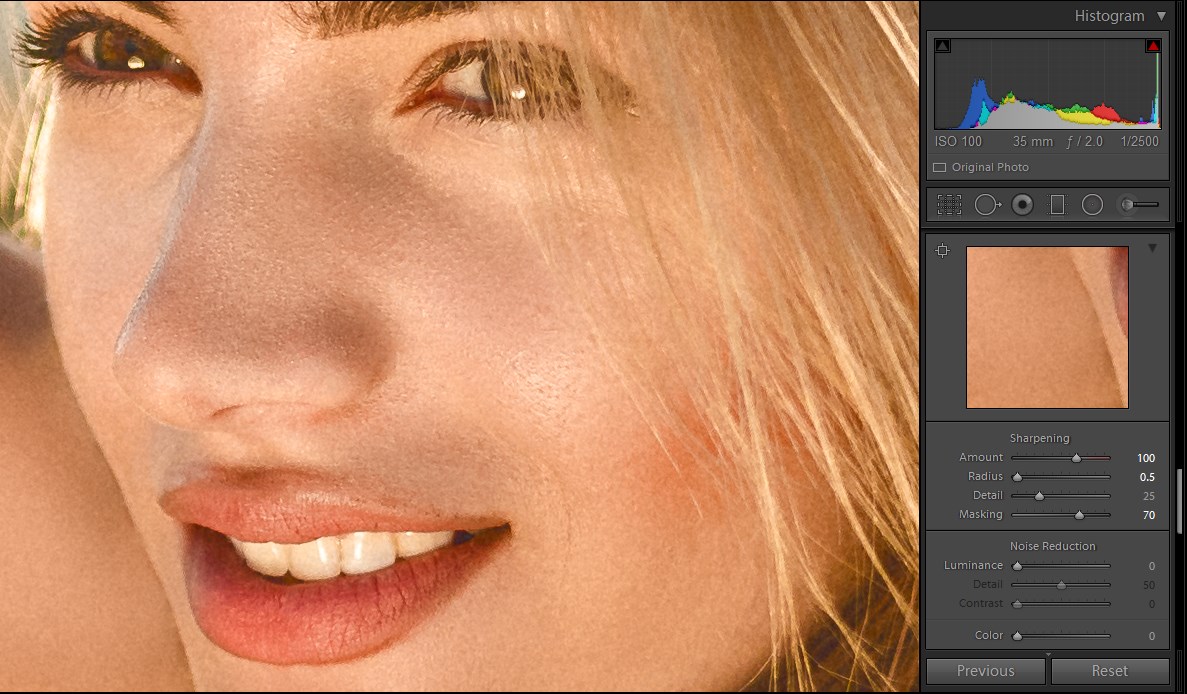
These are the settings I used, you can experiment with settings you like, just don’t overdo it in order to avoid creating artifacts.
That would be all.
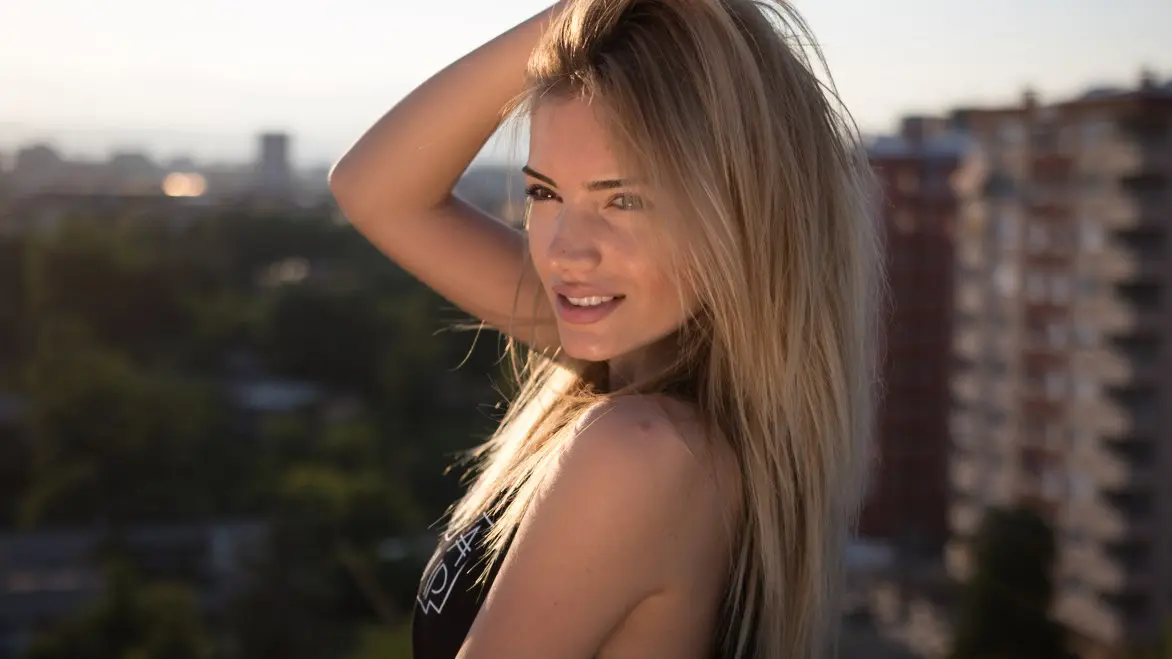
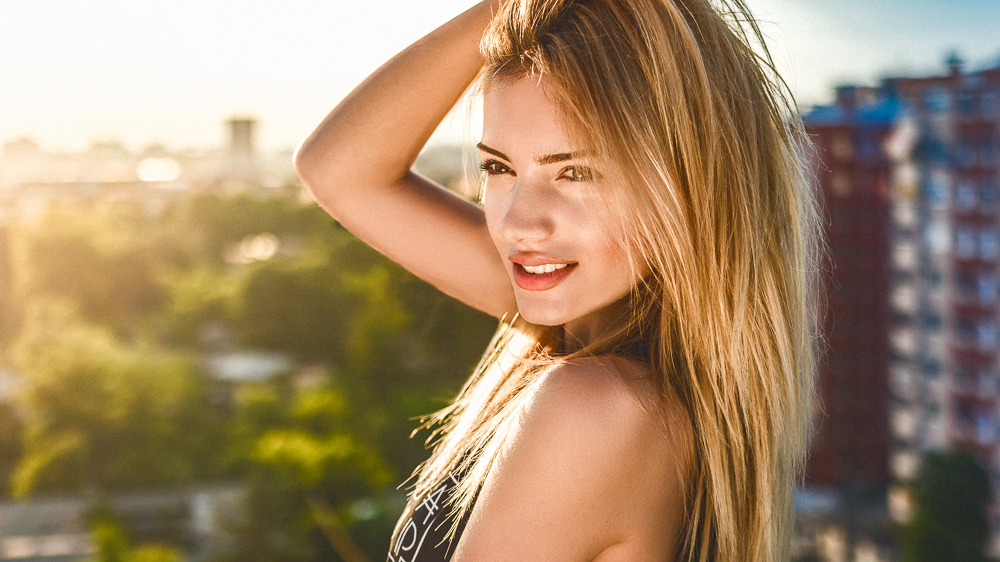
I think that a before and after image is in order, so here it is: