var advanced_ads_pro_visitor_conditions = {"referrer_cookie_name":"advanced_ads_pro_visitor_referrer","referrer_exdays":"365","page_impr_cookie_name":"advanced_ads_page_impressions","page_impr_exdays":"3650"};
var essb_settings = {"ajax_url":"https:\/\/www.lightstalking.com\/wp-admin\/admin-ajax.php","essb3_nonce":"f6325c5592","essb3_plugin_url":"https:\/\/www.lightstalking.com\/wp-content\/plugins\/easy-social-share-buttons3","essb3_stats":true,"essb3_ga":false,"essb3_ga_ntg":false,"blog_url":"https:\/\/www.lightstalking.com\/","post_id":"294209","internal_stats":true};
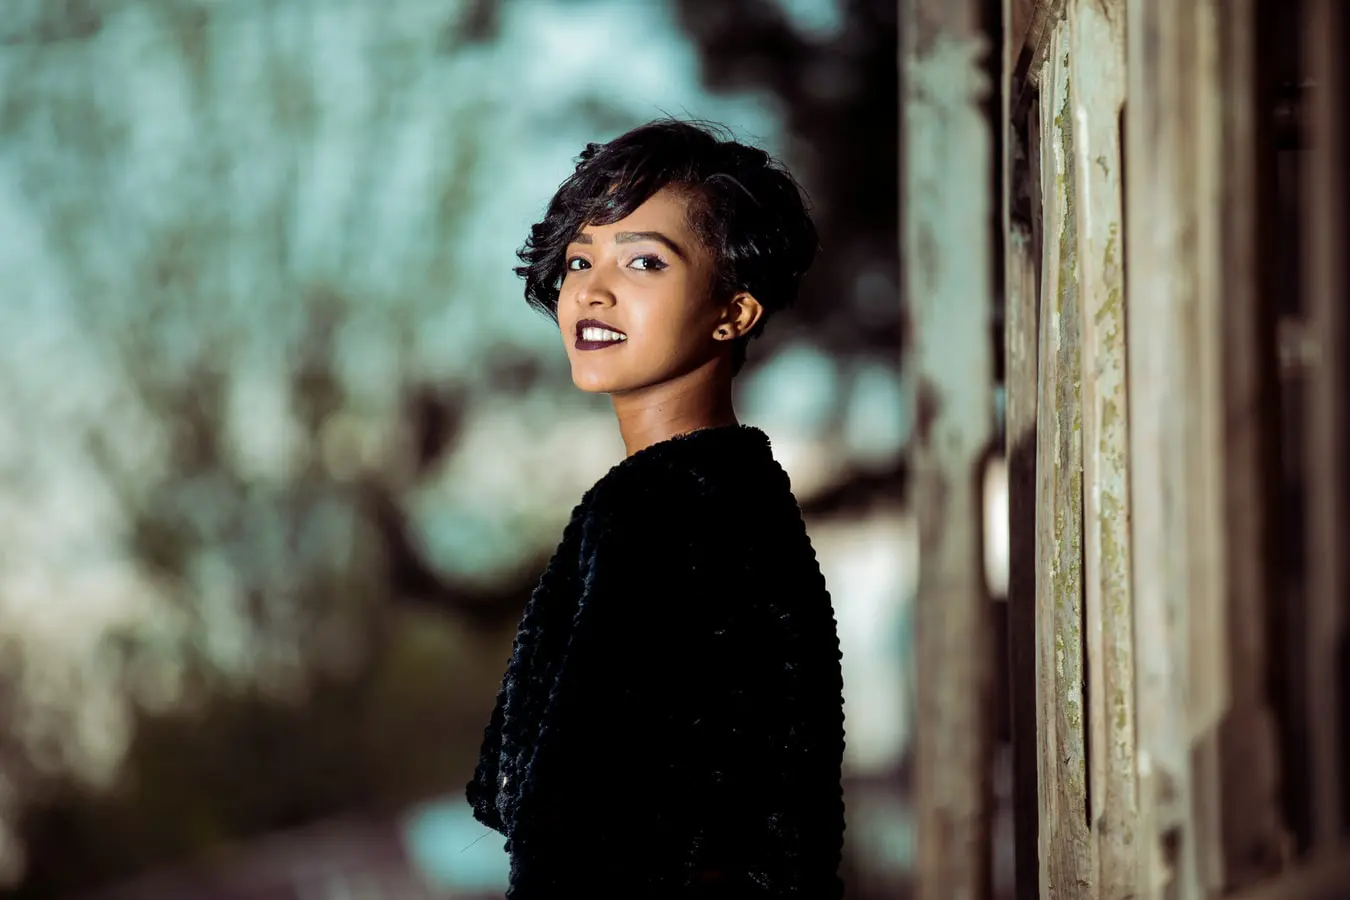
We know that light is so important in portrait photography. If you don't have adequate lighting to light your subject or at least their face, you could run into some problems.
With that said, how are your portraits coming along these days? If you need more light for your portraits, using an external flash is the best place to start.
Image by Michal Bieniek
Portrait Photography With A Speedlight
Although portrait photography may seem a fairly simple type of photography to some, there are so many things that one needs to take into consideration.
Not only this, there are several factors to get perfectly right before they can create an awesome portrait of a person. In fact, portrait photography is a very challenging style and it's always best to have a fairly decent DSLR to begin with in order to allow the photographer to have more control over the settings.
For beginners starting out in portrait photography, basics like aperture, shutter speed and the type of lens to be used are things they need to be fairly knowledgeable about.
Then comes the composition techniques, use of natural light, speed lights and other accessories in order to get that beautiful portrait.
Whatever is the location of your portrait photography, the following tips will help you get started with creating some beautiful portraits.
Photo by Gift Habeshaw
Understanding The Setup Needed For Great Portraits!
Exposure Compensation
While the camera’s metering technique is actually clever enough to work out the exposure value for you, however, sometimes having extreme brights and darks in the frame or having a backlit subject can throw the camera right off, making the photograph underexposed.
It is best to have an exposure compensation of +1 or more depending on the light to get that correct exposure on the subject’s face.
Most photographers go crazy over wide apertures like f/1.4 or f/1.8 to shoot portraits so they can achieve an amazing bokeh of the background.
This is not always feasible when the portrait is at a slightly sideways angle i.e. when you focus on one eye of the model, the other eye may go blurred/out of focus.
This can sometimes look plain weird so what do you do to overcome this?
Try using a narrower aperture between f/2.8 to f5.6 so that both the eyes of the model are in focus.
This will also apply to family portraits and group portraits where there will be a few people who need to be in focus in the photograph. Using very wide apertures will not help here I'm afraid.
Next, shutter speed. As a general rule, always have a shutter speed value greater than the focal length of the lens in order to avoid capturing blurred images due to camera shake.
Let's face it, no one wants to waste their time taking a series of shots which appear focused on the LCD, only to find out….bummer, they're not. Nowhere near! Remember, the longer the focal length, the more visible the blur will be due to handshake.
For example, if you're shooting at 200 mm focal length, make sure that you have the shutter speed greater than 1/250 of a second – this general rule works pretty universally.
But, do bear in mind that this does not apply to moving subjects. Make use of the vibration reduction system available in some lenses and in body stabilization systems available in modern digital cameras.
This helps you to shoot handheld with longer shutter speeds.
Now, some photographers worry about the fact that they have just one speedlight and think that they are limited to what they can capture. For those of you who have such worries, there is some very good news waiting for you.
Put your misconceptions aside because there's so much you can do in terms of portraits with a single Speedlight!
And the advantages are plentiful: portability, ease of set up and less money being invested.
You'll need a wireless trigger set, light stand, hot shoe stand adapter, and a softbox (or umbrella) to create some beautiful images using just one speed light. Total investment, under $50! Shop around.
Image by Tein Ramones
What Is A Speedlight And How To Use One?
In case you didn't know what a Speedlight was, it's a camera flash unit mounted to the camera body via the hotshoe. Basically, a portable camera mounted flash unit and not the built-in ones within the camera.
1. Controlling The Direction Of Light
Having the light fall on your subject from an angle, say 45 degrees to the subject, is a great one to start with. Do not let the flashlight hit your subject directly, but rather use a soft box to diffuse the light.
You can try experimenting with different directions of light depending on the type of portrait and effect you are planning to create. For example, using a softbox to give a gradient effect to the background or lighting the subject from top to get a dramatic portrait, etc.
Did you know that your speedlight is a small source of light that can turn into a larger light source if used efficiently?
Yes, look for a flat white wall or ceiling that will reflect the light back on the subject depending on your need. The reflected or the so-called bounced light, gets spread out on the ceiling and reflects down on the subject/s giving you soft shadows and produces a more flattering light.
You can use the built-in bounce card to bounce a portion of the light off the card to the subject’s face so that you get an evenly lit subject.
Another way to add drama to a subject or the photograph itself is to bounce the light from a white side wall so that light falls on one side of the subject creating some beautiful shadows that indicate depth.
Alternatively, instead of flooding your subject with harsh light, you can just modify your flash using a white cap on it. This acts as a diffuser to scatter the light that hits your subject. That will give a softer look to lights in the photograph.
You may think it seems odd to use a flash when the sun is out all bright? After all, what better light source than a bright sun?
However, that is exactly the time when you should be using a flash.
If you're outdoors where the sun is high up or is very bright, creates dark shadows and unwanted highlights on the face of the model, the best thing to do is to use the flash to compensate for this and fill the dark areas of your subject with light.
This will help get a photograph that has a balanced exposure. Also in situations where the subject is backlit, fill light can help to brighten up the darker regions.
Image by Bess Hamiti
7 Quick Tips
In situations where there is much less light and there are no ways to have your desired aperture and shutter speed (especially in situations where the subjects could be moving), go ahead and increase the ISO. There is no harm in having a grainy (focused) image over a blurry useless one.
Advantages of using speedlights: Speedlights can be tilted and swiveled, which means you can aim the light from the flash to whatever direction you wish to.
Use reflectors or modifiers to increase the source of light; Light your subjects from the side to create a dramatic effect to your portraits.
You don’t always need to have the speed light on your hotshoe, instead, take it off camera and use it from different locations and directions, controlled remotely to get some amazing and professional results.
If you don't have a diffuser or soft box, you can even tape a piece of white paper or white cardboard to your flash to make the light source a bit bigger!
While speedlights are color balanced for daylight, if ever you wanted to use them indoors along with incandescent or fluorescent lamps, the best thing to do is add a colored gel over the light to match the temperature of the light.
If you want to quickly take a few shots and do not have ample time to work with the flash settings, make use of the TTL technology that will let you shoot in automatic mode without worrying about light settings.
Photo by Luciano Zanollo
To summarize, speed lights are very versatile and should be a component of a photographer’s gear.
There really is so much you can accomplish with a speedlight and in case you were hesitant about getting one, you should actually just go get one now and explore what can be done with that one piece of gear!
var advanced_ads_cookies = {"cookie_path":"\/","cookie_domain":""};
var advadsCfpInfo = {"cfpExpHours":"3","cfpClickLimit":"3","cfpBan":"7","cfpPath":"","cfpDomain":"www.lightstalking.com"};
var beloadmore = {"url":"https:\/\/www.lightstalking.com\/wp-admin\/admin-ajax.php","query":{"post__not_in":[294209],"category_name":"portrait","posts_per_page":3}};
var tve_dash_front = {"ajaxurl":"https:\/\/www.lightstalking.com\/wp-admin\/admin-ajax.php","force_ajax_send":"1","is_crawler":"","recaptcha":[],"post_id":"294209"};
var TVE_Ult_Data = {"ajaxurl":"https:\/\/www.lightstalking.com\/wp-admin\/admin-ajax.php","ajax_load_action":"tve_ult_ajax_load","conversion_events_action":"tve_ult_conversion_event","shortcode_campaign_ids":[],"matched_display_settings":[],"campaign_ids":[],"post_id":294209,"is_singular":true,"tu_em":"","evergreen_redirects":[]};
(function() { var po = document.createElement('script'); po.type = 'text/javascript'; po.async=true;; po.src = 'https://www.lightstalking.com/wp-content/plugins/easy-social-share-buttons3/lib/modules/conversions-pro/assets/share-conversions-tracker.js'; var s = document.getElementsByTagName('script')[0]; s.parentNode.insertBefore(po, s); })();(function() { var po = document.createElement('script'); po.type = 'text/javascript'; po.async=true;; po.src = 'https://www.lightstalking.com/wp-content/plugins/easy-social-share-buttons3/assets/modules/pinterest-pro.min.js'; var s = document.getElementsByTagName('script')[0]; s.parentNode.insertBefore(po, s); })();(function() { var po = document.createElement('script'); po.type = 'text/javascript'; po.async=true;; po.src = 'https://www.lightstalking.com/wp-content/plugins/easy-social-share-buttons3/assets/modules/subscribe-forms.min.js'; var s = document.getElementsByTagName('script')[0]; s.parentNode.insertBefore(po, s); })();(function() { var po = document.createElement('script'); po.type = 'text/javascript'; po.async=true;; po.src = 'https://www.lightstalking.com/wp-content/plugins/easy-social-share-buttons3/assets/js/essb-core.min.js'; var s = document.getElementsByTagName('script')[0]; s.parentNode.insertBefore(po, s); })();
let ccwpDOMLoaded=!1;
let ccwp_loaded = false;
let resources_length=0;
let resources =undefined;
let is_last_resource = 0;
ccwpUserInteractions=["keydown","mousemove","wheel","touchmove","touchstart","touchend","touchcancel","touchforcechange"];
ccwpUserInteractions.forEach(function(e){
window.addEventListener(e,calculate_load_times);
});
function calculate_load_times() {
// Check performance support
if (performance === undefined) {
console.log("Performance NOT supported");
return;
}
// Get a list of "resource" performance entries
resources = performance.getEntriesByType("resource");
if (resources === undefined || resources.length <= 0) {
console.log("NO Resource performance records");
}
if(resources.length){
resources_length=resources.length;
}
for(let i=0; i < resources.length; i++) {
if(resources[i].responseEnd>0){
is_last_resource = is_last_resource + 1;
}
}
let uag = navigator.userAgent;
let gpat = /Google Page Speed Insights/gm;
let gres = uag.match(gpat);
let cpat = /Chrome-Lighthouse/gm;
let cres = uag.match(cpat);
let wait_till=300;
let new_ua = "Mozilla/5.0 (Linux; Android 11; moto g power (2022)) AppleWebKit/537.36 (KHTML, like Gecko) Chrome/109.0.0.0 Mobile Safari/537.36";
let new_ua2 = "Mozilla/5.0 (Macintosh; Intel Mac OS X 10_15_7) AppleWebKit/537.36 (KHTML, like Gecko) Chrome/109.0.0.0 Safari/537.36";
if(gres || cres || uag==new_ua || uag==new_ua2){
wait_till = 3000;
}
if(is_last_resource==resources.length){
setTimeout(function(){
console.log("ccwpTriggerDelayedScripts timeout : "+wait_till);
ccwpTriggerDelayedScripts();
},wait_till);
}
}
window.addEventListener("load", function(e) {
console.log("load complete");
setTimeout(function(){
calculate_load_times();
},100);
});async function ccwpTriggerDelayedScripts() {
if(ccwp_loaded){ return ;}
ccwpPreloadStyles();
ccwpPreloadDelayedScripts();
ccwpLoadCss();
ccwpScriptLoading();
ccwp_loaded=true;
}
function ccwpPreloadStyles() {
let e = document.createDocumentFragment();
var cssEle = document.querySelectorAll("link[rel=ccwpdelayedstyle]");
for(let i=0; i <= cssEle.length;i++){
if(cssEle[i]){
cssEle[i].href = removeVersionFromLink(cssEle[i].href);
let r = document.createElement("link");
r.href = cssEle[i].href;
r.rel = "preload";
r.as = "style";
e.appendChild(r);
}
}
document.head.appendChild(e);
}
function ccwpPreloadDelayedScripts() {
var e = document.createDocumentFragment();
document.querySelectorAll("script[type=ccwpdelayedscript]").forEach(function(t) {
var n = removeVersionFromLink(t.getAttribute("src"));
if (n) {
t.setAttribute("src", n);
var r = document.createElement("link");
r.href = n, r.rel = "preload", r.as = "script", e.appendChild(r)
}
}), document.head.appendChild(e)
}
function ccwpScriptLoading(){
var jsEle = document.querySelectorAll("script[type=ccwpdelayedscript]");
jsEle.forEach(function(t) {
t.type = "text/javascript";
if(t.src)
{
t.src = removeVersionFromLink(t.src);
}
});
}function ccwpLoadCss(){
var cssEle = document.querySelectorAll("link[rel=ccwpdelayedstyle]");
for(let i=0; i <= cssEle.length;i++){
if(cssEle[i]){
cssEle[i].href = removeVersionFromLink(cssEle[i].href);
cssEle[i].rel = "stylesheet";
cssEle[i].type = "text/css";
}
}var cssEle = document.querySelectorAll("style[type=ccwpdelayedstyle]");
for(let i=0; i <= cssEle.length;i++){
if(cssEle[i]){
cssEle[i].type = "text/css";
}
}
}
function removeVersionFromLink(link)
{
if(ccwpIsValidUrl(link))
{
const url = new URL(ccwpFormatLink(link));
url.searchParams.delete("ver");
url.searchParams.delete("time");
return url.href;
}
else{
return link;
}
}
function ccwpIsValidUrl(urlString)
{
if(urlString){
var expression =/[-a-zA-Z0-9@:%_\+.~#?&//=]{2,256}\.[a-z]{2,4}\b(\/[-a-zA-Z0-9@:%_\+.~#?&//=]*)?/gi;
var regex = new RegExp(expression);
return urlString.match(regex);
}
return false;
}
function ccwpFormatLink(link)
{
let http_check=link.match("http:");
let https_check=link.match("https:");
if(!http_check && !https_check)
{
return location.protocol+link;
}
return link;
}