The weather does not always play ball with us. Even when it does, it sometimes does not give us the look we had hoped for. Thankfully, to rectify this problem we have post production. With tools like Lightroom it is possible to create dramatic looking skies with some simple techniques. There are some caveats, you need the original sky to have some definition, it works best if you have shot RAW and pushing it too far will result in a very grainy looking sky.
With those issues in mind, lets take a look at adding drama to your sky. We will start at the shooting stage as the more you can do here, the better chance you have of making that sky dramatic.
Getting Close to The End Result in Camera
If you have a sky with some potential for drama when you are shooting, there are a few things you can do to boost your chances of getting the best possible shot for adjusting during post production.
- First is to underexpose the image slightly.
- Second is to bracket your exposure, this will give you the chance to create an HDR image.
- Third you can use a graduated filter to hold back the sky.
- Lastly, shoot RAW, this will give you a stop or more of extra dynamic range over JPEGs.
So assuming we have done everything we can in camera, lets look at what we can do in Lightroom.
Working on a Single Image
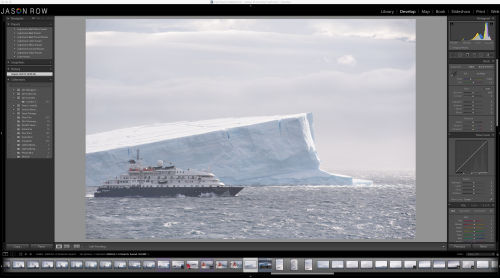
First thing we can do is reduce the Exposure slider to bring down the overall lightness of the image. Keep an eye on the histogram and don’t let the blacks (on the left of the graph) clip (stack up against the edge of the graph). You can click the box top left of the histogram to visually see if you are clipping the shadows.
Next bring up the Shadows slider to add more light into the shadow regions. This will not affect the sky. Then slide the highlights tool to the left to darken the sky a little more.
With the overall image primed for making the sky dramatic, we now have a couple of options. First is to use a Graduated Filter, the second is to make selective edits of the sky using the Radial Filter.
Lets start with the Graduated Filter
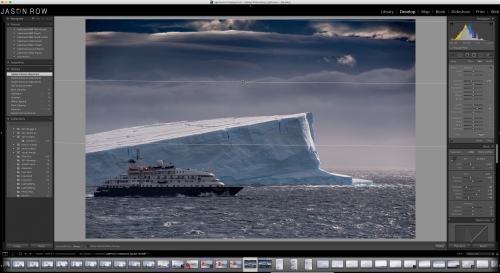
This filter is found in the Develop Module just above the basic settings tab. It is the fourth filter from the right. Click on it and then drag your mouse curser from just above the top of the image to 20% below the horizon. Double click the Effect text top left of the filter settings. This will reset the sliders to default.
You can now use a combination of the Exposure and Dehaze sliders to boost the look of the sky. Bring the exposure down to darken the sky then slide the dehaze to the right boosting the mid tone contrast. Keep an eye on the sky region for excessive noise but if you have shot RAW you will have a certain amount of leeway. If you have the standalone version of Lightroom without Dehaze you can use a combination of the Blacks and Highlights sliders to punch the sky out.
Using the Radial Filter
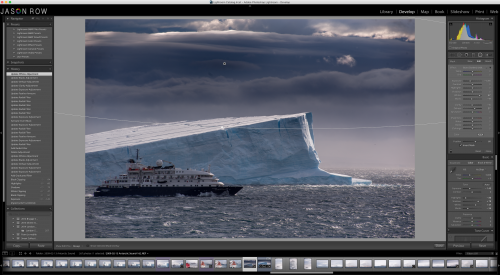
This is useful for horizons that are more cluttered and not straight. The tool is found to the right of the Graduated Filter. Click on it and draw an ellipse the covers the sky area plus 10%. At the bottom of the settings click the Invert Mask box and also double click the Effects text at the top to reset. Set the feather to around 60-65. We can now use the same tools as with the graduated filter, exposure, dehaze or blacks and highlights to punch that sky out. You can also use the Radial Filter to punch out separate sections of sky leaving others intact. Simply draw out radials over the relevant sections of sky.
Working With an HDR Image
The beauty of Lightroom is that if you shot an exposure bracket in RAW, any subsequent HDR you create is also RAW. This gives you a lot of leeway with post production. To create an HDR, select the images you wish to merge in the library module then right click and select Photo Merge HDR. If you used a tripod for your shots, then uncheck Auto Align. Also uncheck Auto Tone as we will be making the adjustments ourselves. If you have people or other objects in some shots but not others, clicking one of the Deghost settings can attempt to remove them. Click Merge once happy.

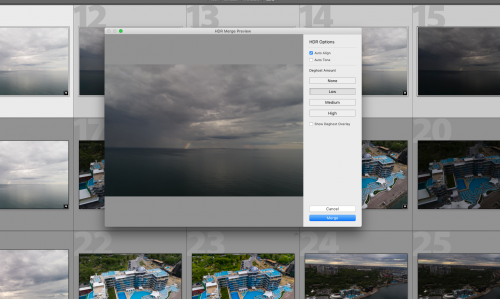
Once complete you should find the merged image at the end of the sequence. You can now select this and move over to the Develop Module. Here you should find that you have a large amount of dynamic range to work with. You may well be able to get a dramatic sky using just the Exposure, Blacks, Highlight and Dehaze/Clarity tools. If you cannot quite achieve the look you want then you can use the Graduated Filter or Radial Filter detailed above. The extra dynamic range will give you the capability of creating a very dramatic sky without pushing beyond the limits of the image.
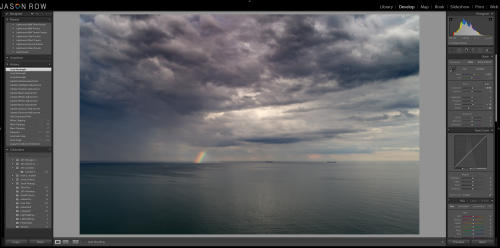
With a few simple Lightroom tools it is possible to create very dramatic skies even if the weather was not playing ball at the time. If you can, put a little forethought in to the shooting (“in-cameras”) stage, underexposing, shooting for HDR or adding a grad filter. Also shoot RAW to give you a better chance of keeping the edits within the limits of the histogram. With the shot in the bag, its pretty easy to punch some drama into that sky.




1 Comment
Don’t forget that you can use the Brush tool with either the GF or the Radial tool to add or remove from the mask. Press O (oh, not zero) to see the mask, and Shift-O to change colour. This can be handy if you have something in the foreground that would also be affected by your filter. You can see more on that here: https://www.wolfnowl.com/2016/09/creative-use-of-the-lightroom-radial-filter/ (toward the bottom).
For links to over 200 sites that provide Lr tips, tutorials and videos (including Ligh Stalking, of course!!) try https://bit.ly/LRTips
Mike.