It all used to be so easy. Resize – Sharpen – Save as. The thing is though, there could be multiple end uses to an edited image. It may be printed large format, it may be for display in an online gallery or maybe for a book. The file, save as technique of older editing software is a little bit one cap fits all.
Adobe’s Lightroom, however, takes a different approach in getting your images out in the wild. Its called Export and today we are going to give you some hints and tips on how to get the best results from it.
Sharpening And Resize The Image.
One of the areas where Lightroom differs from Photoshop and other programs is the way we apply sharpening. If we shoot RAW files we can sharpen the image three times. First, when you import the image, you can apply a light sharpening from the Import Dialogue.
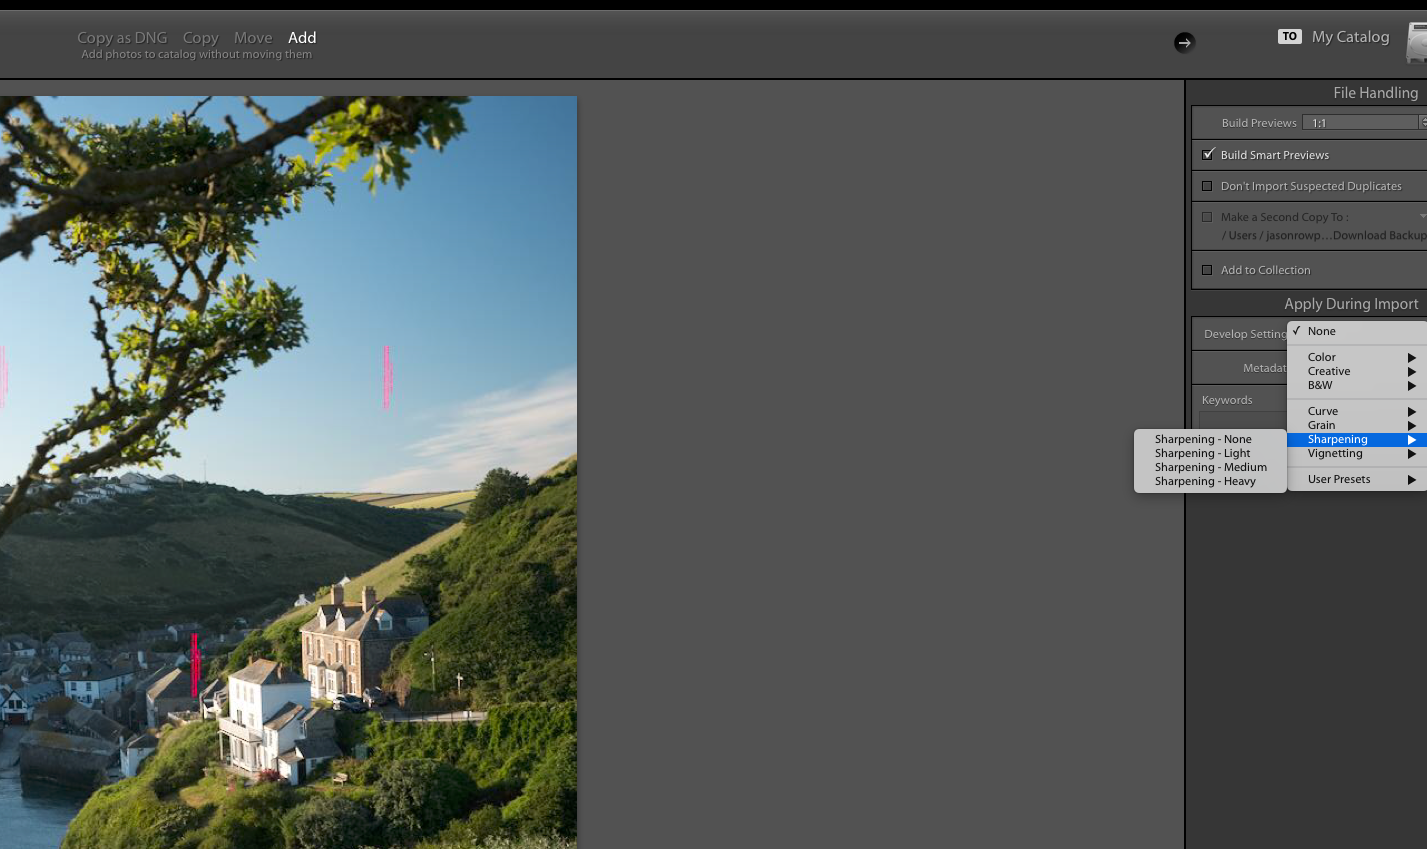
You can choose to sharpen on input
Secondly, when you have finished editing the image in the Develop Module, you can further apply some sharpening.
Lastly, when we export the image, we can apply further sharpening. It can be tricky to find a balance on sharpening but I prefer a light sharpen on import, and do my main sharpening during editing.
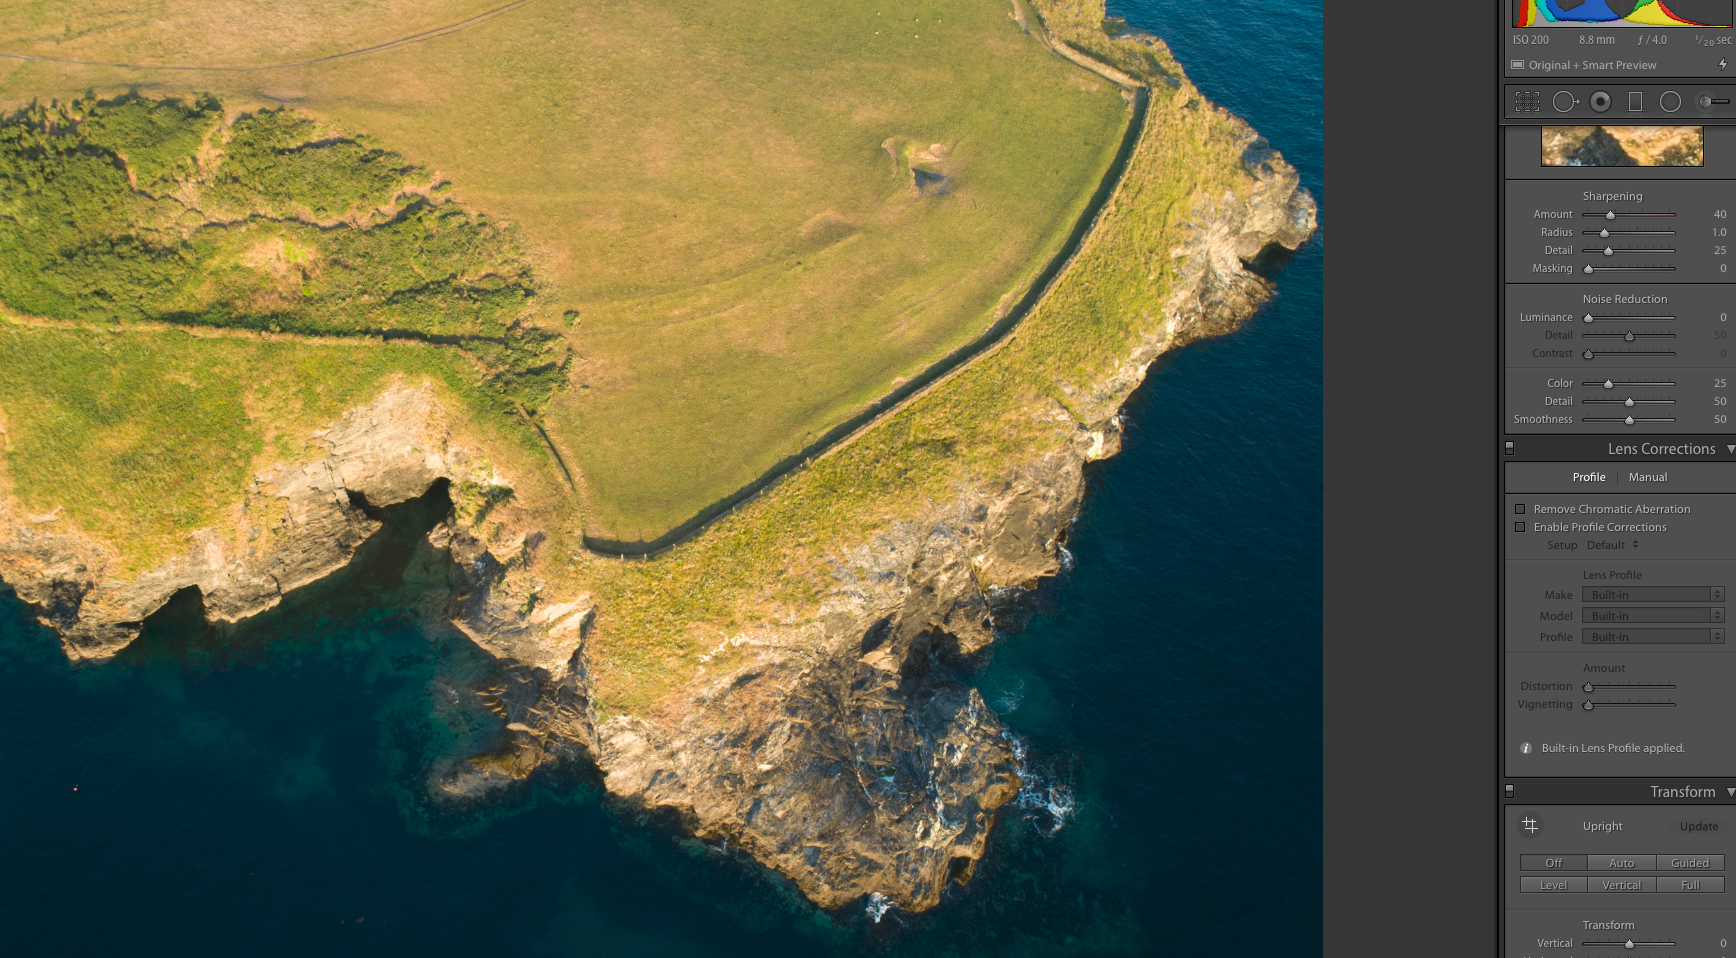
Our main sharpening will be done in the Develop module
The other aspect of output is of course resizing. In Lightroom, you can crop the image to a size in the Develop Module using the crop tool. However, my preference is to set up the final image size through the Export dialogue. I have not seen any difference in quality, although you will need to make sure you have the correct crop ratio before going to the Export module.
Opening the Export Dialogue.
One of the advantages of Lightroom’s export dialogue is that it allows you to very easily batch export images with the same output settings. To do so you select one, several or all of the images in the Library Module, right click and select Export.
Unless you have already set up some presets you will see a selection of Adobe default presets to the left of the screen and a number of sections to the right. Whenever we set up a particular export we can save it as a preset by clicking on add at the bottom left of the window.
Let's look at each section in the Export window.
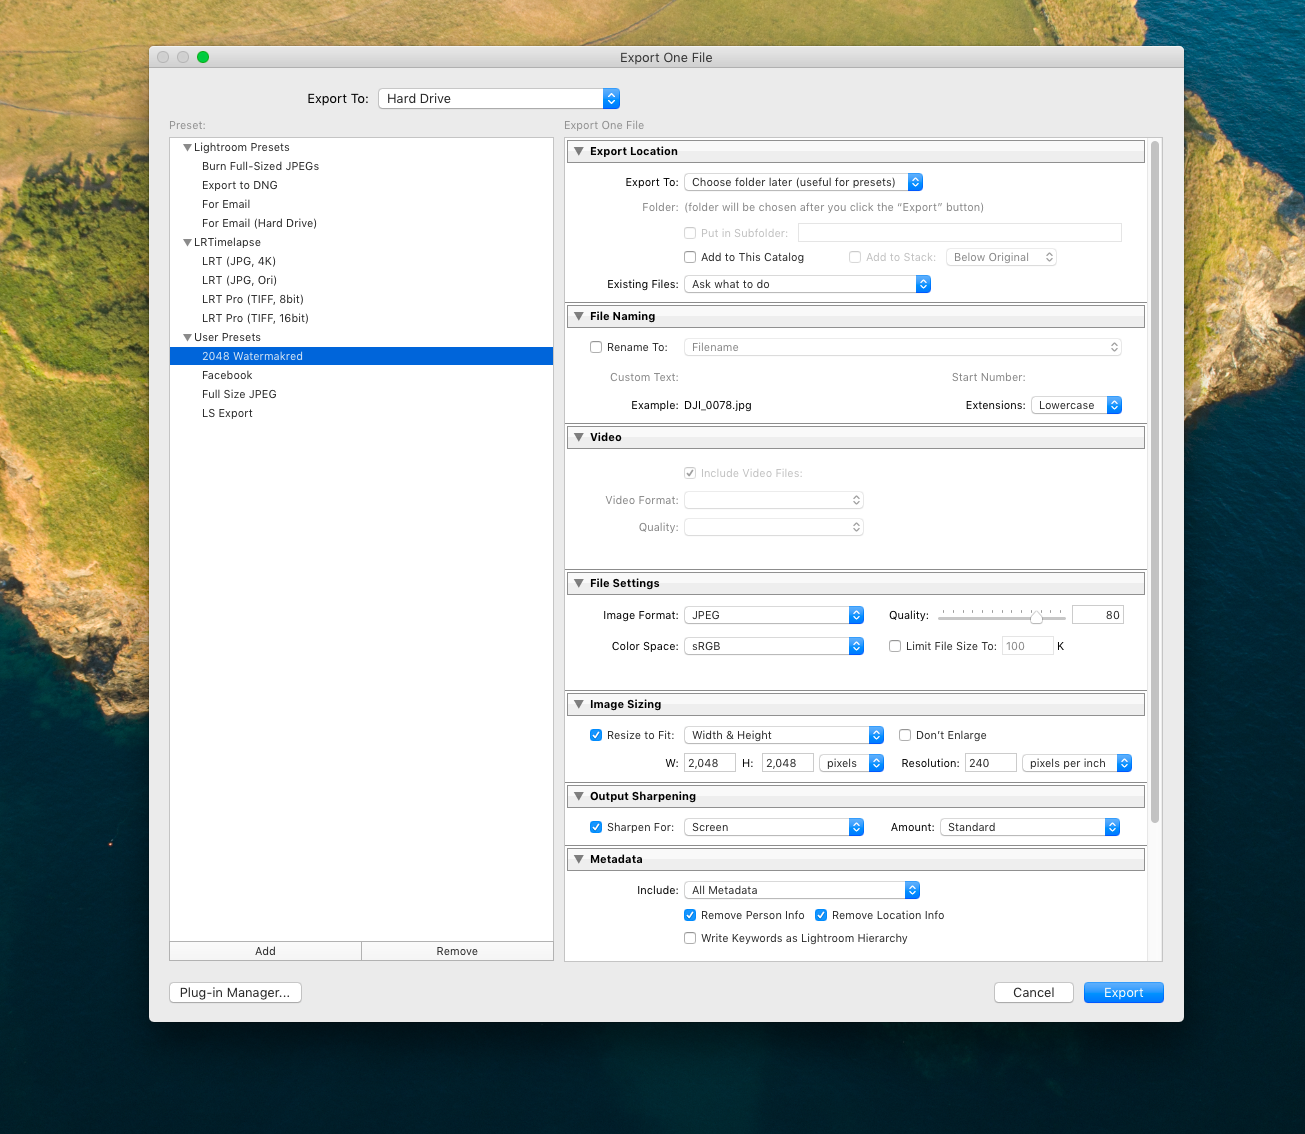
The Export Dialogue Window
Export Location.
Via the dropdown, you can specify a specific folder, a default folder or choose a folder later – upon export. I tend to choose the latter, but if you export all your images to the same location you can specify that folder instead. You can also automatically add the new outputted file to the catalog and specify whether to overwrite the old file or give the edited image a new name.
File Naming.
From the Rename dropdown, we can choose to give our exported image a custom name of our choice or add a sequential suffix to the existing name. This section is particularly important if you are doing a batch export, where you might want to keep the images in numbered sequence.
Video.
As the name suggests allows us to export video although it is pretty limited. You can select a video format and quality. Video creators will find that dedicated NLEs will have better output options but for casual use Lightroom’s video export will be fine.
File Settings
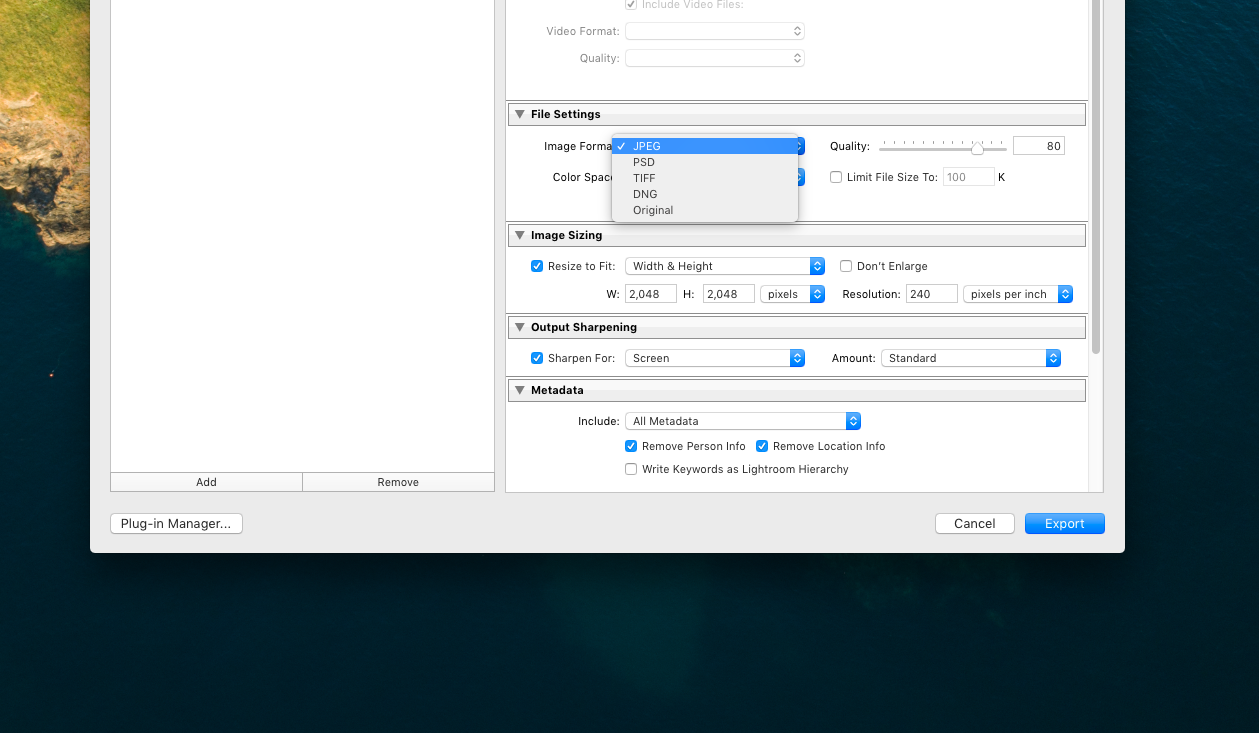
At first glance, this is a fairly simple section yet it is one of the most important aspects of image output. From the Image Format drop-down, we have five options. Jpeg, PSD, TIFF, DNG and the original format. For each format, there will be a range of different settings. For example, with JPeg we have a quality setting, color space and the ability to limit the file size – useful for web exports.
DNG is Adobe’s proprietary RAW format and allows you to export your camera’s RAW to Adobe's own. Original will allow you to output the file in the same format with which it was imported.
It’s also important to set the right color space for your export. If you are outputting for print, check which space will be best. For web generally, sRGB will be fine. For print it will depend on your lab’s printer, some may accept the wider gamut Adobe RGB some may prefer sRGB.
Export file settings
Image Sizing
Another vital section, here we can set the size and resolution of our final output. We can define, width and height, dimensions, longest edge, shortest edge, megapixels or percentage of original size. The dimensions can be defined in pixels, inches or cm.
For web use, you will most likely use pixels whilst for print output you will select cm or inches. If your edited image is not the same size ratio as your final output, you should use the crop tool in the Develop module to set it correctly.
Also very important is the output Resolution. For web use 72 or 90 pixels per inch will be fine, for print a higher resolution will be needed. Again, check with the lab or printer to determine the best output resolution for printing.
Output Sharpening.
The last of the three sharpening stages, this applies a minor, final sharpening depending on your the type of output you are aiming for. You will need to balance the sharpening that you have done in editing with the output sharpening by experimentation.
There are there presets for sharpening, Screen, Gloss Paper and Matte Paper. For each of those settings, you can choose an amount from Low to Standard to High.
Metadata.
This section allows you to choose which metadata you will export for your images. You can choose from a number of presets depending on your final usage. If you are outputting to the web, you should at the very least include copyright detail but you might want to omit any sensitive contact detail.
Watermarking.
As the name suggests you can apply a watermark to your exported images. You can use a simple text watermark defined in the edit watermark section or upload your own logo to act as a watermark. I find a PNG file with transparent background works best for watermarking.
Post-Processing
This section defines what happens after the export has completed. We can – Do Nothing, Show in Finder or Open in Photoshop or another application.
Creating a Preset
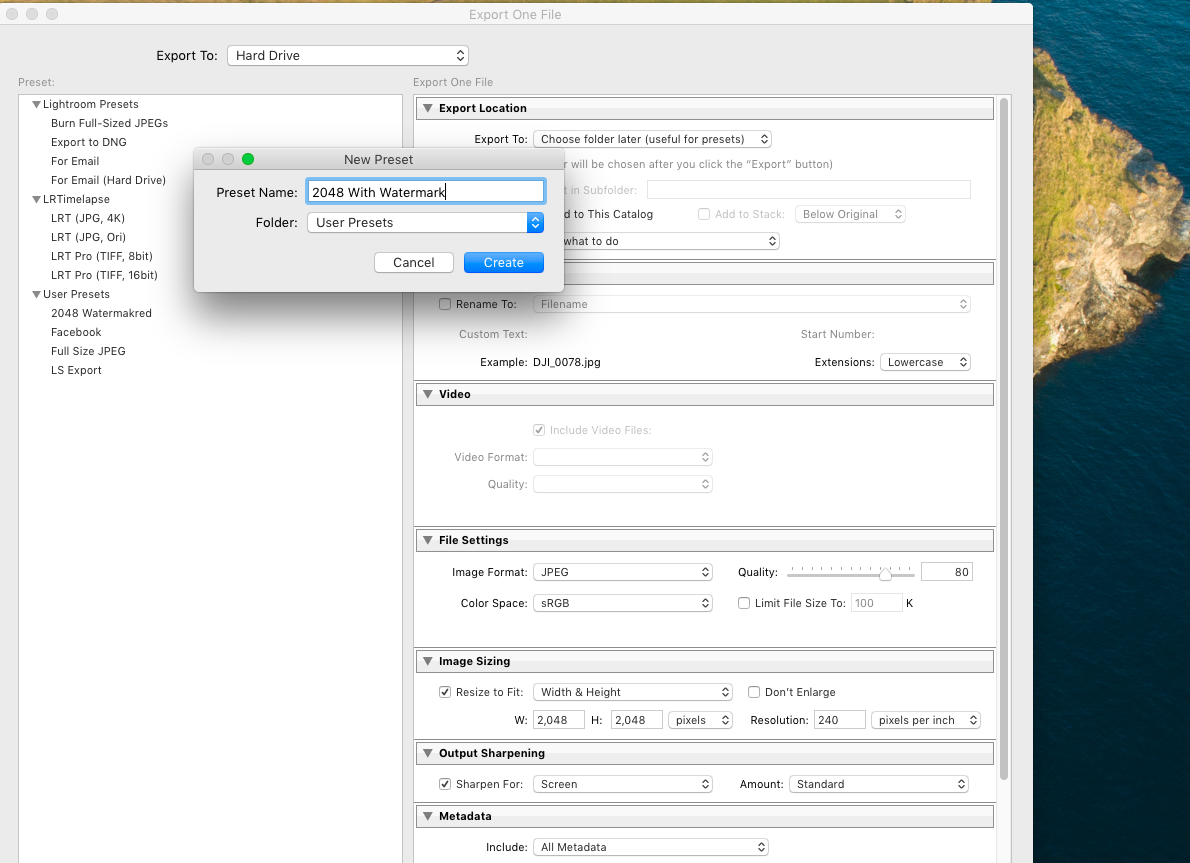
When you have set up your export dialogue as required, you can save those settings as a preset. To do this click on Add at the bottom left of the window. Give your preset a name and select which preset folder to add it to. Once created, your preset will appear in the window to the left. You will also be able to export an image with a preset by right-clicking on it in the Library or Develop Modules.
Creating an Export preset
Exporting can seem complicated if you are used to the old days of File Save. However, if you take a little time to set up preset and experiment with output sharpening, you will soon find what a powerful and efficient tool it is.
Tell us about your workflow in the comments below.

